
Practicing a musical instrument at home is a deeply rewarding pursuit, but it often presents a major challenge: keeping the sound from disturbing your family members and neighbors. True soundproofing is not about hanging a few foam panels on the wall; it requires a systematic approach to block, absorb, and decouple sound waves. By understanding how sound travels through residential structures and applying targeted physical modifications, you can create a functional practice space that respects your shared environment.
Understanding Soundproofing vs. Acoustic Treatment
To build an effective practice space, you must first distinguish between sound isolation and sound absorption. These two concepts serve entirely different purposes, and confusing them is the most common reason home soundproofing projects fail.
Sound isolation, or true soundproofing, is the process of preventing sound from entering or leaving a room. This requires blocking airborne noise and dampening structural vibrations. It is achieved by adding mass, sealing air gaps, and decoupling physical structures so that sound energy cannot easily pass through walls, doors, and windows.
Products mentioned in this guide
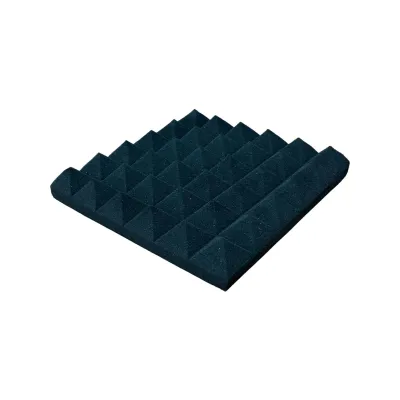


![[SG Stock] SoundProof Panel for Wall Self adhesive Hexagon Foam Acoustic Panels Home Sound-Absorbing Studio](https://img.lazcdn.com/g/p/4f6037997d2d531bf13e27506f4e4526.jpg_400x400q80.jpg_.webp)

Prices are valid at publication and may change. Please refer to the product page for the latest price.
Sound absorption, often referred to as acoustic treatment, focuses on improving the sound quality inside the room. Materials like acoustic foam, fabric panels, and soft furnishings absorb sound reflections to reduce echo and reverberation. While this makes your instrument sound clearer and less harsh to your ears, these lightweight materials do not have the density required to stop sound waves from traveling through walls to your neighbors.
Setting realistic goals is essential, especially when practicing loud instruments like drums, brass, or amplified electric guitars. In high-density residential environments, such as apartments or HDB flats in Singapore where shared concrete walls are common, achieving absolute silence is rarely feasible without professional-grade, room-in-a-room construction. Your goal should be to reduce the transmission of sound to a level that blends into the ambient background noise of the surrounding neighborhood.
Assessing Your Room and Identifying Noise Leaks
Before purchasing any materials, you must conduct a thorough pre-installation inspection to locate the weakest structural links in your room. Sound behaves much like water; it will find and escape through the smallest available opening.

Begin by inspecting your doors and windows, which are almost always the primary escape routes for airborne sound. Check for visible gaps, worn seals, or drafts around the frames. Electrical outlets, light switches, and utility penetrations also create direct pathways through walls that allow sound to bypass solid barriers.
Next, identify flanking noise paths, which occur when sound travels indirectly through connected structural elements. Hard flooring, shared concrete walls, and suspended ceilings can easily transmit impact noise, such as the physical thud of a drum pedal or the vibration of a piano casing. If you live in a multi-story building, these vibrations can travel vertically and horizontally, disturbing neighbors multiple floors away.
Finally, review your local building regulations and estate management rules. In Singapore, HDB renovation guidelines and condominium MCST bylaws strictly regulate structural modifications, drilling, and the types of materials you can permanently install. Understanding these boundaries beforehand ensures your soundproofing efforts remain compliant and do not lead to costly restoration demands when you eventually move.
Practical Steps to Soundproof Your Practice Space
Once you have mapped out the weak points of your room, you can begin implementing physical modifications. The most effective approach addresses three core principles: sealing air leaks, adding mass, and decoupling structures.
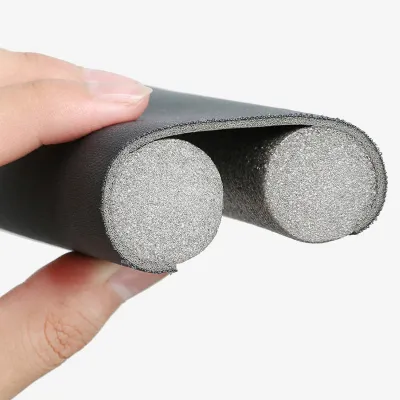
Seal all air gaps Start with the easiest and most cost-effective step. Install heavy-duty weatherstripping around the entire perimeter of your door frame to create a tight seal when closed. Replace standard door sweeps with automatic drop seals that lower to block the gap at the bottom of the door when it shuts. Use a high-quality acoustic sealant to fill any cracks around window frames, baseboards, and electrical boxes. Budgeting around S$50 to S$150 for these sealing materials can yield a noticeable reduction in high-frequency sound leakage.
Add mass to existing barriers Lightweight hollow-core doors and standard drywall sheets offer very little resistance to sound waves. If you cannot replace your door with a solid-core alternative, you can add mass by installing a layer of mass-loaded vinyl (MLV) directly onto the door surface. For walls, adding a second layer of dense drywall with a dampening compound sandwiched between the layers can significantly reduce sound transmission without requiring major structural changes.
Decouple surfaces to prevent vibration Structure-borne noise travels through physical contact. To stop vibrations from entering your walls and floors, you must break the physical connection between surfaces. This can be achieved by installing resilient channels or sound isolation clips behind new drywall layers. For floors, creating a temporary floating platform using interlocking rubber mats or specialized U-boat dampeners can isolate heavy instruments from the building’s concrete slab.
Verify your modifications After completing your physical installations, perform a practical test to measure your progress. Play your instrument at your typical practice volume while a family member or friend stands in the hallway, the adjacent room, or outside the main door. Listen closely for any remaining weak spots, paying particular attention to low-frequency hums or high-frequency leaks that may require additional sealing.
Adapting Your Instrument and Practice Accessories
Physical room modifications are only one part of the equation. You can achieve significant noise reduction by adapting your instrument setup and utilizing modern practice accessories designed for quiet study.
Optimize your practice accessories Traditional mechanical metronomes and loud external tuners add unnecessary ambient noise to your room. Switch to visual metronomes that use flashing lights or vibrating wearable devices to keep time. Use clip-on tuners that detect pitch through the physical vibration of your instrument’s headstock rather than relying on an open microphone, allowing you to tune silently even in a noisy environment.
Utilize silent practice systems Many acoustic instruments can be adapted for near-silent practice. Brass players can use heavy practice mutes that reduce output volume to a whisper while maintaining realistic playing resistance. String players can opt for rubber or metal practice mutes that clamp onto the bridge to dampen acoustic projection. If you play drums or piano, consider investing in digital alternatives—such as electronic drum kits with mesh heads or digital pianos—that allow you to route all audio directly to a high-quality pair of headphones.
Isolate your equipment Amplifiers, speakers, and heavy instrument stands should never sit directly on a bare floor. Place your gear on dedicated acoustic isolation pads or dense foam risers. These accessories decouple the vibrating cabinet from the floor structure, preventing low-frequency bass frequencies from traveling through the building frame and disturbing neighbors below.
Common Soundproofing Myths and Safety Warnings
The internet is filled with cheap DIY soundproofing advice, but relying on unproven methods can lead to wasted time, money, and potential safety hazards.
Debunking common myths One of the most persistent myths is that egg cartons, heavy blankets, or standard mattresses can soundproof a room. While these materials may slightly alter the high-frequency reflections inside the room, they lack the density and mass required to block sound waves from passing through walls. Relying on these materials will not prevent your neighbors from hearing your practice sessions.
Prioritize ventilation and air safety When you seal a room tightly to prevent sound leaks, you also restrict natural airflow. In warm, humid climates like Singapore, a sealed room can quickly become stuffy, hot, and unsafe due to carbon dioxide buildup. Always ensure your practice space has a safe ventilation plan, such as running a quiet split-system air conditioner or scheduling regular breaks to open doors and windows to refresh the air.
Know when to call a professional DIY soundproofing has its limits. If you are dealing with extremely loud low-frequency instruments like an acoustic drum kit or a bass amplifier, or if your housing rules prohibit any structural modifications, you may reach a point where standard DIY methods are insufficient. If your budget allows and you require guaranteed noise reduction, stop your DIY efforts and consult a qualified acoustic contractor who can design a certified room-in-a-room solution.
Frequently Asked Questions (FAQ)
Can I completely soundproof a standard bedroom for loud instruments?
Achieving 100% soundproofing in a standard residential bedroom is virtually impossible without professional, structural reconstruction. Loud instruments like acoustic drums or brass produce high decibel levels and low frequencies that easily penetrate standard residential walls. However, by applying mass, sealing air leaks, and using mutes, you can reduce the sound to a level that is highly manageable and unlikely to cause disturbance during reasonable hours.
Do I need acoustic panels if my main goal is to stop noise from leaving the room?
No, acoustic panels are designed for sound absorption to improve internal sound quality, not for sound isolation. If your sole goal is to stop noise from escaping, your budget is better spent on sealing air gaps, upgrading your door, and adding mass to your walls. However, some internal absorption is still helpful, as a completely untreated room can create harsh echoes that make practicing uncomfortable.
How do I soundproof a room in an apartment or condo without permanent alterations?
If you are renting or cannot make permanent changes, focus on non-destructive methods. Use removable weatherstripping and temporary draft stoppers on your doors. Hang heavy, industrial-grade acoustic blankets over windows and walls using damage-free adhesive hooks. Place thick rugs with dense rubber underlays on the floor, and use acoustic isolation pads under your instruments and amplifiers to prevent structure-borne noise transmission.
Community discussion
Share your experience or ask a question. Comments are reviewed before publication.