
Integrating a pocket drum set into your music production workflow or live DJ performance offers a highly tactile, portable way to inject human groove into electronic beats. Whether you are producing tracks in a compact home studio or performing a live hybrid set at a local venue, these compact instruments can bridge the gap between acoustic expression and digital convenience. By using a pocket drum set as either a MIDI controller or an external audio source, you can craft dynamic rhythms on the fly and elevate your live mixes beyond standard track playback.
To successfully incorporate these portable instruments into a professional workflow, you must understand the technical requirements of audio routing, MIDI mapping, and synchronization. This guide provides a comprehensive, step-by-step blueprint for setting up, recording, and performing with a pocket drum set in both studio and live environments.
Essential Gear and Setup Requirements
Establishing a stable physical and digital connection is the foundation of any production or performance setup. Pocket drum sets generally fall into two categories: sensor-based air-drumming sticks or ultra-compact physical pad controllers. Both types require specific hardware and software configurations to communicate effectively with your computer or live performance rig.
Products mentioned in this guide
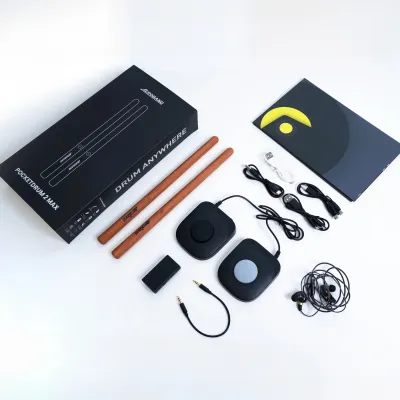
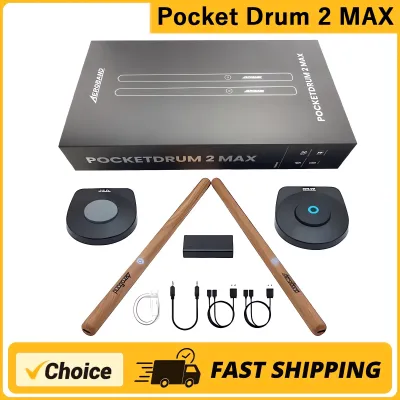
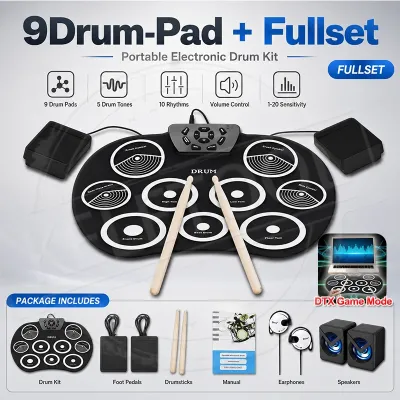
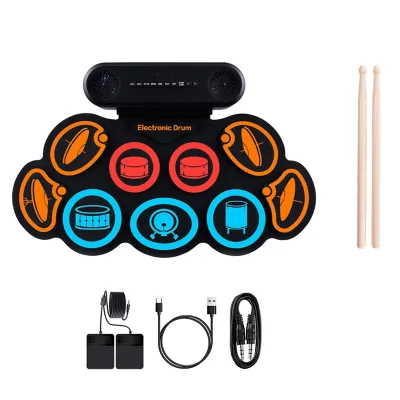
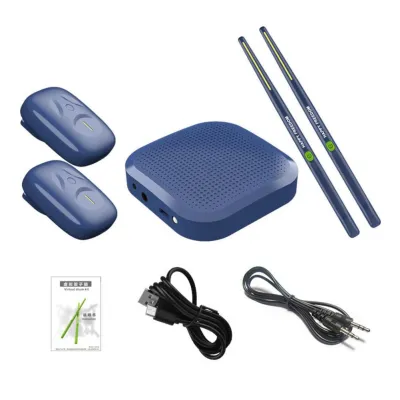
Prices are valid at publication and may change. Please refer to the product page for the latest price.
Hardware Connection Types
Most modern pocket drum sets utilize one or more of the following connection interfaces:
- USB MIDI: This is the most reliable connection for studio production. A direct USB-C or Micro-USB cable connects the drum set to your computer, transmitting MIDI data with minimal latency.
- Bluetooth MIDI: This offers wireless convenience, which is highly beneficial for active live performances. However, it requires a compatible Bluetooth LE (Low Energy) receiver and can introduce minor latency that must be managed in your software.
- Analog Audio Output: Typically a 3.5mm stereo headphone jack, this output sends the drum set's internal sounds directly to an audio interface, mixer, or PA system.
Required Cables and Adapters
Depending on your destination hardware, you will need specific adapters to ensure clean signal transfer. If you are routing analog audio to a professional DJ mixer, a 3.5mm TRS to dual 6.35mm (1/4-inch) TS mono breakout cable is essential. This splits the stereo headphone output into separate left and right channels for the mixer. For USB connections on modern laptops, you may need a high-quality USB-C hub or a direct USB-B to USB-C cable to avoid the signal degradation associated with cheap adapters.
Software Infrastructure
For beat-making, you will need a Digital Audio Workstation (DAW) such as Ableton Live, FL Studio, Logic Pro, or Reaper. These platforms host the virtual instruments and samplers that your pocket drum set will trigger. For live DJ mixing, you need software that supports external audio inputs or MIDI clock integration, such as Rekordbox, Serato DJ Pro, or Traktor Pro. Always verify your computer’s operating system compatibility and driver requirements on the manufacturer’s website before purchasing any secondary software or hardware accessories.
Step-by-Step Guide to Beat-Making in a DAW
Using a pocket drum set as a MIDI controller allows you to play virtual drum kits with natural human feel, bypassing the rigid, robotic timing of programmed step sequencers. Follow these sequential steps to configure, record, and edit your beats within a DAW.

Step 1: Connection and Configuration
Begin by connecting your pocket drum set to your computer using a USB cable. Open your DAW and navigate to the preferences menu, typically found under “Settings” or “Options.” Locate the MIDI tab and ensure your specific pocket drum device is listed and enabled as an active input. In Ableton Live, for example, you must check the “Track” and “Remote” boxes next to the controller’s input port to allow it to trigger instruments and map to software controls.
Step 2: Instrument Mapping
Once the DAW recognizes the controller, load a drum sampler or drum rack onto a MIDI track. If your pocket drum set uses standard General MIDI (GM) mapping, the pads should automatically align with standard drum sounds, such as a kick on C1, a snare on D1, and a closed hi-hat on F#1. If the default mapping does not match your playing preferences, use your DAW’s MIDI learn function or manual editor to reassign the physical pads or sensors to the specific sampler slots of your choice.
Step 3: Recording the Groove
Set your project tempo (BPM) and enable the metronome or a basic click track to guide your playing. Arm the MIDI track for recording and press the record button on your DAW’s transport bar. Start by recording a basic rhythmic skeleton, such as a kick and snare pattern. If your pocket drum set includes an internal step sequencer, you can sync its playback to the DAW’s master transport clock, allowing you to build layers step-by-step while maintaining perfect tempo alignment.
Step 4: Editing and Arranging
After recording your performance, double-click the recorded MIDI clip to open the piano roll editor. Here, you can clean up minor timing errors using the quantization tool. To maintain a natural, humanized groove, avoid quantizing to a strict 100% grid; instead, use a non-destructive quantization setting of 50% to 70%, which pulls the notes closer to the grid while preserving your natural swing. Once the core loop is polished, duplicate and arrange the clips to build the intro, verse, build-up, and drop of your electronic track.
Velocity Sensitivity Tuning
To prevent your beats from sounding flat and computerized, adjust the velocity sensitivity settings on your pocket drum set or within the DAW’s sampler. Virtual instruments respond to velocity data by changing both volume and timbre. Ensuring that your sampler’s velocity-to-volume parameter is active will allow soft taps on the pocket drum set to trigger quiet, warm sounds, while hard strikes produce loud, bright transients.
Integrating the Pocket Drum Set into a Live DJ Setup
Performing live with a pocket drum set adds an improvisational, hybrid element to your DJ sets. By routing the drum set’s audio into your DJ mixer, you can play live percussion over playing tracks, perform drum solos during breakdowns, or build custom transitions between songs.
Audio Routing
To integrate the drum set’s audio, connect its physical audio output to an available auxiliary or line-in channel on your DJ mixer. If you are using a controller-based setup, route the drum set’s output into the auxiliary inputs of your DJ controller or directly into an available channel on your external audio interface. Ensure the channel input switch on the mixer is set correctly to “Line” or “Aux” rather than “Phono” to prevent extreme distortion and potential hardware damage.
Gain Staging
Proper gain staging ensures that your live drums sit perfectly in the mix without clipping or getting drowned out by the master track. Set the master volume of your pocket drum set to approximately 75% to 80% to provide a clean, unclipped output signal. Next, play a steady rhythm on the drum set and adjust the input gain (trim) knob on the mixer channel until the channel’s LED meters peak near 0dB, matching the average output level of your active DJ decks.
Syncing Methods
Keeping your live drumming perfectly in sync with the playing track is critical for a cohesive performance. If your pocket drum set supports MIDI clock input, you can send a sync signal from your DJ software (such as Traktor or Rekordbox) through your audio interface to the drum set. This locks the drum set’s internal delays or sequencers to the master deck’s BPM. If MIDI sync is unavailable, you must rely on manual beatmatching. Tap the tempo button on your drum set to match the playing track’s BPM, and use manual cueing to trigger your loops precisely on the downbeat.
Performance Blending
To blend your live drums smoothly into the mix, use your DJ mixer’s three-band EQ. If the playing track features a prominent, heavy bassline, cut the low frequencies (EQ Bass) on your live drum channel to prevent muddy low-end phase cancellation. Conversely, during a track breakdown where the studio drums drop out, boost the low and mid EQs on your pocket drum channel to deliver a powerful, live kick and snare performance. Utilizing built-in mixer effects, such as a short stereo delay or a hall reverb, can also help glue the live acoustic transients to the polished studio master tracks.
Troubleshooting Common Sync and Audio Issues
Live performance and studio production environments present unique technical challenges. Understanding how to diagnose and resolve these issues quickly ensures your creative flow remains uninterrupted.
Latency
Latency is the audible delay between the physical action of striking a drum pad and hearing the resulting sound from your speakers. High latency makes natural finger drumming or air-drumming nearly impossible. To resolve this, navigate to your DAW or DJ software’s audio preferences and lower the audio buffer size. Setting the buffer to 64 or 128 samples typically reduces latency to an imperceptible level (under 10 milliseconds). Ensure you are using high-performance, dedicated audio drivers, such as ASIO on Windows or CoreAudio on macOS, to handle these lower buffer sizes without audio dropouts.
MIDI Clock Drift
When syncing hardware via MIDI clock over long periods, the devices can slowly drift out of phase, causing the beats to flam or sound sloppy. This is often caused by unstable computer operating system clocks or low-quality USB MIDI interfaces. To mitigate drift, use a dedicated hardware MIDI thru box or a stable external master clock generator. If drift occurs mid-set, quickly pause and restart the drum set’s internal sequencer on the downbeat of the next bar to reset the synchronization grid.
Ground Loops and Noise
Connecting a USB-powered pocket drum set to a computer while simultaneously routing its analog audio output to a mixer connected to a large PA system often creates a loud, high-pitched hum or buzz. This is a ground loop, caused by multiple paths to the electrical ground. To eliminate this noise, insert a passive ground loop isolator or a Direct Input (DI) box with a ground lift switch between the drum set’s audio output and the mixer input.
Emergency Live Performance Protocol
If audio drops out completely during a live performance, do not attempt to restart your DAW or DJ software, as this will silence the entire venue. Instead, stop playing the drum set, mute its mixer channel, and systematically check your physical cable connections, power supplies, and mixer routing. If a cable has failed, bypass the drum set entirely and rely on your standard DJ decks to maintain the music while you address the hardware issue safely.
Advanced Techniques for Electronic Music Production
Once you have mastered basic beat-making and live routing, you can explore advanced workflows to unlock the full creative potential of your pocket drum set.
Sampling and Custom Kit Creation
Instead of relying solely on stock virtual instruments, use your pocket drum set to record custom audio samples. Record the internal synthesizer sounds of your drum set directly into your DAW as high-resolution WAV files. You can then slice, pitch-shift, and process these recordings using professional samplers to build a signature, stylized electronic drum kit that is completely unique to your production style.
External Hardware Processing
Route the physical audio output of your pocket drum set through external hardware processors before sending it to your DAW or mixer. Running your drums through guitar distortion pedals, analog tape simulators, or desktop synthesizer filters can inject rich harmonic warmth, grit, and dynamic movement that is difficult to replicate using software plugins alone.
Polyrhythmic Sequencing
Utilize the step sequencer on your pocket drum set to program complex polyrhythms. By setting one drum track (such as a hi-hat) to a loop length of five steps while your kick and snare run on a standard sixteen-step grid, you create an evolving, hypnotic rhythmic pattern. This technique is highly effective in genres like minimal techno, deep house, and ambient electronic music, where subtle rhythmic evolution keeps the listener engaged over long arrangements.
Frequently Asked Questions (FAQ)
How do I fix audio latency when recording my pocket drum set?
Audio latency is typically resolved by adjusting the audio buffer size in your DAW or DJ software’s audio preferences. Lowering the buffer size to 128 or 64 samples reduces the delay between hitting a pad and hearing the sound. Additionally, ensure you are using optimized, dedicated audio drivers, such as ASIO on Windows or CoreAudio on macOS, and close unnecessary background applications to free up CPU processing power.
Can I use a pocket drum set without a computer for live gigs?
Yes, standalone use is possible if your pocket drum set features an internal sound engine, a direct analog audio output, and an internal step sequencer or built-in rhythm patterns. However, standalone setups have limitations when performing alongside external DJ gear; without a computer or dedicated hardware MIDI clock generator, you will not be able to automatically tempo-sync the drum set, requiring you to beatmatch manually using the drum set’s tempo controls.
Community discussion
Share your experience or ask a question. Comments are reviewed before publication.