
To clean a violin safely without damaging its delicate varnish, you must use a specialized, pH-balanced violin cleaner applied sparingly to a soft microfiber cloth, never directly onto the wood. Daily dry wiping remains your primary defense against rosin buildup, while liquid cleaners should only be used occasionally to address stubborn residue. Because violin varnish is highly sensitive to moisture, alcohol, and synthetic solvents, maintaining a gentle touch and using the correct materials is essential to preserving both the aesthetic and acoustic qualities of your instrument.
In tropical climates like Singapore, high humidity can soften natural varnishes, making them even more susceptible to trapping dust, sweat, and acidic rosin. Understanding how to care for this protective layer prevents costly structural damage and preserves the instrument’s value over time.
Understanding Varnish Sensitivity and Cleaning Risks
Violin varnish is not merely a cosmetic coating; it is a critical component that protects the wood and influences the instrument’s resonance. Traditional violins are finished with spirit- or oil-based varnishes containing natural resins like shellac, mastic, copal, or sandarac. These organic materials are highly sensitive to environmental changes and chemical exposure. Unlike the durable polyurethane finishes found on modern furniture, violin varnish is soft, porous, and easily dissolved by common household chemicals.
Products mentioned in this guide

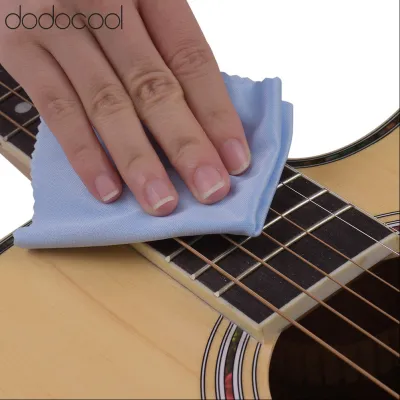
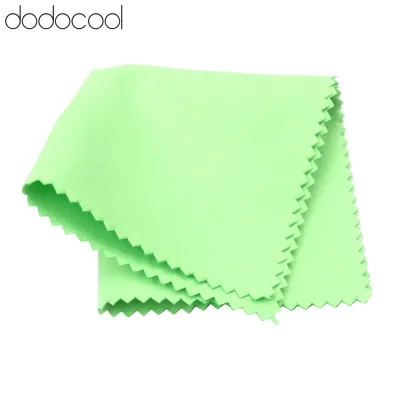

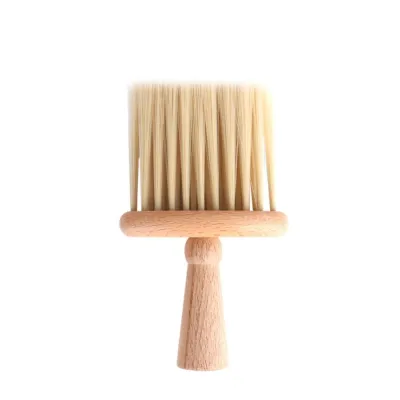


Prices are valid at publication and may change. Please refer to the product page for the latest price.
Using household detergents, window cleaners, or furniture polishes can cause immediate, irreversible damage. These products often contain alcohol, ammonia, or silicone. Alcohol acts as a powerful solvent that can strip spirit varnish down to the bare wood in seconds. Silicone-based polishes leave a slick residue that penetrates the wood pores, making future structural repairs or gluing virtually impossible for a luthier.
Before attempting to clean your instrument, inspect the varnish closely under a bright, indirect light. Look for visual and tactile signs of compromise, such as flaking, fine cracks (craquelure), cloudiness, or areas that feel unusually soft or sticky. If the varnish is worn away to expose bare wood, particularly on the upper bouts where your hand rests or near the bridge, stop immediately. Applying any liquid cleaner to exposed wood can cause the spruce or maple to swell, warp, or become permanently stained. In these instances, consult a qualified luthier for a professional assessment.
Selecting the Right Tools and Violin Cleaner
Safe violin maintenance begins with selecting products specifically formulated for delicate string instruments. When purchasing a commercial violin cleaner, read the manufacturer’s label carefully to verify that it is free of alcohol, heavy solvents, and silicone. High-quality cleaners are designed to lift oil and rosin without dissolving the underlying natural resins. If you are unsure about a product’s compatibility with your instrument’s specific finish, consult the maker or a specialty violin shop before application.

Your choice of cleaning cloth is just as important as the liquid cleaner itself. Avoid paper towels, facial tissues, or kitchen rags, as these materials contain coarse wood fibers that can leave microscopic scratches on soft varnish. Instead, use high-density, lint-free microfiber cloths. It is best to keep two separate cloths on hand: one dedicated to dry-wiping rosin dust after playing, and another reserved exclusively for applying liquid cleaner.
For hard-to-reach areas, such as the spaces beneath the fingerboard, around the bridge, or inside the f-holes, do not force a thick cloth into the gaps. Doing so can put dangerous pressure on the top plate or displace the bridge. Instead, use a soft-bristled makeup brush, a clean artist’s paint brush, or a dry cotton swab to gently sweep away accumulated dust without pressing down on the wood.
Step-by-Step Technique for Cleaning the Violin Body
When your violin requires a deeper clean to remove stubborn rosin film, follow a controlled, systematic process to minimize the risk of damage.
- Prepare the Workspace: Find a flat, stable surface, such as a sturdy table. Lay down a clean, padded towel or an instrument mat to protect the back of the violin from scratches. Ensure your hands are clean, dry, and free of rings, watches, or bracelets that could accidentally nick the wood. Remove the shoulder rest and place the violin gently on the padded surface.
- Perform a Dry Dusting: Use a clean, dry microfiber cloth or a soft brush to remove all loose dust and fresh rosin particles from the body. Skipping this step can cause the abrasive rosin dust to scratch the varnish when you begin wiping with the liquid cleaner.
- Conduct a Spot Test: Always test your violin cleaner on a small, inconspicuous area first, such as the lower rib near the endpin. Apply a tiny drop of cleaner to your cloth, rub the spot gently, and inspect the cloth. If you see any color transfer matching the varnish, stop immediately; this indicates the cleaner is dissolving your instrument's finish.
- Apply the Cleaner Sparingly: If the spot test is successful, apply a pea-sized drop of violin cleaner directly to your microfiber cloth. Never spray or pour liquid directly onto the instrument. Fold the cloth and rub the damp sections together to distribute the product evenly through the fibers.
- Wipe with Gentle, Circular Motions: Work in small, localized sections. Use light, circular motions to lift the dirt. Focus on the areas flanking the fingerboard and bridge where rosin accumulates, but avoid touching the bridge itself. The bridge is held in place solely by string tension; bumping or shifting it can alter your instrument's intonation or cause the bridge to collapse.
- Dry and Buff: Immediately follow up with a clean, dry section of the microfiber cloth to buff away any remaining moisture or cleaner residue. Never allow liquid to sit or dry on the varnish.
If you encounter a patch of stubborn, hardened rosin that does not lift with gentle pressure, do not scrub harder. Excessive friction generates heat, which can soften the varnish and cause the rosin to fuse permanently into the finish. If the residue refuses to yield, leave it alone and seek professional assistance.
Cleaning the Fingerboard, Strings, and Hardware
The unvarnished wood and metal components of your violin require different maintenance techniques than the varnished body.
The fingerboard, typically made of dense, unvarnished ebony, accumulates sweat, skin oils, and dirt from your fingertips. You can clean this area by wiping it firmly with a dry microfiber cloth. If there is heavy buildup, a slightly damp cloth can be used, but you must ensure that no moisture drips onto the spruce top plate directly beneath the fingerboard.
Strings also accumulate a layer of rosin dust, which dampens their vibration and deadens the tone of the instrument. After every playing session, slide a dry cloth under the strings and pinch each string individually, sliding the cloth up and down the length of the fingerboard to remove the white powder. For stubborn string buildup, some players use specialized string cleaners, but these must be applied with extreme caution. Keep all liquid string cleaners away from the varnished wood, as they often contain solvents that will ruin the finish on contact.
The chinrest and tailpiece should be wiped down regularly to remove sweat and skin oils. When cleaning the chinrest, pay close attention to the metal clamps. Ensure no moisture or sweat pools around the cork pads or metal screws, as this can cause the metal to corrode and damage the underlying ribs of the violin.
There are several areas of the violin that must remain completely dry. Never apply liquids, cleaners, or polishes to the pegs, the pegbox, or the soundpost area. Moisture inside the pegbox can cause the wooden pegs to swell and seize, or lubricate them so they slip constantly, making the instrument impossible to tune.
Daily Maintenance Habits to Preserve the Finish
The most effective way to protect your violin’s varnish is to establish a daily maintenance routine that prevents dirt and rosin from building up in the first place. Rosin dust is naturally acidic; if left on the varnish, it reacts with the finish over time, creating a dull, greyish crust that is incredibly difficult to remove safely.
Make it an absolute rule to dry-wipe your entire instrument immediately after every playing session. Spend thirty seconds wiping down the strings, the fingerboard, the body under the fingerboard, and the area around the bridge. This simple habit keeps the instrument clean and reduces the need for commercial liquid cleaners to once or twice a year.
Avoid common maintenance mistakes, such as over-applying polishes or using products designed for other stringed instruments, like guitars. Guitar polishes often contain oils and synthetic compounds that are far too aggressive for the delicate spirit or oil varnishes used on violins.
Finally, pay close attention to your storage environment. In warm, humid regions like Singapore, fluctuations in temperature and humidity can cause the wood to expand and contract, leading to varnish cracking or softening. Keep your violin stored in its hard case when not in use, away from direct sunlight, air conditioning vents, or drafty areas. Maintaining a stable relative humidity—ideally between 45% and 55%—will preserve both the structural integrity of the wood and the longevity of the varnish. While a bottle of specialized violin cleaner might cost around S$15 to S$30, taking these preventive measures will save you from luthier repair bills that can easily run into hundreds of dollars.
Frequently Asked Questions (FAQ)
Can I use rubbing alcohol or glass cleaner on my violin?
No, you should never use rubbing alcohol, glass cleaner, or any household solvents on your violin. Rubbing alcohol is a powerful solvent that will instantly dissolve spirit-based varnishes and severely strip oil-based finishes, exposing the raw wood underneath and causing permanent aesthetic and structural damage. Glass cleaners contain ammonia and other harsh chemicals that dry out the wood and strip the finish.
How often should I apply a commercial violin cleaner?
Commercial violin cleaner should only be used occasionally, typically once or twice a year, when a dry microfiber cloth is no longer sufficient to remove accumulated dirt or a dull rosin film. Over-using liquid cleaners can lead to product buildup, which attracts more dust and eventually dulls the natural resonance and luster of the wood.
What should I do if the varnish feels sticky after cleaning?
If the varnish feels sticky or tacky after cleaning, stop rubbing immediately. This stickiness usually indicates that the cleaner has reacted with the varnish, or that too much product was used and has mixed with semi-dissolved rosin. Gently blot the area with a clean, dry microfiber cloth to absorb excess moisture. Do not attempt to scrape or scrub the residue; instead, take the instrument to a professional luthier to safely lift the sticky layer without stripping the underlying finish.
Community discussion
Share your experience or ask a question. Comments are reviewed before publication.