
Quick Answer: Which Brand Aligns With Your Goals?
Choosing the right electronic drum pad depends heavily on your budget, playing style, and technical requirements. Roland, Yamaha, and Alesis each approach electronic percussion with a distinct design philosophy. Roland is generally the go-to brand if you prioritize advanced triggering accuracy, deep onboard editing, and rugged roadworthiness, though these premium features typically require a higher financial investment.
Yamaha appeals to players seeking a highly natural, acoustic-like feel and intuitive layouts. Their proprietary silicone pad technology offers a unique physical response that many traditional drummers prefer over standard mesh or rubber. Alesis focuses on maximizing features, pad counts, and connectivity options at highly accessible price points, making them a popular choice for beginners, hobbyists, or those on a strict budget.
Because product lineups change and features overlap across different price tiers, brand generalizations do not apply to every single model. It is always best to verify specific model specifications, test pad responsiveness in person at a local music showroom, or consult verified user feedback before making your final purchase.
Products mentioned in this guide
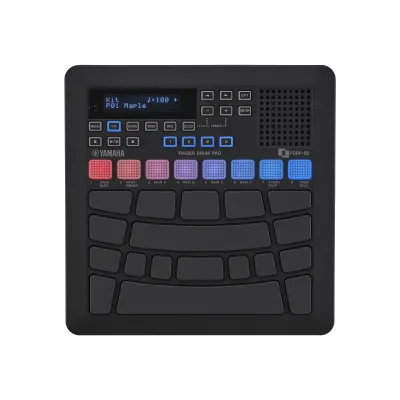
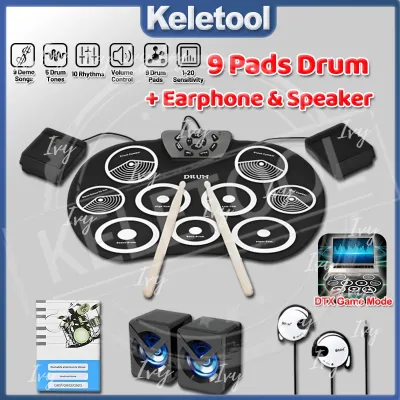
Prices are valid at publication and may change. Please refer to the product page for the latest price.
Core Comparison Dimensions for Electronic Drum Pads
Pad Material and Responsiveness
The physical surface of a drum pad dictates both your playing comfort and the amount of acoustic noise generated in your room. Mesh heads are highly popular because they allow you to adjust the tension with a standard drum key, offering a customizable rebound. They are also exceptionally quiet, making them ideal for high-density living spaces, such as HDB flats in Singapore, where keeping ambient noise low is a priority.

Silicone pads, specifically Yamaha’s Textured Cellular Silicone (TCS), use a proprietary aerated design that mimics the natural playability of an acoustic drum head. TCS pads absorb the impact of the stick, reducing wrist fatigue during long practice sessions while remaining remarkably quiet. Rubber pads are the most traditional option; they are highly durable and offer a firm, fast rebound, but they produce a louder acoustic “click” when struck and can feel stiff to players accustomed to acoustic drums.
When comparing models, check the manufacturer specifications for multi-zone triggering. Single-zone pads only trigger one sound regardless of where you strike them. Multi-zone pads allow you to trigger different sounds from the center, the edge, or the rim, enabling more expressive playing techniques like rimshots or cymbal chokes.
Connectivity Options
Your drum pad must integrate seamlessly with your existing gear. Standard 5-pin MIDI ports or USB-MIDI connections are essential if you plan to trigger external sound modules, hardware samplers, or software instruments on a computer. A USB connection that supports both MIDI and multi-channel audio transfer is highly convenient, as it allows you to record your performance directly into a Digital Audio Workstation (DAW) without needing a separate audio interface.
For audio outputs, look for dedicated left and right 1/4-inch jacks to connect to PA systems, keyboard amplifiers, or audio interfaces. A dedicated headphone output (either 1/4-inch or 3.5mm) is crucial for silent practice. Additionally, check for auxiliary inputs (Aux In), which let you plug in a smartphone or media player to play along with your favorite tracks.
Power and Portability
If you plan to use your drum pad for busking, outdoor performances, or quick rehearsals, power options and physical dimensions are critical. Some compact drum pads can run on AA batteries or USB bus power, offering ultimate portability. Larger, multi-pad sample pads almost always require a dedicated AC adapter, which limits where you can set them up.
Weight and footprint also vary significantly. Lightweight, plastic-chassis pads are easy to slip into a backpack, but they may slide around on a table if not securely mounted. Heavy-duty models with metal frames offer excellent stability but add noticeable weight to your gear bag, which is an important consideration if you rely on public transit to get to gigs.
Evaluating Sound Engines and Expandability
Internal Sound Library
A drum pad’s internal sound engine determines the quality and variety of the percussion sounds available right out of the box. High-quality modules offer high polyphony limits (typically 32 to 64 voices or more), which prevent older notes from being abruptly cut off when you play fast rolls or trigger long cymbal decays. Look for modules that offer a balanced mix of realistic acoustic drum kits, electronic percussion, and melodic instruments.
Many modern modules allow you to customize these sounds directly on the unit. You can adjust parameters such as tuning, muffling, decay time, and digital effects (reverb, delay, or compression). If you enjoy sound design, prioritize modules that offer deep, menu-based editing capabilities over those that only provide basic volume and pan controls.
Sample Importing and Editing
For music producers and live performers, the ability to import custom WAV or AIFF samples is a game-changing feature. Check the manufacturer’s documentation for the total user sample capacity, which is often measured in megabytes (MB) or gigabytes (GB). Some entry-level pads have very limited internal memory, allowing only a few short sound bites, while professional sample pads can hold hours of high-fidelity backing tracks.
Pay close attention to the supported audio formats. Most pads require specific sample rates and bit depths (such as 16-bit/44.1 kHz mono or stereo WAV files). If you import an unsupported format, the pad may fail to play it or require tedious conversion on your computer beforehand. Onboard sample editing tools, such as the ability to loop, truncate, or normalize samples directly on the pad, add immense convenience.
External Integration
If you plan to use your drum pad as a MIDI controller for virtual drum software (such as Superior Drummer, EZdrummer, or Steven Slate Drums), low-latency performance is vital. High latency—the delay between striking the pad and hearing the sound from your computer speakers—can ruin your sense of timing. Look for pads with optimized USB-MIDI drivers that support low-buffer settings in your DAW.
Furthermore, check if the brand provides dedicated software editors for your computer or tablet. These applications make it much easier to organize your sample libraries, assign sounds to different pads, adjust trigger sensitivity curves, and back up your custom kits than navigating small, monochrome screens on the physical unit itself.
Build Quality, Ergonomics, and Hardware
Chassis and Construction
Electronic drum pads are designed to be hit with wooden or synthetic sticks, meaning they must withstand significant physical impact. Premium models feature rugged metal chassis or high-impact ABS plastic housings that resist cracking. Pay close attention to the durability of the input and output jacks; metal-reinforced jacks are far less likely to loosen or break over time than plastic ones that are soldered directly to the internal circuit board.
Buttons, knobs, and dials should feel firm and responsive. Recessed controls or physical barriers around knobs help prevent accidental stick strikes from damaging the interface during an energetic performance. If you live in a humid climate like Singapore, look for sealed buttons that prevent moisture and sweat from seeping into the internal electronics.
Pad Layout and Zoning
The physical arrangement of the pads affects your playing accuracy and ergonomics. Multi-pad units typically feature a grid layout (such as a 3×3 or 4×2 configuration). Ensure the pads are large enough to hit comfortably without accidentally striking the adjacent pads. Raised rubber borders or physical dividers between pads can help prevent cross-triggering.
Cross-triggering occurs when the vibration from striking one pad travels through the chassis and triggers a neighboring pad. High-quality modules include advanced crosstalk cancellation settings, allowing you to fine-tune the threshold and sensitivity of each pad to ensure clean, isolated triggers even during heavy playing.
Mounting and Accessories
Most electronic drum pads do not come with mounting hardware included in the box. You will need to purchase a compatible mounting plate, clamp, or stand separately. Verify the thread sizes and mounting patterns on the back of the unit; many brands use standard 1.5-inch rack clamps or standard cymbal stand threads, but some require proprietary mounting brackets.
Always check the package contents before purchasing. While some packages include the power supply, a pair of drumsticks, and basic connection cables, others may only include the main unit. If you plan to expand your setup, verify how many external trigger inputs are available on the back of the pad, allowing you to connect extra kick pedals, hi-hat controllers, or additional cymbal pads.
How to Match the Drum Pad to Your Playing Needs
Practice and Skill Development
If your primary goal is to improve your drumming skills at home, look for a drum pad equipped with robust coaching functions. Many modules include built-in metronomes with adjustable time signatures, rhythm coach programs that grade your timing accuracy, and pre-recorded play-along tracks across various musical genres.
For home practice in shared living spaces, prioritize quiet pad materials like mesh or silicone. A compact footprint is also beneficial, as it allows you to set up the pad on a standard desk or a lightweight snare stand, which can be easily folded and stored away when not in use.
Live Performance
Performing live demands maximum reliability and quick accessibility. Your drum pad should feature a rugged, gig-ready chassis and bright, high-contrast displays that are easy to read on dark stages. Quick kit-switching is essential; look for models that allow you to assign kit changes to an external footswitch so you can keep your hands on your sticks.
Reliable audio routing is another priority for live gigs. Pads with multiple physical outputs allow you to send your backing tracks to the house mixing console while routing a click track exclusively to your in-ear monitors. This ensures your band stays perfectly in sync without the audience hearing the metronome.
Studio Production and Beat Making
For studio environments, the drum pad acts as the bridge between your physical performance and your digital audio workstation. High-resolution MIDI velocity curves are crucial here, as they ensure that every subtle ghost note and heavy accent is captured accurately by your software instruments.
Look for pads that offer seamless DAW integration, allowing you to map the physical pads and knobs to control transport functions (play, stop, record) or adjust plugin parameters. Low-latency USB audio streaming is also a major advantage, enabling you to record high-quality audio directly from the pad’s internal sound engine without extra conversion steps.
Space and Noise Constraints
In compact living environments, the physical noise of sticks hitting rubber pads can easily travel through walls and floors, causing unwanted disturbances. If you live in an apartment, choosing a pad with mesh or silicone heads is highly recommended. You can also place a vibration-absorbing mat underneath your stand to prevent physical impact noise from traveling through the floorboards.
Consider the overall footprint of your setup. A single multi-pad unit on a snare stand takes up a fraction of the space of a full electronic drum kit, making it an excellent alternative for musicians who want to practice drum patterns but do not have the square footage for a larger setup. Budgeting for a high-quality pair of closed-back headphones will also ensure you get a rich, immersive sound without leaking audio into your surroundings.
Frequently Asked Questions (FAQ)
Can I use these electronic drum pads with my existing acoustic drum kit?
Yes, integrating an electronic drum pad into an acoustic drum kit is a highly popular way to create a hybrid setup. To do this, you will need compatible mounting hardware, such as a multi-clamp and an L-rod, to attach the pad securely to an existing cymbal stand or drum rack.
When playing a hybrid kit, you must manage your audio routing carefully. If you are performing live, you will need to route the audio outputs of the drum pad to the main PA system or a dedicated drum amplifier so that the electronic sounds blend naturally with the acoustic volume of your acoustic drums and cymbals.
Do I need a separate amplifier for these drum pads?
Electronic drum pads do not have built-in speakers, so you will need an external audio device to hear them. For private practice, a high-quality pair of closed-back headphones is the most practical option. If you want to play out loud, you can connect the pad to studio monitors, a keyboard amplifier, or a dedicated electronic drum amplifier.
Avoid using standard guitar amplifiers, as they are not designed to handle the wide frequency range and deep low-end transients of drum sounds, which can damage the speaker. Always check the output impedance and connector types (such as 1/4-inch TS or TRS jacks) on your specific drum pad model to ensure you purchase the correct cables for your playback system.
Community discussion
Share your experience or ask a question. Comments are reviewed before publication.