
Choosing the right digital drum for electronic music production and DJ mixing in Singapore requires balancing physical space, performance style, and digital integration. In a market where home studios are often set up in compact HDB apartments or shared condominiums, the ideal hardware must deliver precise control without overwhelming your living space. Producers and DJs must decide between full-scale electronic drum kits that replicate acoustic play, multi-pads designed for rapid sample triggering, and hybrid controllers optimized for sequencing. The decision ultimately hinges on how seamlessly the device interfaces with your Digital Audio Workstation (DAW) or live performance software, alongside its physical noise profile.
By understanding the technical specifications of digital drum controllers, you can select a tool that enhances your creative workflow. Whether you are performing live in a club along the Singapore River or programming intricate drum-and-bass patterns in a bedroom studio, the right hardware acts as a bridge between physical expression and digital sound design. This guide outlines the essential criteria, form factors, and integration strategies to help you make an informed investment.
Core Selection Criteria for Electronic and DJ Workflows
Integrating a digital drum into an electronic music production or DJ setup requires a different set of priorities than choosing a kit for traditional acoustic practice. The primary value of a digital drum in these modern workflows lies in its ability to communicate with software and hardware instruments reliably. To find the right fit, you must evaluate several core technical dimensions before committing to a purchase.
Products mentioned in this guide
![Yamaha DTX6K2X Electronic Drums DTX6K2-X DTX 6K2 X Digital Drum DTX 6K2X DTX6 The Music Works [PREORDER]](https://img.lazcdn.com/g/p/dbb03d29e0c686e3e39376ae0c45e5e3.jpg_400x400q80.jpg_.webp)
![Yamaha DTX452K Electronic Drums Digital Drum Set DTX-452K DTX 452 K DTX 452K DTX452 [PREORDER]](https://img.lazcdn.com/g/p/af5553ead0032cf1aa86c61dfabcbc22.jpg_400x400q80.jpg_.webp)
![Donner DED-70 Complete Set 7 Pieces Beginner Electronic Drums Foldable DED 70 Series [PREORDER]](https://img.lazcdn.com/g/p/855629ea0fba78ae6b998d76130c6571.png_400x400q80.png_.webp)
![Alesis Nitro Max Kit Foldable Electronic Drum Set With Dual Zone Mesh Head Snare Toms Cymbals Kick Pedal Module Drumsticks [LIMITED STOCK]](https://img.lazcdn.com/g/p/b547a4b2e62e79fe5eee647b3c9dfb29.png_400x400q80.png_.webp)
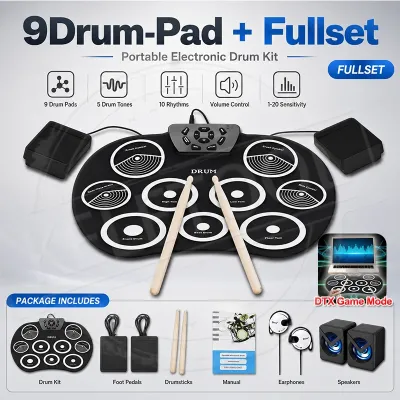
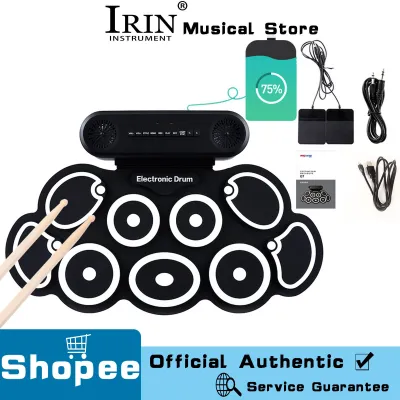
Prices are valid at publication and may change. Please refer to the product page for the latest price.
First, evaluate the depth of MIDI mapping and DAW integration. A high-quality digital drum should not only send basic note-on and note-off messages but also allow you to customize MIDI Continuous Controller (MIDI CC) values. This capability is essential for mapping physical pads, knobs, or foot pedals to software parameters such as filter cutoff, delay feedback, or sample start times. Look for devices that offer dedicated software editors, which simplify the process of assigning specific MIDI channels and note numbers to individual pads.
Second, assess pad sensitivity, velocity curves, and aftertouch. Electronic music genres rely heavily on dynamics to create groove and humanize programmed beats. The pads must be sensitive enough to register light finger taps while remaining durable enough to handle heavy stick strikes. Most professional units allow you to adjust the velocity curve—the mathematical relationship between how hard you hit the pad and the volume of the resulting sound. Some advanced controllers also feature aftertouch, which detects continuous pressure applied to a pad after the initial strike, allowing you to modulate sounds dynamically.
Third, determine whether your workflow requires standalone audio outputs or if USB-only routing is sufficient. If you plan to integrate the digital drum into a live DJ set, having dedicated physical audio outputs (such as balanced TRS or RCA jacks) is crucial. This allows you to route the drum sounds directly into a spare channel on a DJ mixer, giving you independent control over EQ, volume, and hardware effects. Conversely, if your setup is purely studio-based, a USB-only controller that routes MIDI data to your computer and relies on your audio interface for sound output may be more cost-effective.
Finally, compare the utility of an internal sound engine against a reliance on external software samplers. Hardware with a built-in sound engine operates independently of a computer, offering zero-latency performance and immediate playability. This is highly advantageous for live gigs where computer stability is a concern. However, if you primarily produce music inside a DAW using high-end virtual instruments, a dedicated MIDI controller without an internal sound engine can save you money while offering deeper integration with your software library.
Form Factors: Drum Kits vs. Sampling Pads vs. Controllers
Digital drums come in several distinct physical formats, each tailored to specific performance styles and space constraints. Choosing the right form factor depends on how you plan to interact with your music and the physical limitations of your studio or performance environment.

Full electronic drum kits consist of a rack-mounted array of pads representing a traditional drum set, complete with a snare, toms, cymbals, and foot pedals. These kits are the best choice for musicians who have formal drumming training and want to utilize multi-limb coordination. They offer the most realistic playing experience, particularly when equipped with mesh heads that mimic the rebound of acoustic drums. However, they have a large physical footprint, typically requiring at least 1.2 by 1.2 meters of floor space, making them difficult to integrate into a tight DJ booth or a small bedroom studio.
Multi-pads and sampling pads offer a highly compact and portable alternative. These devices feature a grid of rubber pads (typically six to nine) housed in a single, rugged chassis that can sit on a tabletop or mount to a standard cymbal stand. Multi-pads are the industry standard for live DJs and hybrid performers because they can easily be positioned next to a DJ mixer or laptop. They allow you to trigger loops, backing tracks, and one-shot samples using drumsticks or hands, providing a highly visual and energetic element to a live performance without taking up excessive space.
Hybrid controllers and grooveboxes represent a third category, designed primarily for finger drumming and studio production. Instead of being struck with sticks, these devices feature a grid of smaller, highly sensitive silicone pads (often in a 4×4 or 8×8 layout) designed to be played with your fingers. They frequently include built-in step sequencers, rotary encoders, and small screens for editing waveforms directly on the hardware. If your primary goal is to program complex electronic beats, chop samples, and tweak synthesizer parameters on the fly, a hybrid controller is often more practical than a stick-based drum pad.
Key Features to Verify Before Purchase
Before finalizing your purchase, it is essential to verify several technical specifications and compatibility requirements. This pre-purchase check ensures that the hardware will integrate smoothly with your existing gear and remain functional as your studio evolves.
Start by checking the physical connectivity options. Ensure the device has the correct ports for your workflow. Traditional 5-pin DIN MIDI ports are necessary if you want to control legacy hardware synthesizers or drum machines without a computer. For modern computer-based setups, a USB-C port that handles both MIDI data and bus power is highly convenient, as it reduces cable clutter. Additionally, look for dedicated trigger inputs if you plan to expand your setup later with external trigger pads or foot pedals.
Next, verify the storage expansion capabilities of the device. If you choose a sampling pad with an internal sound engine, you will likely want to import your own custom sample libraries. Check whether the unit supports standard SD or SDHC cards, and verify the maximum storage capacity it can read. Some older or budget-friendly units are limited to smaller card sizes or require specific file formatting (such as FAT32). You should also confirm the supported audio file formats; professional workflows typically require the ability to import 24-bit WAV files at 44.1 kHz or 48 kHz without automatic downsampling.
Review the included software bundle licenses and operating system compatibility. Many digital drum manufacturers bundle their hardware with introductory versions of popular DAWs, virtual instruments, or proprietary sample management software. Ensure that these software tools are compatible with your current operating system version. If you use a modern Apple Silicon Mac or a Windows 11 PC, verify that the manufacturer provides native drivers and updated software editors that run smoothly on your system without causing latency or crashes.
Finally, confirm the availability of firmware updates and ongoing manufacturer support. Digital drum hardware relies heavily on internal software to manage MIDI routing, pad sensitivity, and USB communication. Visit the manufacturer’s support website to see how recently they have released firmware updates for the model you are considering. A history of regular updates indicates that the manufacturer actively resolves bugs and maintains compatibility with evolving computer operating systems, protecting your investment for years to come.
Building Your Shortlist Based on Workflow Needs
To narrow down your options, it is helpful to match your specific performance or production style to a distinct hardware profile. By identifying your primary workflow, you can prioritize the features that matter most and avoid paying for unnecessary capabilities.
If you are a live DJ performer, your priority should be rugged build quality, standalone reliability, and quick-access pad layouts. Look for multi-pads with thick rubber surfaces that can withstand energetic stick hits during a high-pressure gig. The chassis should be constructed from high-impact composite or metal to survive transport. Standalone sampling capability is essential here; you want a device that can load and play samples directly from an SD card without needing a laptop connection, minimizing the risk of software crashes on stage. Bright, customizable LED indicators around the pads are also highly beneficial for visibility in dark club environments.
For a studio production profile, prioritize high-resolution velocity sensitivity, polyphonic aftertouch, and deep DAW integration. In the studio, the physical durability of the pads is secondary to their expressiveness. You want a controller that can capture the subtle nuances of your playing, allowing you to record realistic-sounding hi-hat patterns or dynamic synth leads. Look for devices that offer extensive MIDI CC mapping options, allowing you to use physical knobs or sliders on the controller to automate software parameters in real-time. A pure USB-MIDI controller is often the smartest choice for this workflow, as it maximizes software integration while keeping costs reasonable.
If you have a space-constrained or mobile profile, focus on compact USB-MIDI controllers that offer bus-powered operation. In Singapore, where studio space is often at a premium, a device that can easily be tucked into a drawer or slipped into a backpack is incredibly valuable. Look for lightweight, slim-profile finger drumming pads that draw power directly from your laptop’s USB port, eliminating the need for a bulky external power adapter. These devices rely entirely on your computer or mobile device for sound generation, making them highly portable tools for producing music on the go or in temporary workspaces.
Setup and Integration Considerations
Once you have selected your digital drum hardware, proper physical setup and technical configuration are essential to achieve optimal performance and maintain a harmonious living environment.
Begin by planning the ergonomic placement of your gear. If you are integrating a multi-pad into a DJ setup, position it at a height and angle that allows you to strike the pads comfortably without straining your wrists or shoulders. Using an adjustable stand or a dedicated desktop wedge can help you achieve the correct angle. For full electronic drum kits, ensure that the rack is adjusted so that your elbows are at a comfortable 90-degree angle when playing, and that your feet rest naturally on the pedals to prevent long-term physical strain.
Managing mechanical noise is a critical consideration for digital drum users in Singapore’s high-density residential areas. While electronic drums are silent to the player wearing headphones, the physical impact of sticks striking rubber or mesh pads creates low-frequency kinetic energy. This vibration travels down the drum stand, through the floorboards, and directly into the structure of the building, where it can be heard as a loud, rhythmic thumping by neighbors living below. To mitigate this, place your setup on a heavy-duty, vibration-dampening mat. You can also construct a simple isolation platform using interlocking high-density EVA foam tiles or a wooden riser decoupled from the floor with tennis balls, which effectively absorbs the kinetic energy before it enters the building structure.
Finally, configure your audio interface routing and buffer sizes to minimize monitoring latency. Latency is the delay between the physical moment you strike a pad and the moment you hear the sound in your headphones. For natural-feeling performance, this delay should be kept under 10 milliseconds. In your DAW or audio interface control panel, set your audio buffer size to 64 or 128 samples. While lower buffer sizes require more computer processing power, they significantly reduce latency, ensuring that your digital drum feels responsive and tight during recording and live performance.
Frequently Asked Questions (FAQ)
Can I use a standard electronic drum kit for DJ mixing?
Yes, you can use a standard electronic drum kit for DJ mixing, but it presents several physical and technical challenges. The primary obstacle is the physical footprint; a full electronic kit is too large to fit into most standard DJ booths or performance stages. To make it work, you must connect the drum module’s MIDI output to your laptop running DJ software or a DAW, mapping specific drum pads to trigger samples or effects. You will also need to route the audio output of your drum module or computer into an open channel on your DJ mixer, ensuring that your audio interface is configured for low-latency performance so your drumming stays perfectly in sync with the playing track.
Do I need built-in sounds if I primarily use a DAW?
If you primarily produce music within a DAW, you do not strictly need a digital drum with built-in sounds. A dedicated USB-MIDI controller without an internal sound engine is generally more affordable, lighter, and offers deeper integration with your software instruments. However, hardware with built-in sounds offers the advantage of standalone playability, allowing you to practice or perform without turning on your computer. It also guarantees zero-latency performance, which can sometimes be difficult to achieve on older computers running heavy DAW projects.
How do I manage trigger noise in an apartment?
Managing trigger noise in a high-density apartment requires addressing both acoustic noise and structural vibration. To reduce acoustic noise, choose pads made of mesh or soft silicone rather than hard rubber, as they produce a quieter physical impact. To eliminate structural vibration, place your drum stand or pedals on a thick, sound-absorbing mat made of high-density foam. For maximum isolation, build a decoupled riser using two layers of plywood separated by halved tennis balls or specialized acoustic dampening blocks, which prevents the kinetic energy of your foot pedals and stick strikes from traveling through the floor to your neighbors.
Community discussion
Share your experience or ask a question. Comments are reviewed before publication.