
To select the most suitable digital drum for electronic music production and DJ mixing, you must prioritize digital connectivity, low-latency performance, and sample customisation over traditional acoustic emulation. While acoustic drummers seek realistic head rebound and the subtle tonal variations of physical shells, electronic music producers and DJs require precise MIDI triggering, seamless integration with Digital Audio Workstations (DAWs), and the ability to load custom sample libraries. The ideal instrument acts as a bridge between physical performance and digital sound design, allowing you to trigger complex synthesizers, manipulate effects in real time, and integrate live percussion into a DJ set. By focusing on how a digital drum interacts with your software and hardware ecosystem, you can choose a tool that enhances your creative workflow rather than restricting it to traditional drumming paradigms.
Core Requirements for Electronic Music and DJ Workflows
Integrating a digital drum into an electronic music production or DJ setup requires a shift in perspective from traditional acoustic drumming. Instead of evaluating how closely a kit mimics the physical resonance of wood and metal, you must assess how efficiently the hardware communicates with your digital environment. The primary requirement is robust MIDI connectivity. High-speed USB-MIDI and traditional 5-pin MIDI DIN ports ensure that your trigger signals are transmitted to your computer or external hardware synthesizers with minimal delay. Low-latency performance is critical; even a few milliseconds of delay between striking a pad and hearing the sound can disrupt your timing and ruin a live performance or recording session.
Customization is another cornerstone of electronic music. Unlike acoustic kits with fixed tonal profiles, your digital drum must offer flexible sample import capabilities and a versatile internal sound engine. Electronic genres rely heavily on specific, synthesized drum sounds—such as deep 808 sub-kicks, crisp 909 snares, and custom glitch percussion. The drum module or pad controller should allow you to load your own WAV samples, map them across different pads, and edit parameters like pitch, decay, and filtering directly on the hardware. This flexibility ensures your physical kit can adapt to any genre, from house and techno to drum and bass.
Products mentioned in this guide
![Yamaha DTX6K2X Electronic Drums DTX6K2-X DTX 6K2 X Digital Drum DTX 6K2X DTX6 The Music Works [PREORDER]](https://img.lazcdn.com/g/p/dbb03d29e0c686e3e39376ae0c45e5e3.jpg_400x400q80.jpg_.webp)
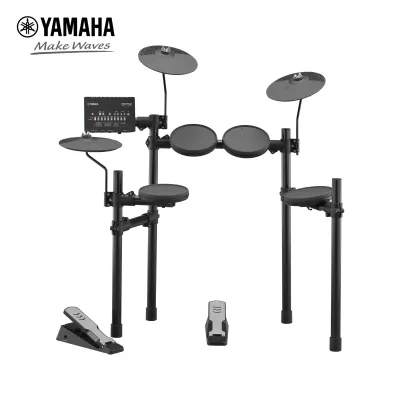
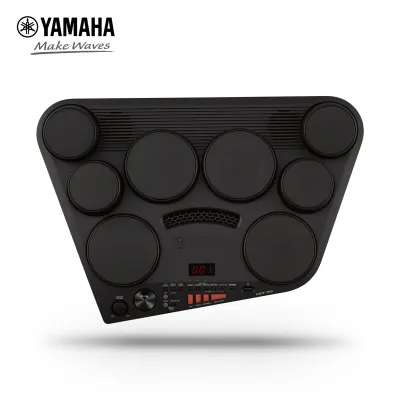
![Yamaha DTX452K Electronic Drums Digital Drum Set DTX-452K DTX 452 K DTX 452K DTX452 [PREORDER]](https://img.lazcdn.com/g/p/af5553ead0032cf1aa86c61dfabcbc22.jpg_400x400q80.jpg_.webp)
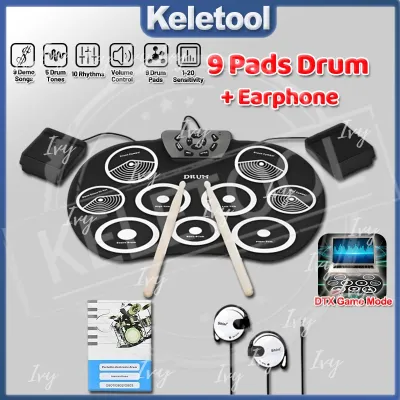
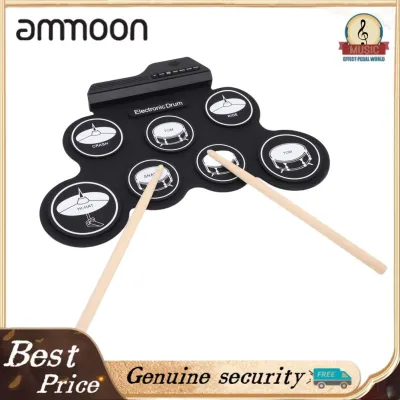
![Alesis Nitro Pro 8-Piece Electronic Drums Kit for Beginners to Advanced Players with Bluetooth [LIMITED STOCK]](https://img.lazcdn.com/g/p/fba2c7c3ade9763f9c88e42370eb61a5.png_400x400q80.png_.webp)
Prices are valid at publication and may change. Please refer to the product page for the latest price.
Deep DAW integration and MIDI mapping capabilities are essential for modern studio workflows. Your digital drum should not only trigger drum sounds but also act as a comprehensive controller for your production software. This includes the ability to map pads to trigger clips in Ableton Live, control transport functions (play, stop, record), or modulate synthesizer parameters using external control knobs or expression pedals. A well-integrated controller allows you to keep your hands off the computer mouse, maintaining a tactile and intuitive creative flow during production sessions.
Finally, the physical pad material and trigger response must be tailored for rapid electronic beats and finger-drumming techniques. Electronic music often features fast, intricate patterns—such as trap hi-hat rolls or complex breakbeats—that are difficult to execute on heavy, slow-rebounding pads. Look for pads that offer high sensitivity and rapid recovery times, allowing for quick successive strikes without dropped notes or accidental double-triggering. Whether you prefer full-sized mesh heads for a physical stick performance or compact silicone pads for desktop finger-drumming, the triggers must be highly responsive to your specific playing dynamics.
Key Specifications to Evaluate Before Purchasing
Before purchasing a digital drum, it is crucial to verify specific technical details in the manufacturer’s documentation to ensure compatibility with your workflow. Start by evaluating the sound module’s expandability and sample-loading specifications. Check if the module supports external storage media, such as SD cards or USB flash drives, and note the maximum storage capacity supported. More importantly, verify the file format limitations; many modules only accept specific sample rates and bit depths, such as 16-bit/44.1kHz mono WAV files. Understanding these limits beforehand prevents the frustration of having to manually convert your entire sample library before importing it.

Output routing is another critical specification that distinguishes studio-grade gear from basic practice kits. For professional mixing, you need the ability to process different drum elements separately. Compare modules that offer multi-channel physical outputs (often labeled as direct outs) with those that only offer a single stereo output. Multi-channel routing allows you to send the kick, snare, and hi-hats to separate channels on your mixing console or audio interface for individual EQ, compression, and effects processing. Alternatively, some modern modules support multi-channel audio over USB, sending individual tracks directly to your DAW via a single cable.
Physical connectivity ports must match your existing studio or DJ gear. Ensure the digital drum features a USB-MIDI port for direct connection to your computer, as well as traditional 5-pin MIDI DIN input and output ports. The 5-pin ports are essential if you plan to control hardware samplers, drum machines, or analog synthesizers without routing through a computer. Additionally, look for dedicated audio inputs, such as a 3.5mm or 6.35mm auxiliary input, which allow you to feed audio from a DJ mixer or media player directly into the drum module for monitoring or play-along purposes.
Ergonomics and layout play a significant role, especially in space-constrained home studios or crowded DJ booths. Assess the physical footprint of the digital drum system. Full-size electronic kits require a dedicated floor area and an adjustable rack system, which must be sturdy enough to withstand energetic performances. For desktop setups, evaluate the pad spacing and the placement of the control module. The layout should allow you to reach all pads and control knobs comfortably during long production sessions, without straining or accidentally hitting adjacent triggers.
Matching Drum Configurations to Your Production Style
Your choice of digital drum configuration should align closely with your primary workflow, whether you are a studio-bound beatmaker, a performing DJ, or a hybrid artist. Compact desktop MIDI pad controllers are highly favored by electronic music producers who work primarily at a desk. These devices feature a grid of velocity-sensitive pads optimized for finger-drumming and sample triggering. They occupy minimal desk space, are highly portable, and integrate seamlessly with software samplers. If your focus is on programming beats, arranging tracks, and triggering clips within a DAW, a desktop pad controller offers the most efficient and space-saving solution.
For live DJ performances, standalone electronic multipads with built-in sound engines and sequencers offer distinct advantages. These self-contained units allow you to perform live percussion over your DJ sets without the need for an additional laptop, reducing the complexity of your live rig and minimizing the risk of software crashes. You can pre-load your custom performance samples onto the device, organize them into kits matching your DJ sets, and trigger them in real time. Some advanced multipads also feature onboard looping and sequencing, enabling you to build up rhythmic layers on the fly to complement the tracks you are mixing.
If you prefer a physical drumming experience with sticks, a full-size electronic drum kit with mesh heads is the ideal configuration. Mesh heads provide a realistic rebound that closely mimics acoustic drums, making them suitable for producers who transition between acoustic playing and electronic production. However, when selecting a full kit for electronic music, ensure the module supports modular expansion. As your production needs grow, you may want to add extra cymbal pads, auxiliary triggers, or external sample pads to your setup. Ensure the module has unused trigger input jacks to accommodate these hardware upgrades.
It is also important to consider the trade-offs between acoustic feel and electronic responsiveness. While mesh heads are excellent for traditional playing techniques, some electronic producers find that high-quality rubber or silicone pads offer a more immediate, punchy response that is better suited for executing tight, quantized electronic rhythms. Rubber pads have less physical give, which can reduce hand fatigue during rapid, repetitive stick work but provides a highly consistent trigger signal. Evaluate your playing style and choose the pad material that feels most natural and responsive for the specific genres you produce.
Building Your Shortlist: Decision Matrix and Verification Steps
To build a reliable shortlist of digital drums, establish a clear decision framework based on your budget and technical requirements. In Singapore, budget tiers generally fall into three categories. Entry-level options under S$500 consist primarily of compact desktop MIDI controllers and basic pad units, which are excellent for simple beatmaking but lack advanced onboard sound engines. The mid-range tier, from S$500 to S$1,500, introduces robust electronic drum kits with mesh heads and multi-pads that support basic sample importing. Premium options above S$1,500 offer professional-grade sound modules, extensive internal memory, multi-channel audio routing, and advanced trigger customization.
Once you have defined your budget, cross-reference manufacturer specification sheets to verify critical performance limits. Do not rely on vague marketing claims such as “unlimited sound library.” Instead, look for the exact user sample memory capacity, which is typically specified in megabytes (MB) or gigabytes (GB). A module with only 32MB of internal memory will limit you to short, low-resolution drum hits, whereas a module with several gigabytes of storage can accommodate long loops, backing tracks, and high-fidelity multi-samples. Also, confirm the maximum number of user kits you can save simultaneously on the device.
Operating system compatibility and driver support must be verified directly on the manufacturer’s official website. Before purchasing, check the support downloads section for the specific model to ensure that official drivers are available for your computer’s operating system, whether you use macOS or Windows. This is particularly important if you are running the latest OS updates, as older hardware may no longer receive driver support, leading to connectivity issues or high latency. Additionally, search for user forums or compatibility charts to confirm that the hardware integrates smoothly with your preferred DAW, such as Ableton Live, Logic Pro, or FL Studio.
Finally, download the product’s user manual and study the MIDI Implementation Chart and polyphony specifications. The MIDI chart will reveal any limitations in MIDI CC mapping, showing you exactly which knobs and pads can send control messages to your software. Polyphony is another critical factor; it dictates how many individual sounds the module can play simultaneously. For complex electronic music with layered samples, long cymbal decays, and active sequencers, a high polyphony count (such as 64 or 128 voices) is essential to prevent notes from being cut off abruptly during dense musical passages.
Setup and Integration Checklist for Studio and Live Use
Once you have acquired your digital drum, proper setup and calibration are essential to ensure seamless integration into your studio or live performance rig. Start with audio interface routing and gain staging. Connect the physical audio outputs of your drum module to the line inputs of your audio interface using balanced TRS cables to minimize electrical noise. Adjust the output volume of the drum module so that it peaks around -12 dBFS in your DAW. This provides sufficient headroom for subsequent processing, such as adding saturation, compression, or EQ, without risking digital clipping or distortion.
Next, configure your MIDI mapping and DAW synchronization. In your DAW’s MIDI preferences, enable the digital drum as an active MIDI input device. If you are using a desktop pad controller, map the physical pads to the corresponding slots in your software drum rack. For modules with built-in sequencers or tempo-synced effects, configure your DAW to send MIDI Clock signals to the drum module. This ensures that any internal delays, LFOs, or sequences on the hardware remain perfectly synchronized with the master tempo of your project.
Calibrating pad sensitivity and velocity curves is a crucial step that is often overlooked. Access the trigger settings menu on your drum module or controller software to adjust the threshold and sensitivity of each pad. The threshold determines how hard you must strike the pad for it to register a hit, which helps eliminate accidental triggers caused by physical vibrations from adjacent pads. Adjust the velocity curves to match your playing dynamics; a linear curve offers a natural response, while an exponential curve can make it easier to trigger maximum-velocity hits with lighter strikes, which is highly useful for energetic electronic styles.
For live DJ gigs, implement a robust redundancy plan to prevent technical failures during your performance. Always prepare backup USB flash drives containing your custom sample libraries and kit configurations, allowing you to quickly restore your settings if the module resets. Use high-quality, shielded cables and secure them with cable ties to prevent accidental disconnection in a dark, high-vibration DJ booth. If possible, route a secondary stereo output from your drum module directly to a spare channel on the DJ mixer, giving you an immediate backup audio path if your primary interface or computer encounters an issue.
Frequently Asked Questions (FAQ)
Do I need a full acoustic-style kit or just a MIDI pad controller for beatmaking?
For most electronic music beatmakers, a compact desktop MIDI pad controller is more practical and cost-effective than a full acoustic-style electronic kit. Desktop controllers occupy very little space, making them ideal for home studios, and their closely spaced pads are optimized for rapid finger-drumming and triggering samples. A full-size electronic kit is only necessary if you prefer performing with drumsticks, require a physical drumming experience for live shows, or want to practice traditional drumming techniques alongside your production work.
Can I import my own custom electronic samples into any digital drum module?
No, not all digital drum modules support custom sample importing. Many entry-level modules only allow you to play the pre-installed factory sounds and do not feature any user sample memory. Before purchasing, you must check the product specifications to confirm that the module supports user sample loading via USB or SD card, and verify the supported audio file formats, such as 16-bit WAV files.
How do I minimize latency when triggering software synths via MIDI?
To minimize latency, connect your digital drum directly to your computer using a high-quality USB cable rather than routing through multiple hubs. In your DAW’s audio preferences, select a dedicated ASIO driver (on Windows) or Core Audio (on macOS) and lower the audio buffer size to 64 or 128 samples. This reduces the time it takes for your computer to process and output the sound, ensuring an immediate response when you strike a pad.
Community discussion
Share your experience or ask a question. Comments are reviewed before publication.