
Selecting your first piano cleaner kit requires focusing on chemical safety, material compatibility, and the quality of the physical tools included. Because pianos and digital keyboards are constructed from highly sensitive woods, specialized lacquers, and delicate plastics, using generic household cleaners can cause permanent surface damage. A proper kit must feature a pH-balanced, alcohol-free cleaning solution, ultra-soft microfiber cloths to prevent micro-scratches, and specialized detailing tools to safely clear dust from tight spaces. By prioritizing these elements, you can safely maintain your instrument’s appearance and protect your investment without risking chemical clouding or physical wear.
Identify Your Piano's Finish and Key Material
Before browsing online marketplaces or local music shops for a cleaning kit, you must accurately identify the exact materials used in your instrument’s construction. Pianos and digital keyboards do not have a single, universal surface; rather, they feature a combination of distinct finishes and key types that react differently to chemical solutions.
Acoustic pianos typically feature one of two primary cabinet finishes: high-gloss polyester or a traditional satin/matte wood finish. High-gloss finishes, common on modern grand and upright pianos, are highly reflective and durable but are susceptible to hairline scratches and swirl marks if wiped with the wrong cloth. Satin or matte finishes, often found on older or classic wooden pianos, feature an open-pore or low-sheen lacquer that can be easily ruined by heavy polishes, which leave greasy streaks or unwanted shine. Digital pianos and electronic keyboards, on the other hand, usually feature plastic or synthetic wood-grain cabinets that require gentle, non-solvent-based cleaners to avoid melting or discoloring the outer casing.
Products mentioned in this guide
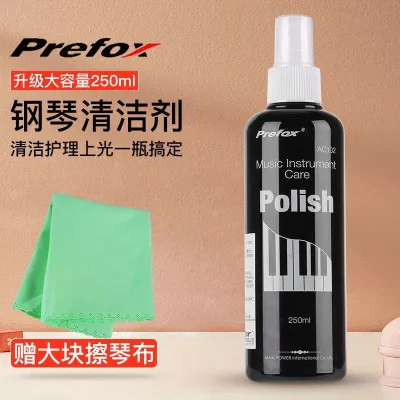
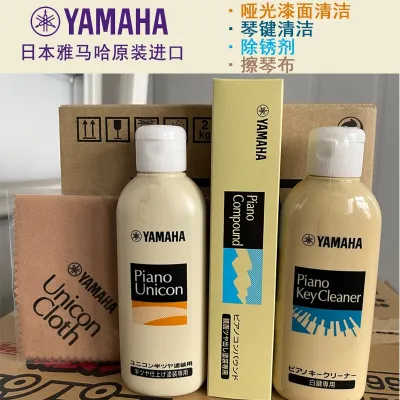
Prices are valid at publication and may change. Please refer to the product page for the latest price.
The keys themselves demand an equally precise identification process. Vintage acoustic pianos may feature genuine ivory keytops, which are highly porous, prone to yellowing, and easily damaged by excess moisture or harsh chemicals. Modern acoustic pianos and high-end digital keyboards typically use acrylic or synthetic ivory alternatives, while entry-level digital keyboards rely on standard molded ABS plastic. Each of these key materials has a different tolerance for moisture and cleaning agents.
Because of these vast material differences, your very first step must always be to consult your instrument manufacturer’s care manual. The manual will explicitly state what finishes were used during manufacturing and list any specific chemical warnings or approved cleaning methods. Armed with this information, you can cross-reference the manufacturer’s guidelines with the specifications of any piano cleaner kit you consider buying.
Essential Components Every Beginner Kit Should Include
A comprehensive piano cleaner kit should provide a complete, specialized system for maintaining your instrument, rather than just a single bottle of spray. Purchasing a well-curated bundle is generally more practical and cost-effective than sourcing individual components separately, as it ensures all tools are designed to work safely together. A beginner-friendly kit must contain a balanced mix of liquid solutions, high-quality textiles, and specialized detailing tools to address every surface of your piano without causing accidental wear.

Safe Cleaning Solutions and Polishes
The liquid solutions included in a high-quality kit are the core of its protective value. You should look for formulations that are pH-balanced, completely non-abrasive, and entirely free from harsh alcohols or solvents. These solutions must be specifically labeled for musical instruments, as general furniture polishes often contain oils or silicones that can ruin a piano’s finish over time.
It is vital to distinguish between daily cleaning sprays and occasional polishing compounds. Daily cleaners are designed to gently lift fingerprints, light dust, and skin oils from the keys and cabinet without leaving any residue behind. Polishes, conversely, are formulated to restore the deep luster of high-gloss cabinets and should only be used periodically. A superior kit will clearly label each bottle, indicating which solution is safe for the delicate keytops and which is formulated strictly for the outer cabinet.
Microfiber Cloths and Wiping Tools
The physical cloths you use to wipe your piano are just as important as the liquid solutions. Standard cotton rags, old t-shirts, and paper towels contain coarse fibers that act like ultra-fine sandpaper, leaving permanent micro-scratches on high-gloss polyester and delicate lacquers. A proper piano cleaner kit must include high-density, lint-free microfiber cloths with ultra-soft, laser-cut or silk-banded edges to prevent scratching.
Ideally, the kit should provide multiple color-coded cloths. This color-coding is not just for aesthetics; it serves a critical functional purpose by preventing cross-contamination. You should use one specific cloth exclusively for the keys and another for the cabinet, ensuring that any oils or polishes used on the woodwork never transfer to the playing surface where they could cause slipperiness or chemical degradation. Additionally, look for kits that include a soft-bristled detailing brush to safely sweep away dust from hard-to-reach areas, such as around the tuning pins, music stand hinges, or the narrow spaces of the keybed.
Key Detailing and Dusting Accessories
Cleaning the keyboard itself requires specialized tools designed to navigate the narrow gaps between individual keys. Dust and debris easily accumulate in these crevices, potentially slipping down into the key action and affecting the instrument’s performance over time. A beginner kit that includes dedicated key detailing accessories offers significant added value.
Look for kits that feature specialized key cleaning wands, low-pressure compressed air dusters, or soft, flexible gap-cleaning tools. These accessories must be constructed from materials that do not shed fibers, leave sticky residues, or scratch the vertical sides of the keys. Having these tools on hand allows you to maintain the hygiene of the playing surface without resorting to makeshift household items like toothpicks or cotton swabs, which can easily break or push dirt deeper into the key mechanism.
Harmful Ingredients and Features to Avoid
When evaluating potential piano cleaner kits, knowing what to avoid is just as crucial as knowing what to look for. Many generic cleaning products contain chemical ingredients that can cause immediate, irreversible damage to a piano’s delicate surfaces. Reading the ingredient list and product warnings carefully is your best defense against a costly mistake.
First and foremost, completely avoid any kits that contain ammonia, bleach, or high concentrations of alcohol. Ammonia and bleach will instantly strip the protective lacquer off wooden pianos and can cause high-gloss polyester finishes to cloud, haze, or develop micro-cracks. High-alcohol formulations can dry out and crack natural wood, dissolve the adhesives holding keytops in place, and degrade the plastics used in digital piano cabinets. Furthermore, steer clear of silicone-based polishes; while they provide a temporary, high-shine finish, silicone penetrates the wood grain and creates a barrier that makes future professional refinishing or repairs nearly impossible.
You must also reject kits that include abrasive physical tools. Abrasive sponges, scrubbing pads, paper towels, and stiff-bristled brushes have no place near a musical instrument. These materials will quickly dull satin finishes and leave a web of fine scratches on high-gloss surfaces.
Finally, be highly skeptical of “all-purpose” household cleaner bundles that claim to clean everything from kitchen counters to musical instruments. These products lack the specialized, gentle formulations required for delicate instrument woods and plastics. If a kit does not explicitly state on its packaging that it is safe for pianos or keyboards, do not risk using it on your instrument.
Evaluating Kit Quality and Value Before Purchase
To ensure you are getting a safe and effective product, you should carefully evaluate the overall quality and value of a piano cleaner kit before making a purchase. Start by examining the product packaging and documentation. High-quality manufacturers will provide clear, detailed ingredient lists, explicit safety warnings, and visible expiration dates on their liquid solutions, giving you confidence in what you are applying to your instrument.
Next, assess the physical quality of the included microfiber cloths. Check the density of the weave and inspect the edges; cheap cloths often have rough, synthetic stitching along the borders that can scratch your piano’s finish. The cloths should be highly durable, machine-washable, and designed to retain their softness after multiple washes, ensuring long-term reusability.
It is also wise to perform a quick cost comparison. Look at the total price of the bundled kit—which typically ranges from S$20 to S$50 on local online marketplaces—and compare it to the cost of purchasing equivalent high-quality individual components separately. A good kit should offer a clear financial saving and the convenience of having perfectly matched tools in one package.
Lastly, verify that the manufacturer provides clear, step-by-step usage instructions, accessible safety data sheets (SDS), and reliable customer support contact information. A reputable brand will stand behind its product and make it easy for you to get answers if you are unsure about compatibility with your specific piano model.
Establishing a Safe Cleaning Routine
Once you have selected and purchased a high-quality, compatible piano cleaner kit, establishing a safe and consistent cleaning routine is essential for maintaining your instrument’s beauty and longevity. The key to safe cleaning lies in following a strict order of operations to prevent accidental scratching or moisture damage.
Always begin your cleaning routine with dry dusting. Use a clean, dry microfiber cloth or a soft-bristled detailing brush to gently lift away loose dust particles from the cabinet and keys. Skipping this step and applying liquid cleaner directly to a dusty piano will turn the dust into an abrasive paste, which will scratch the finish as you wipe.
When you are ready to use a liquid cleaner, never spray the solution directly onto the piano’s surfaces. Direct spraying can cause liquid to seep into the seams of the wood, run down between the keys, or penetrate the sensitive electronic components of a digital piano. Instead, spray a small amount of the solution onto your microfiber cloth until it is slightly damp, then gently wipe the instrument.
When cleaning the keys, always use a straight, back-to-front motion—wiping from the back of the key near the fallboard toward the front edge. Avoid wiping side-to-side, as this can push moisture and dirt down into the narrow gaps between the keys, potentially warping the wooden key slips or damaging the underlying keybed sensors. Use a separate, dry microfiber cloth immediately afterward to buff away any remaining moisture.
Your cleaning frequency should be guided by how often you play, the amount of environmental dust in your home, and local climate factors. In humid environments, dust can easily combine with ambient moisture and skin oils to form a sticky film on the keys. To combat this, perform a quick dry dust after every playing session, and use a dedicated key cleaner once a week. Cabinet polishing, however, should be kept to a minimum—typically only once every few months—to prevent a cloudy buildup of product on the wood or polyester finish.
Frequently Asked Questions (FAQ)
Can I use regular glass cleaner on my high-gloss piano finish?
No, you should never use regular household glass cleaners on a high-gloss piano finish. Most commercial glass cleaners contain ammonia, alcohol, or other harsh solvents designed to strip grease from glass, but these chemicals are far too aggressive for the delicate polyester or lacquer coatings on a piano. Over time, using glass cleaner will cause the finish to cloud, haze, and develop microscopic cracks, permanently ruining its reflective luster. To safely maintain a high-gloss cabinet, always use a dedicated, non-abrasive high-gloss piano polish and a clean microfiber cloth included in a specialized instrument care kit.
How do I clean sticky keys on a digital piano?
To clean sticky keys on a digital piano, you must proceed with extreme caution to avoid damaging the sensitive electronic sensors located directly beneath the keybed. Never spray any liquid cleaners directly onto the keys, and do not use a dripping wet cloth. Instead, lightly dampen a high-quality microfiber cloth with a mild, manufacturer-approved key cleaning solution or a highly diluted mixture of water and a drop of gentle dish soap. Wipe the sticky keys gently from back to front, ensuring no moisture does not drip down the sides of the keys. If the stickiness is caused by an internal mechanical issue or a liquid spill that has penetrated the casing, do not attempt to force liquid into the gaps; instead, contact a qualified digital piano technician for professional service.
Is it necessary to polish my piano every time I clean it?
No, it is neither necessary nor advisable to polish your piano every time you clean it. Over-polishing is a common mistake that leads to a heavy, cloudy buildup of wax, silicone, or chemical residues on the cabinet, which actually attracts more dust and fingerprints over time. For routine maintenance, a simple dry dusting with a clean microfiber cloth or a light wipe with a dedicated daily cleaning spray is all that is required. Polishing should be reserved as a periodic treatment—typically performed only once every few months or quarterly—to restore the deep shine of the finish and provide a fresh protective layer.
Community discussion
Share your experience or ask a question. Comments are reviewed before publication.