
Producing electronic music requires a drum kit that does more than just mimic acoustic sounds. When choosing an electronic drum kit for your studio, the most critical factors are low-latency MIDI performance, pad sensitivity, and seamless integration with your digital audio workstation (DAW). Unlike traditional drummers who prioritize acoustic realism, electronic music producers need a highly responsive controller that can trigger diverse sample libraries, synth engines, and custom drum racks with absolute precision.
Whether you are programming intricate drum and bass breaks, laying down house grooves, or triggering experimental glitch percussion, the physical interface of your kit shapes your creative workflow. The right setup bridges the gap between human feel and digital precision, allowing you to capture natural velocity variations and micro-timing adjustments that are difficult to program with a mouse or keyboard. By focusing on how the kit communicates with your software and how the pads translate your physical performance, you can find a tool that enhances both your production speed and your musical expression.
Understanding the Workflow: E-Drums as MIDI Controllers vs. Sound Modules
Before evaluating specific hardware, you must decide how the drum kit will fit into your production environment. The primary decision is whether you will use the kit as a dedicated MIDI controller to trigger software instruments inside your computer, or if you will rely on the internal sound engine of the drum module itself. This choice dictates which features you should prioritize and how you should allocate your budget.
Products mentioned in this guide
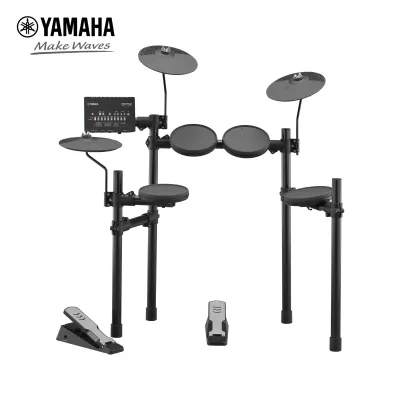
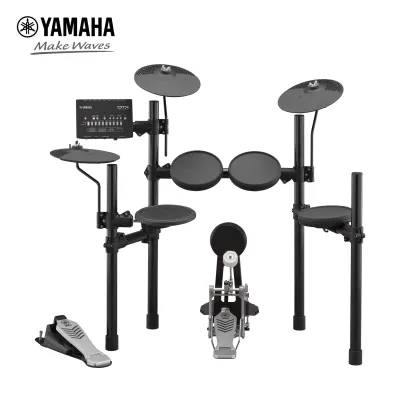
![Donner DED-70 Complete Set 7 Pieces Beginner Electronic Drums Foldable DED 70 Series [PREORDER]](https://img.lazcdn.com/g/p/855629ea0fba78ae6b998d76130c6571.png_400x400q80.png_.webp)
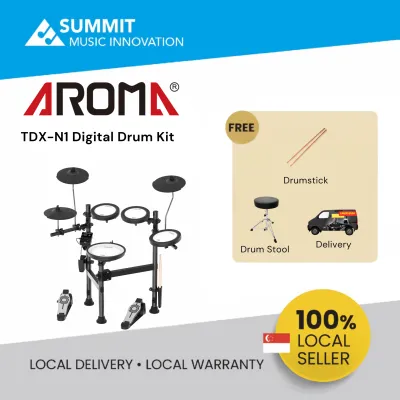
![AROMA TDX-18SC Electronic Drum Kit [AROMA TDX18SC Digital Drum]](https://img.lazcdn.com/g/p/f3eb7bc4d0fcaf4316f92647395675b8.jpg_400x400q80.jpg_.webp)
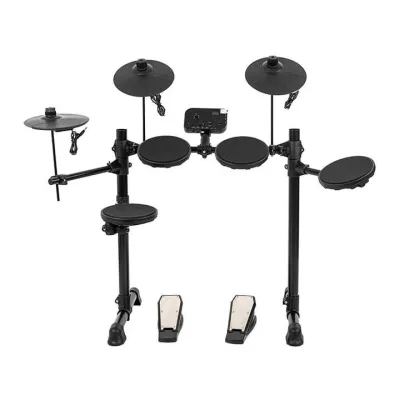
Prices are valid at publication and may change. Please refer to the product page for the latest price.
Using the kit as a pure MIDI controller is the most common approach for modern electronic music producers. In this workflow, the drum module acts simply as a translator, converting physical strikes into digital MIDI data sent to your DAW. The internal sounds of the module are irrelevant because you are triggering high-end software samplers, virtual analog drum machines, or custom synth patches. For this setup, you can save money by choosing a kit with a basic module, provided it offers excellent trigger tracking, low latency, and stable USB connectivity.
Conversely, relying on the drum module as a standalone sound source requires a much more sophisticated “brain.” This workflow is ideal if you want to practice without turning on your computer, or if you prefer the immediate, zero-latency response of dedicated hardware. If you choose this path, you must closely examine the module’s internal synthesis engines, its ability to load custom user samples, and its physical audio outputs. A module with limited audio outputs will force you to record your entire drum kit as a single stereo track, which severely limits your mixing options during production.
Regardless of your workflow, latency is the ultimate performance killer in electronic music. Any noticeable delay between striking a pad and hearing the sound in your headphones will disrupt your timing and ruin your groove. When using the kit as a MIDI controller, latency is determined by a combination of the module’s internal trigger processing speed, the MIDI connection type, and your computer’s audio driver settings. Prioritizing a module known for rapid trigger-to-MIDI conversion ensures that your recorded performances align perfectly with your project’s grid.
Essential Hardware Specs: Pads, Triggers, and Cymbal Zones
The physical construction of the pads directly influences how comfortably you can play and how accurately your dynamics are captured. The two primary pad materials are mesh and rubber, each offering distinct physical properties that suit different playing styles. Understanding these differences helps you choose a surface that matches the fast-paced demands of electronic music.

Mesh heads are widely favored for their realistic rebound and quiet physical response. They feature a woven material that can be tensioned with a standard drum key, allowing you to customize the bounciness of each pad. This adjustability is highly beneficial for executing fast double-strokes and rolls common in genres like drum and bass or footwork. Additionally, mesh pads are significantly quieter than rubber, making them ideal for late-night production sessions in shared living spaces.
Rubber pads, while louder and less realistic in feel, still hold a valuable place in electronic music production. They offer a firm, consistent rebound that some producers prefer for triggering non-acoustic sounds like hand claps, cowbells, or synthetic percussion. Because rubber pads do not mimic the deep sink of an acoustic drum head, they can feel more like playing a traditional MPC-style pad controller, which can be advantageous for tight, quantized beatmaking.
Trigger zones are another critical specification that determines the expressive potential of your kit. A single-zone pad only triggers one sound regardless of where or how hard you hit it. Multi-zone pads, such as dual-zone snares (head and rim) or three-zone cymbals (bell, bow, and edge), allow you to map multiple samples to a single physical pad. For electronic music, this means you can map a standard snare to the center of the pad, a rimshot to the edge, and a completely different sample, like a vocal chop or a sub-bass drop, to the rim trigger.
The hi-hat controller is often the most complex part of an electronic kit to configure and play. Basic kits use a simple switch-based pedal that only registers fully open or fully closed positions. For expressive electronic genres, a continuous hi-hat controller is highly recommended. Continuous controllers detect the exact position of the pedal throughout its travel, allowing you to program smooth, sweeping transitions and subtle half-open sizzles that add organic movement to your digital hi-hat patterns.
Connectivity and DAW Integration
A seamless connection between your electronic drum kit and your computer is essential for an efficient studio workflow. Modern kits offer several ways to transmit data, and understanding these connections prevents bottlenecks during recording and editing.
USB-MIDI is the standard connection method for contemporary music production. A single USB cable connects the drum module directly to your computer, allowing your DAW to recognize the kit as a plug-and-play MIDI input device. This eliminates the need for a dedicated MIDI interface and simplifies your studio cabling. For the vast majority of producers, USB-MIDI provides more than enough bandwidth and speed for flawless performance.
Traditional 5-pin MIDI connections remain highly relevant for producers who work with hardware-based studios. If you use external hardware samplers, vintage drum machines, or standalone synthesizers without a computer, a module with physical 5-pin MIDI Out ports is indispensable. This allows you to trigger your hardware gear directly from the drum pads, bypassing the computer entirely and maintaining a highly stable, hardware-only signal path.
Some advanced drum modules offer native DAW control integration, transforming your drum kit into a physical control surface for your software. These modules feature physical buttons, knobs, or sliders that can be mapped to control your DAW’s transport functions, such as play, stop, and record, or even adjust track volumes and pan settings. This integration keeps you focused on the instrument rather than constantly reaching for your computer mouse or keyboard during a session.
If you plan to record the internal sounds of your drum module rather than just MIDI data, you must consider your audio routing options. Some modules feature built-in multi-channel USB audio interfaces. This advanced feature allows the module to send individual audio tracks for each pad down a single USB cable into your DAW simultaneously. Without this capability, you will need an external audio interface with multiple physical inputs to record each drum channel separately, which adds complexity and cost to your setup.
Sound Modules and Sampling Capabilities
For producers who want to use the drum kit independently of a computer, the internal sound module—often called the “brain”—is the most critical component. The quality of the internal synthesis engine and the flexibility of its editing parameters determine how useful these sounds will be in your final mixes.
Many standard drum modules are designed primarily for acoustic drum emulation, which can feel limiting if you produce electronic genres. Look for modules that feature dedicated electronic sound engines, virtual analog synthesis, or licensed libraries of classic drum machines. The ability to edit parameters like pitch, decay, filtering, and distortion directly on the module allows you to sculpt unique electronic tones without needing to load external plugins.
The ability to import custom user samples is a game-changing feature for electronic music producers. This function allows you to load your own WAV files, such as signature kicks, custom sound effects, or vocal samples, onto an SD card or USB drive and assign them directly to the drum pads. This turns your electronic drum kit into a powerful, physical performance sampler, allowing you to play your own studio-produced sounds live with the expressive feel of real drumsticks.
Polyphony is a technical specification that is often overlooked but highly critical for dense electronic arrangements. Polyphony refers to the maximum number of individual sounds the module can play simultaneously. When you play a fast roll on a crash cymbal while triggering long sub-bass notes and rapid hi-hat patterns, the module must process dozens of overlapping sound decays. If the polyphony limit is too low, older sounds will be cut off abruptly, resulting in an unnatural, choppy audio performance.
Building Your Shortlist: Matching Kits to Production Needs
Choosing the right electronic drum kit requires balancing your physical space, production style, and budget. By categorizing your needs, you can narrow down the vast market to a few strong candidates that fit your specific studio environment.
If you have limited studio space and primarily plan to trigger third-party software instruments, a compact, MIDI-focused setup is your best option. These kits feature smaller pads and a minimalist module, which minimizes their physical footprint and keeps the cost down. Because you are bypassing the internal sounds, you can focus your budget entirely on getting high-quality mesh pads that offer the best physical feel and trigger response, rather than paying for a premium sound engine you will never use.
For producers who require a standalone instrument for both studio production and live performance, a full-size kit with an advanced module is necessary. These setups offer larger, multi-zone pads that mimic the layout of an acoustic kit, along with a powerful module capable of high-end internal synthesis and multi-track audio output. This configuration allows you to perform complex routines without a computer, while still providing the extensive physical inputs and outputs needed to integrate with professional studio consoles and live sound systems.
When comparing different models on your shortlist, pay close attention to the expandability of the module. Many entry-level modules only have enough trigger inputs for the pads included in the box. If you anticipate wanting to add an extra crash cymbal, an auxiliary percussion pad, or a dedicated acoustic trigger in the future, ensure the module features extra auxiliary trigger inputs. Additionally, check if the kit includes any software bundles, as some manufacturers partner with software developers to provide high-quality virtual drum instruments or DAW starter editions with your purchase.
Pre-Purchase Checks and Studio Setup Considerations
Before finalizing your purchase, there are several practical and technical factors to verify to ensure the kit integrates smoothly into your physical and digital workspace. Taking the time to perform these checks can prevent frustrating compatibility issues or noise complaints down the road.
Physical footprint and noise management are major considerations, especially for producers working in high-density housing environments like apartments in Singapore. While electronic drums are significantly quieter than acoustic kits, the physical impact of your sticks on the pads and, more importantly, the heavy thump of the kick drum pedal can transmit low-frequency vibrations through the floor. To maintain good relations with your neighbors, consider investing in noise-isolating drum mats, specialized dampening platforms, or beaterless kick pedals designed to minimize structural vibration.
Confirming ongoing software and firmware support is essential for maintaining a stable digital workflow. Check the manufacturer’s website to ensure the drum module’s firmware is regularly updated and compatible with your computer’s current operating system and your preferred DAW. A module that lacks class-compliant USB drivers or regular updates may become obsolete or difficult to configure after a major operating system update, disrupting your production schedule.
Finally, double-check the physical hardware requirements of the kit. Many electronic drum kits do not include essential accessories like a kick drum pedal, a hi-hat stand, a drum throne, or headphones in the standard package. Ensure you factor these additional items into your overall budget so you are not left with an unplayable kit on delivery day. Verifying these details beforehand ensures a smooth setup process, allowing you to focus on what matters most: creating music.
Frequently Asked Questions (FAQ)
Do I need a specific audio interface to record an electronic drum kit?
You do not need a dedicated audio interface if you only plan to record MIDI data from your electronic drum kit. A standard USB cable connecting the drum module directly to your computer is sufficient for your DAW to capture your performance as MIDI notes. However, if you want to record the actual internal sounds generated by the drum module, you will need an audio interface with physical line inputs to capture the analog audio signals from the module’s outputs.
Can I use an acoustic drum trigger system instead of a full electronic kit?
Yes, you can use acoustic drum triggers mounted on a standard acoustic kit as an alternative to a dedicated electronic drum kit. This setup allows you to retain the physical feel and visual presence of acoustic drums while triggering electronic sounds. However, acoustic trigger systems require a separate trigger interface or drum module to convert the analog signals to MIDI, and they often lack the nuanced multi-zone triggering and continuous hi-hat control found on dedicated electronic kits.
How important is positional sensing for electronic music production?
Positional sensing, which alters the timbre of a drum sound based on where you strike the pad, is generally less critical for electronic music production than for acoustic emulation. While highly valuable for realistic jazz or rock drum performances, electronic music often relies on consistent, highly punchy, or heavily processed samples where a uniform sound is desired. Unless you are aiming for highly expressive, acoustic-style performances within your electronic tracks, you can safely prioritize other features like low latency and custom sample loading over advanced positional sensing.
Community discussion
Share your experience or ask a question. Comments are reviewed before publication.