
A scratchy, crackling sound when you adjust your guitar’s volume knob—or a signal that cuts out entirely—is one of the most common issues electric guitarists face. This frustrating noise usually points to a dirty or worn potentiometer, the internal component behind your volume control. Fortunately, you do not need to be an experienced luthier to resolve most volume knob issues. By understanding how these components work and following a systematic troubleshooting process, you can restore a clean, uninterrupted signal to your amplifier.
Identifying the Exact Symptoms of Your Volume Knob
Before reaching for tools, isolate the issue to confirm the volume potentiometer is the culprit. A scratchy sound that occurs only while you are actively turning the knob is a classic sign of a dirty potentiometer. If the crackling happens when you are not touching the guitar, or if the signal cuts out when you wiggle the instrument, the issue is more likely a loose output jack, a faulty instrument cable, or an unstable amplifier connection.
To isolate the problem, plug your guitar into your amplifier using a known, working cable. Set your amplifier to a clean channel at a moderate volume. Turn the volume knob slowly from zero to ten. Note whether the scratchiness occurs throughout the entire rotation or only at specific points, such as near the maximum or minimum settings.
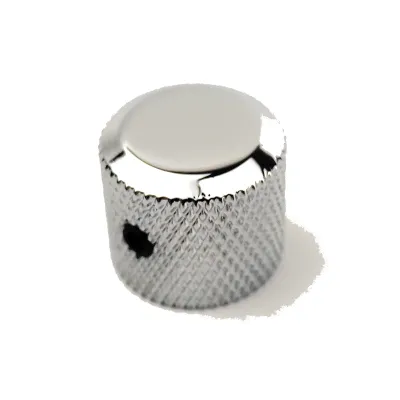
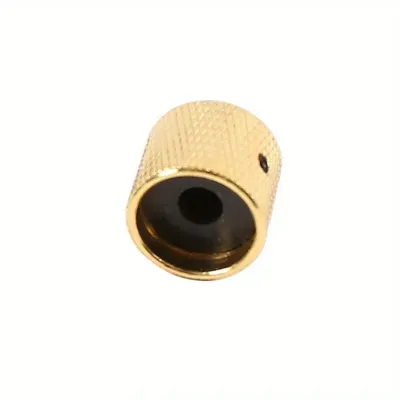
Products mentioned in this guide

![[Upgrade Your Style] 6Pcs Multi Color Flet Pedal Knob Electric Pot Potentiometer Knobs Guitar Accessories](https://img.lazcdn.com/g/p/7e0f117681748afad9111820317a57d8.jpg_400x400q80.jpg_.webp)
Prices are valid at publication and may change. Please refer to the product page for the latest price.
Next, test the other controls on your guitar. Turn the tone knobs and toggle the pickup selector switch. If the crackling only occurs when adjusting the volume knob, you have successfully isolated the issue to that specific potentiometer. If multiple controls crackle or the signal cuts out regardless of which knob you turn, the problem may lie further down the signal chain, such as a loose ground wire in the main control cavity or an oxidized output jack contact.
Why Guitar Potentiometers Get Scratchy or Fail
To understand why a volume knob fails, it helps to look at how a potentiometer is constructed. Inside the metal casing of the potentiometer is a curved strip coated with resistive carbon material, known as the carbon track. A small metal wiper, connected to the center shaft of the knob, slides along this track as you turn the volume control. This movement varies the electrical resistance, which determines how much of your guitar’s signal is sent to the output jack versus how much is sent to the ground.

Over time, dust, lint, and airborne debris find their way through the small gaps in the potentiometer casing. These particles settle on the carbon track, creating physical barriers between the wiper and the track. When the wiper collides with these microscopic obstacles, it momentarily loses contact or rubs against debris, producing the audible scratchy sound through your amplifier.
In addition to physical debris, oxidation is a major cause of potentiometer failure. When the metal contacts inside the casing are exposed to oxygen and moisture, a thin layer of non-conductive oxide forms on the surfaces. In humid environments, such as Singapore’s tropical climate, this oxidation process can occur much more rapidly.
Finally, mechanical wear plays a role. Years of heavy use can physically wear down the thin carbon track or weaken the tension of the metal wiper. If the carbon track is physically scraped away or the wiper is bent, the potentiometer will experience dead zones where the signal cuts out completely. Physical stress can also cause the solder joints on the potentiometer’s external lugs to crack, leading to intermittent signal loss when the knob is turned or bumped.
Safe Step-by-Step Fixes for Scratchy Knobs
Most scratchy volume knobs can be resolved with simple, non-invasive maintenance. Always start with the easiest, least risky method before moving on to opening up your guitar’s control cavity.
With your guitar completely unplugged from the amplifier, turn the volume knob rapidly back and forth across its entire range of motion about 30 to 50 times. This mechanical action allows the internal wiper to scrape away minor surface dust and light oxidation from the carbon track without the need for chemical cleaners. Plug the guitar back in and test the signal. If the scratchiness is gone or significantly reduced, you may not need to take further action.
If the dry sweep does not resolve the issue, you will need to use a specialized electronic contact cleaner. Ensure the guitar is unplugged. Lay the instrument flat on a stable, padded surface. Remove the control cavity cover plate on the back of the guitar (or remove the pickguard if you are working on a Stratocaster-style instrument) to access the rear of the potentiometers.
Protect your guitar’s finish by placing a clean microfiber cloth or a piece of cardboard around the work area. Locate the small opening or “spray port” on the side of the metal potentiometer casing, usually near the solder lugs. Attach the thin straw extension to your contact cleaner nozzle. Insert the straw slightly into the opening and apply a very brief, controlled spray of cleaner inside the casing.
Immediately turn the volume knob back and forth through its full range of motion for about 30 seconds to distribute the cleaner evenly across the carbon track. Allow the cleaner to dry completely—usually a few minutes—before plugging the guitar back in to test.
While the control cavity is open, perform a visual inspection of the wiring. Look closely at the solder joints on the potentiometer lugs and the back of the casing where ground wires are attached. A healthy solder joint should look shiny and smooth. If a joint appears dull, cracked, or loose, it is a “cold solder joint” that can cause intermittent signal loss. Do not attempt to re-solder these connections unless you have experience with electronics soldering, as excessive heat can easily destroy the internal components of the potentiometer.
Troubleshooting Quick Reference Table
| Symptom | Likely Cause | Recommended Action |
|---|---|---|
| Scratchy sound only when turning the knob | Dust, dirt, or light oxidation on the carbon track | Perform the dry sweep method; if unresolved, apply electronic contact cleaner. |
| Signal cuts out at maximum volume | Worn carbon track or bent wiper at the end of the sweep | Inspect the potentiometer for physical wear; replace the potentiometer if cleaning fails. |
| Intermittent signal when the knob is touched or bumped | Loose solder joint or cracked wire on the potentiometer lugs | Visually inspect wiring; re-solder loose connections or have a professional technician repair the joint. |
| Complete loss of signal | Broken ground connection, completely severed wire, or failed potentiometer | Check all internal connections; verify component continuity with a multimeter or consult a technician. |
When to Replace the Potentiometer or See a Tech
While cleaning solves the majority of scratchy knob issues, there are times when a potentiometer is beyond saving. If you have thoroughly cleaned the component with electronic contact cleaner and the scratchiness or signal cutout returns within a few days, the carbon track is likely worn down to the base material. In this scenario, replacement is the only permanent solution.
Replacing a potentiometer requires basic soldering skills. If your guitar features complex electronics—such as active pickups that require a battery, push-pull pots for coil-splitting, or intricate active preamp circuits—it is highly recommended to take the instrument to a professional guitar technician or luthier. Incorrect soldering in these systems can lead to phase issues, unwanted hum, or complete signal failure.
If you decide to replace the potentiometer yourself, you must verify several critical specifications before purchasing a new part. First, check the resistance value: standard electric guitars typically use 250k ohm potentiometers for single-coil pickups to preserve warmth, and 500k ohm potentiometers for humbuckers to maintain brightness. Second, determine the taper: volume controls usually use logarithmic (audio) taper pots for a natural-sounding volume sweep, while linear taper pots are sometimes preferred for specific tone controls. Finally, measure the shaft length and type; carved-top guitars require long-shaft potentiometers, while pickguard-mounted controls require short-shaft versions. Ensure you match the shaft type (split-shaft for push-on knobs or solid-shaft for set-screw knobs) to your existing hardware. High-quality replacement potentiometers are readily available at local music shops in Singapore, typically ranging from S$5 to S$20 depending on the brand and specifications.
Preventive Maintenance for Guitar Electronics
Taking proactive steps can significantly extend the lifespan of your guitar’s electronics and prevent scratchiness from returning.
Make it a habit to sweep your volume and tone knobs through their full range of motion every time you finish playing. This simple action prevents dust from settling permanently on the carbon track and rubs away minor oxidation before it can build up.
Proper storage is also essential. Store your guitar in a high-quality gig bag or hard case when not in use to shield it from airborne dust and pet hair. In humid climates like Singapore, consider using silica gel packs or a dedicated instrument dehumidifier inside your guitar case to maintain a stable relative humidity level, protecting both the wood and the internal electronics from moisture damage.
Never use compressed air to clean your guitar’s control cavity. The high pressure can force dust and debris deeper into the small openings of the potentiometer casing, worsening the problem. Additionally, avoid using household cleaning sprays, solvents, or generic lubricants on your guitar’s electronics, as these substances can dissolve the protective lubricants inside the potentiometer or damage your instrument’s finish.
Frequently Asked Questions (FAQ)
Can I use standard WD-40 to clean my guitar volume knob?
No, you should never use standard WD-40 to clean guitar electronics. Standard WD-40 is a general-purpose lubricant and rust preventative that leaves behind a heavy, oily residue. While it might temporarily restore contact, this residue acts as a magnet for dust, dirt, and lint, which will quickly clog the potentiometer and make the scratchiness far worse than before. Furthermore, the chemicals in standard WD-40 can degrade the delicate carbon track inside the potentiometer over time. Always use a dedicated, fast-evaporating electronic contact cleaner that leaves zero residue.
Does a scratchy volume knob affect my tone when turned all the way up?
In most standard guitar wiring configurations, turning the volume knob all the way up to ten minimizes the resistance in the signal path, allowing the full signal to pass to the output jack. If the scratchiness is caused solely by loose dust on the carbon track, your tone should remain unaffected when the knob is stationary at maximum volume. However, if the underlying issue is a severely oxidized ground connection or a physically damaged track, it can introduce subtle high-end loss, unwanted hum, or intermittent signal drops even when turned all the way up. If you notice any tonal degradation, it is best to clean or inspect the potentiometer.
Community discussion
Share your experience or ask a question. Comments are reviewed before publication.