
Selecting the right Yamaha DTX electronic drum kit for your home music production setup requires aligning the hardware’s physical response with your digital audio workstation (DAW) workflow. The ideal model is not necessarily the most expensive flagship, but rather the one that matches how you intend to capture and manipulate drum performances. If your primary goal is to trigger software samplers and virtual instruments, a compact kit with reliable USB-MIDI output is often sufficient. Conversely, if you want to record high-quality internal drum sounds directly into your DAW as separate audio tracks, you will need a mid-range or flagship module that supports multi-channel audio over USB or features multiple physical outputs.
Evaluating these options involves looking closely at pad materials, module processing capabilities, and connectivity options. By understanding how these technical specifications translate to your daily production tasks, you can avoid overpaying for unnecessary features while ensuring your kit fully supports your creative process.
Key Specifications for Electronic Music Production
When choosing an electronic drum kit for a home studio, the physical feel of the pads directly influences the MIDI data you record. Yamaha electronic drums utilize different pad materials across their lineups, primarily focusing on rubber and their proprietary Textured Cellular Silicone (TCS). TCS pads are designed with a pocketed air structure that mimics the natural rebound and resistance of an acoustic drum head. This material helps prevent wrist fatigue during long tracking sessions and provides a highly accurate dynamic response.
Products mentioned in this guide
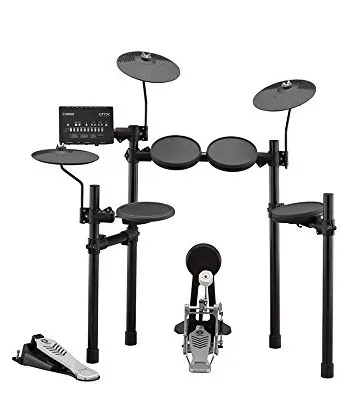
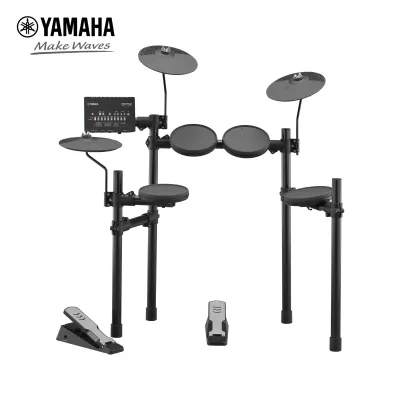
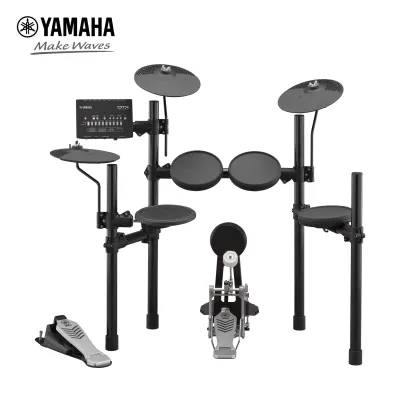
![Yamaha DTX402K Electronic Drums DTX-402K DTX 402 K Digital Drum Set [LIMITED STOCK]](https://img.lazcdn.com/g/p/70cd82f589c9b929f2e99afd4e639545.jpg_400x400q80.jpg_.webp)
![Yamaha DTX452K Electronic Drums Digital Drum Set DTX-452K DTX 452 K DTX 452K DTX452 [PREORDER]](https://img.lazcdn.com/g/p/af5553ead0032cf1aa86c61dfabcbc22.jpg_400x400q80.jpg_.webp)
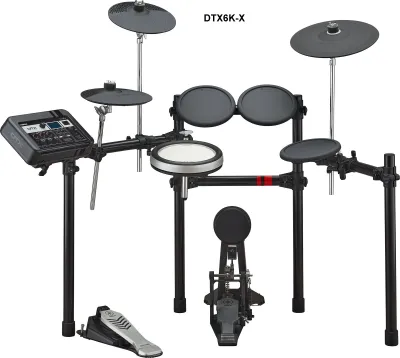
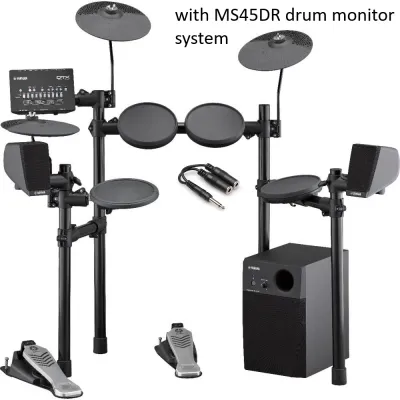
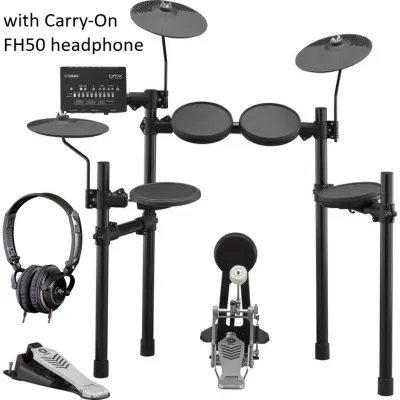
Prices are valid at publication and may change. Please refer to the product page for the latest price.
For electronic music producers, this dynamic response translates directly into precise MIDI velocity values. When you strike a TCS pad, the sensor captures subtle variations in your playing, allowing your DAW’s virtual instruments to trigger the correct velocity layers. This is particularly important for genres that rely on expressive drum programming, such as drum and bass, future bass, or organic house. Rubber pads, while highly durable and budget-friendly, offer a stiffer rebound that can make it more challenging to play nuanced ghost notes or consistent velocity gradients.
Beyond the physical pads, the drum module’s sound engine and routing capabilities dictate how easily you can integrate the kit into your mixing workflow. Basic modules generate a stereo mix of the drum kit, which is suitable for quick demo recording but limits your ability to mix individual drums later. Advanced modules feature multi-channel audio routing, allowing you to send individual tracks for the kick, snare, hi-hat, and cymbals directly to your DAW over a single USB cable. This multi-channel capability is essential if you want to apply specific plugins, equalization, or compression to individual drum elements during the production phase.
Connectivity is the final technical pillar to consider. Every modern production setup relies on seamless data transfer between hardware and software. A module with class-compliant USB-MIDI allows you to plug directly into your computer without installing complex third-party drivers. However, if you work with hardware samplers, vintage drum machines, or external MIDI gear, you should verify whether the module includes traditional 5-pin MIDI ports. These physical ports allow you to bypass the computer entirely, turning your DTX kit into a central controller for your hardware synthesizer rig.
Matching Yamaha DTX Tiers to Your Production Needs
The Yamaha DTX lineup is structured into distinct tiers, each catering to different levels of production complexity, space availability, and budget. Understanding where each tier excels helps you identify the most cost-effective solution for your home studio.

Entry-Level Tier
The entry-level tier is designed with a compact footprint and straightforward functionality. These kits typically feature durable rubber pads and a streamlined module that focuses on essential drum sounds and basic USB-MIDI connectivity. Because the rack systems are lightweight and often foldable, these models are highly suited for small bedrooms or multi-purpose home offices where space is at a premium.
For music production, an entry-level DTX kit functions primarily as a dedicated MIDI controller. If you plan to bypass the module’s internal sounds entirely and use the kit to trigger high-end software drum libraries in your DAW, this tier offers excellent value. You receive reliable trigger response and a compact setup without paying for advanced on-board editing features or multi-channel audio outputs that you do not plan to use.
Mid-Range Tier
The mid-range tier introduces a significant upgrade in both pad playability and module processing power. In this category, you will typically find kits equipped with a TCS snare pad, which dramatically improves the feel of your primary drum. The modules in this tier offer expanded editing suites, allowing you to adjust parameters like room ambience, compression, and digital effects directly on the hardware.
Producers working in electronic music and DJ mixing will appreciate the sample-import capabilities often found in mid-range modules. This feature allows you to load your own custom WAV samples via a USB flash drive, enabling you to play your signature electronic drum hits, risers, or vocal chops directly from the physical pads. Additionally, the improved trigger sensors in this tier offer better crosstalk rejection, ensuring that striking one pad does not accidentally trigger an adjacent cymbal or tom.
Flagship Tier
The flagship tier represents the pinnacle of Yamaha’s electronic drum technology, designed for professional home studios and demanding production environments. These kits feature large TCS or high-quality mesh pads across the entire setup, including independent tom pads and multi-zone cymbals that support realistic choking. The accompanying hardware often includes real acoustic hi-hat stands and heavy-duty racks that eliminate pad movement during intense playing.
At the flagship level, the drum module acts as a fully realized audio interface and production hub. These modules support extensive multi-channel USB audio streaming, allowing you to send up to several individual audio channels directly to your DAW. They also feature physical faders on the faceplate, giving you instant tactile control over the volume of individual kit pieces during a recording session. If your production workflow demands the highest level of expressive detail, custom sample layering, and comprehensive routing, the flagship tier provides the necessary tools.
Decision Matrix for Home Producers
To help narrow down your choice, consider this quick checklist to weigh your production requirements against the features of each tier:
- Primary Workflow: If you only need to trigger DAW plugins, prioritize USB-MIDI reliability (Entry-Level). If you want to record the module's internal sounds as separate tracks, prioritize multi-channel USB audio (Mid-Range to Flagship).
- Custom Samples: If your music relies heavily on unique electronic samples, verify that the module supports custom WAV importing (Mid-Range to Flagship).
- Physical Space: Measure your studio layout. Entry-level kits offer compact, foldable frames, while flagship kits require a dedicated footprint similar to an acoustic drum set.
- Pad Feel: If you perform complex drum rolls or require highly realistic rebound for expressive genres, look for kits featuring TCS pads on the snare and toms (Mid-Range to Flagship).
Integrating Your DTX Module with a DAW
Once you have selected your Yamaha DTX kit, integrating the module with your DAW is the next step toward a productive workflow. Proper configuration ensures low latency, accurate note mapping, and reliable recording sessions.
Before connecting the module to your computer, visit the official Yamaha website to download the latest USB-MIDI drivers and firmware updates for your specific model. Installing the correct driver, such as the Yamaha Steinberg USB Driver, is crucial for establishing a stable connection and enabling multi-channel audio streaming if your module supports it. Keeping the module’s firmware updated also resolves potential compatibility issues with newer operating system updates.
After installing the drivers, connect the module to your computer using a high-quality USB cable. Open your DAW and navigate to the MIDI preferences menu to enable the DTX module as an active MIDI input device. Create a new MIDI or instrument track and load your preferred drum plugin, such as a sampler or virtual drum kit. You will then need to map the MIDI notes sent by the DTX pads to the corresponding samples in your software. Most modern drum plugins include pre-configured mapping templates for Yamaha DTX kits, which can save you significant setup time.
Latency, the slight delay between striking a pad and hearing the sound from your computer speakers, can disrupt your performance timing. To minimize latency, access your DAW’s audio settings and adjust the buffer size. Setting the buffer size to 64 or 128 samples generally reduces latency to an imperceptible level, though this requires more processing power from your computer. If your computer struggles with low buffer sizes, you can use the direct monitoring feature on your DTX module. This allows you to hear the module’s internal sounds through headphones with zero latency while your DAW records the incoming MIDI data.
Managing Space and Vibration in a Home Studio
Operating an electronic drum kit in a residential environment presents unique physical challenges, particularly regarding space constraints and structural noise. Even though electronic kits do not produce the high decibel levels of acoustic drums, they are not completely silent.
Start by carefully measuring your available floor space before purchasing a kit. Entry-level racks are highly compact and can often be tucked into a corner or folded away when not in use. Flagship kits, however, utilize robust, wide-stance racks and real acoustic hardware that require a permanent footprint. Ensure you leave enough clearance around the kit for comfortable seating, headphone cable routing, and access to your computer or audio interface.
The most common source of noise complaints in apartment buildings is the physical impact of the kick pedal. When you press the bass drum pedal, the mechanical force creates low-frequency vibrations that travel directly through the pedal, into the floor, and through the building’s structure. To mitigate this, consider building or purchasing an isolation platform. A simple DIY platform made from medium-density fibreboard (MDF) and tennis balls can effectively decouple the drum kit from the floor, absorbing the structural vibrations before they reach neighboring units.
Additionally, the physical sound of drumsticks striking rubber or TCS pads creates a high-frequency clicking noise within your room. While this noise rarely penetrates thick walls, it can be distracting to others in the same household. Placing a thick, heavy carpet or specialized drum mat beneath the entire kit helps absorb these surface vibrations. Adding basic acoustic treatment, such as foam panels or heavy curtains in your studio space, will also reduce the reflection of these clicking sounds, creating a quieter environment for everyone.
Frequently Asked Questions (FAQ)
Do I need an external audio interface to record my DTX kit?
You do not need an external audio interface if you only plan to record MIDI data, as a standard USB connection can transmit MIDI directly to your computer. If you want to record the module’s internal audio sounds, some mid-range and flagship DTX modules can stream multi-channel audio directly over USB, acting as their own audio interface. For modules that do not support USB audio streaming, you will need to connect the module’s analog audio outputs to an external audio interface to record the sounds.
Can I load custom electronic samples into the DTX sound module?
Custom sample importing depends on the specific DTX module you choose. Mid-range and flagship modules generally support importing custom WAV samples via a USB flash drive, allowing you to assign your own electronic drum hits to the physical pads. Entry-level modules typically do not support custom sample loading, meaning you will need to rely on the built-in preset sounds or use the kit as a MIDI controller to trigger samples hosted inside your computer’s DAW.
What is the best way to isolate kick pedal vibrations in an apartment?
The most effective way to isolate kick pedal vibrations is to decouple the pedal and kick pad from the floor. You can achieve this by placing a specialized vibration-absorbing drum mat under your kit or by constructing a DIY isolation riser using layers of plywood and acoustic foam or tennis balls. Additionally, using noise-reducing kick trigger pedals designed specifically to minimize physical impact noise can significantly reduce the transmission of low-frequency thuds through apartment floors.
Community discussion
Share your experience or ask a question. Comments are reviewed before publication.