
Starting to play the piano is an exciting journey, but staring at a sea of identical black and white keys can feel overwhelming. Keyboard labels serve as an excellent temporary training aid, helping you bridge the gap between sheet music and the physical keyboard. However, choosing the wrong type of label can lead to alignment issues, sticky residue, or a cluttered learning experience that hinders your progress. Selecting the right set requires understanding your instrument’s specific layout, your current learning stage, and the physical properties of the labels themselves.
How to Identify Your Keyboard Size and Layout
Before purchasing any labels, you must accurately determine the size and layout of your instrument. Keyboards and digital pianos generally come in three standard sizes: 61 keys, 76 keys, and 88 keys. An 88-key instrument is the standard size for a full acoustic piano, consisting of 52 white keys and 36 black keys. A 76-key model typically features 45 white keys and 31 black keys, while a 61-key portable keyboard contains 36 white keys and 25 black keys.
To verify your key count, simply count the white keys first, or count the total keys from the far left to the far right. Mismatched sets can cause significant confusion because different keyboard sizes start and end on different notes. For example, a standard 88-key piano starts on an A, whereas a standard 61-key keyboard starts on a C. If you attempt to apply an 88-key label set to a 61-key keyboard without adjusting for this starting note, every single label will be incorrect, disrupting your pitch recognition.
Products mentioned in this guide
![[LAI1]Piano Notes Guide for Beginner Removable Piano Keyboard Note Labels Full SizeNo Need Stickerswith Box](https://img.lazcdn.com/g/p/30eefbb6ccbd2be03c5f075fa5325048.jpg_400x400q80.jpg_.webp)
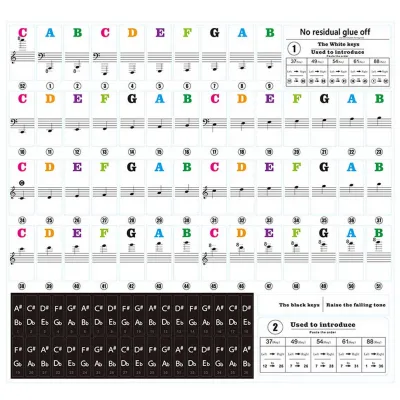
Prices are valid at publication and may change. Please refer to the product page for the latest price.
Physical dimensions also vary across different keyboard types. Fully weighted digital pianos designed to mimic acoustic pianos usually feature standard-width keys, which are approximately 22 millimeters wide for white keys. In contrast, budget-friendly portable keyboards, MIDI controllers, or synthesizer-action models may have slightly narrower keys or different spacing between the black and white keys.
Before finalizing your purchase, consult your instrument’s user manual or check the manufacturer’s official specifications online to verify the exact key width. Measuring the width of a single white key with a physical ruler is also a reliable way to ensure compatibility. Choosing labels that are too wide will cause them to overlap or overhang, leading to peeling and a sticky, uncomfortable playing surface.
Key Features to Evaluate in Keyboard Labels
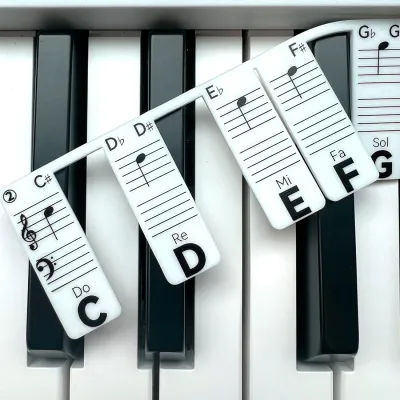
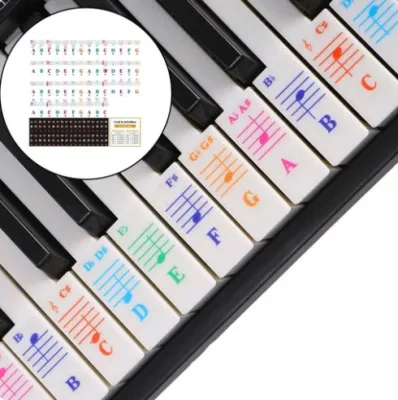
Keyboard labels are available in several distinct materials, each offering unique advantages and trade-offs. Transparent vinyl stickers are highly popular because they blend seamlessly with the keys, showing only the printed notation. These stickers typically use a low-tack adhesive that allows for repositioning during installation, though they require careful handling to avoid trapping air bubbles or dust underneath.

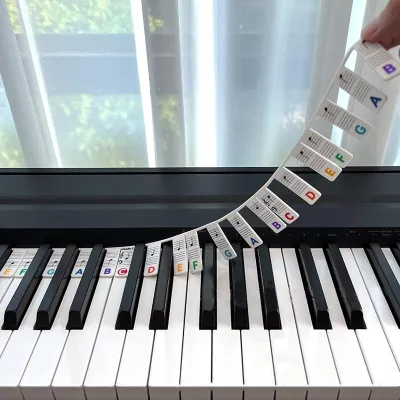
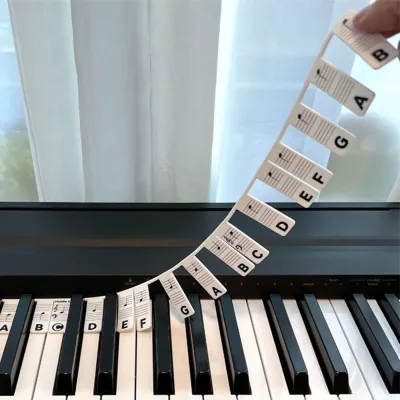
Silicone note strips or caps represent a modern, adhesive-free alternative. These flexible strips lay flat across the top of the keys, held in place by gravity and the physical shape of the keyboard’s fallboard area. Because they do not use glue, they can be installed or removed in seconds without leaving any residue, making them an excellent option for shared instruments or players who want to practice without visual aids periodically. However, they require a specific clearance space behind the keys, which may not be present on all keyboard models.
Paper stickers are another option, often being the most budget-friendly choice. However, they are generally less durable than vinyl or silicone. Paper can absorb oils from your fingertips, leading to smudging, discoloration, and tearing over time. They also tend to use stronger adhesives that can be difficult to remove without leaving a stubborn, sticky residue on your keys.
The notation style printed on the labels should align with your learning curriculum. Most labels feature standard letter names (A, B, C, D, E, F, G), but some also include solfège syllables (Do, Re, Mi) or musical staff notation showing where the note sits on the treble or bass clef. Color-coded systems can help young children or absolute beginners associate colors with specific pitches, but they may slow down your transition to reading traditional black-and-white sheet music if relied upon for too long.
Matching Label Styles to Your Learning Stage
Your choice of keyboard labels should evolve alongside your musical skills. For absolute beginners who have never played an instrument, color-coded labels or large-letter stickers provide immediate positive reinforcement. These visual cues help you find the correct hand positions quickly, reducing the initial frustration of navigating the keyboard and allowing you to focus on basic rhythm and finger dexterity.
As you transition to an intermediate level, your goal should shift from identifying individual key names to reading sheet music. At this stage, transparent labels that feature small letters combined with prominent staff notation are highly effective. This design encourages your eyes to look at the musical staff lines rather than just reading the letter “C” or “G,” helping you build a mental map of how written notes correspond to physical keys.
The ultimate goal of using keyboard labels is to eventually play without them. Relying on visual aids indefinitely can prevent you from developing muscle memory and spatial awareness of the keyboard. To wean yourself off labels, try a gradual removal strategy. Start by removing the labels from the middle octave (around Middle C), where your hands spend the most time. Once you can navigate this section comfortably by feel, remove the labels from the adjacent octaves until the keyboard is completely clear.
How to Apply and Remove Labels Without Damaging Keys
Proper application is crucial to ensure your labels stay in place and do not damage your instrument’s keys. Before applying any adhesive stickers, you must clean the keyboard thoroughly. Use a lint-free microfiber cloth slightly dampened with water or a mild, highly diluted dish soap solution to wipe away finger oils, dust, and dirt. Avoid using harsh chemical solvents, alcohol, or acetone, as these substances can permanently melt or discolor plastic keys.
Allow the keys to dry completely before beginning the application process. To avoid transferring oils from your fingers to the adhesive backing, use a small tool such as a wooden craft stick, tweezers, or the edge of a plastic card to position each sticker. Start applying the sticker from the top edge of the key, smoothing it downward slowly to prevent air bubbles from getting trapped.
When it comes time to remove adhesive labels, patience is key to protecting your keyboard’s finish. Gently peel the stickers back at a shallow angle rather than pulling them straight up, which can strain the key mechanism. If the adhesive is stubborn, you can apply very gentle warmth using a hairdryer on its lowest heat setting from a distance of at least 30 centimeters. Never apply direct or intense heat, as this can warp the plastic keys or damage the internal electronics of a digital piano. If you encounter significant resistance, stop immediately and consult your keyboard’s manufacturer for approved adhesive removal methods.
Condition-Based Selection Guide for Your Keyboard
Selecting the right label style depends heavily on your specific instrument type and playing environment. For a standard 88-key digital piano, full-set transparent vinyl labels with standard staff notation are highly recommended. These labels preserve the clean, professional appearance of a digital piano while providing the complete range of notes needed for classical or contemporary piano literature.
If you are practicing on a 61-key portable keyboard, pre-cut silicone caps or durable vinyl stickers are excellent choices. Portable keyboards are often moved, stored, or transported frequently, which can cause paper labels to wear down quickly. Silicone strips are particularly convenient here, as you can easily pack them away when traveling or practicing on the go.
For 76-key stage pianos, which often feature unique key spacing or non-standard layouts, adjustable or trim-to-fit label sheets offer the best flexibility. These sheets allow you to cut individual labels to match the exact dimensions of your keys, ensuring a clean fit without overlapping the edges.
Before finalizing your purchase on any online marketplace or music specialty store, run through a quick verification checklist. Confirm that the label set matches your exact key count (61, 76, or 88 keys) and starts on the correct note for your layout. Verify that the notation system matches your learning materials (such as English letters versus German or Solfège notation). Finally, check the seller’s return policy and product specifications to ensure the materials are rated as safe for your specific keyboard type.
Frequently Asked Questions (FAQ)
Will keyboard labels leave a sticky residue on my digital piano?
Whether a label leaves residue depends largely on its adhesive type and environmental conditions. High-quality vinyl labels designed specifically for musical instruments use low-tack, static-cling, or removable adhesives that are formulated to peel off cleanly. However, prolonged exposure to high temperatures, direct sunlight, or high humidity can cause even high-quality adhesives to break down and leave a sticky film. To protect your instrument, always test a single label on an inconspicuous area—such as the side of the highest or lowest key—for a few days before applying the entire set.
Can I use an 88-key label set on a 61-key keyboard?
While it is technically possible to use a portion of an 88-key label set on a 61-key keyboard, it requires careful planning and is generally not recommended. Because 88-key pianos start on an A note and 61-key keyboards typically start on a C note, you cannot simply apply the labels from left to right. You must locate the correct starting C note on your 61-key keyboard and align the corresponding labels from there, discarding the unused notes. Additionally, key widths can differ significantly between weighted 88-key digital pianos and unweighted 61-key models, which may lead to physical overlap or alignment issues.

Community discussion
Share your experience or ask a question. Comments are reviewed before publication.