
A beginner’s first piano keyboard table must provide a stable, level, and ergonomically correct foundation for practice. While it is tempting to focus on advanced features or premium aesthetics, the primary goals are structural stability and correct height alignment. For most entry-level setups, a sturdy double-X or Z-style stand that accommodates standard 61 to 88-key models provides an excellent balance of safety, comfort, and value without overspending. Selecting the wrong support can lead to a frustrating playing experience, physical discomfort, or even damage to your instrument.
Key Factors for Choosing a Beginner Keyboard Table
Establishing clear evaluation criteria ensures your selected keyboard table supports daily practice safely and comfortably. The physical demands of playing a keyboard require a support system that does not interfere with your technique or compromise the safety of your instrument.
Stability and wobble prevention are the most critical factors to consider. When you play, especially during dynamic or fast-paced pieces, your hands exert both downward and lateral force on the keys. A shaky stand causes the keyboard to sway or vibrate, which disrupts your concentration, ruins your hand positioning, and can cause physical fatigue as your body tries to compensate for the movement.
Products mentioned in this guide


![17vm [In stock]Simple modern piano table Electric Piano Studio worktable music table arranger keyboard tuning table household piano stand F2H6C](https://img.lazcdn.com/g/p/7dbd3aef968890a11e96724edf44bce5.jpg_webp_400x400q80.jpg_.webp)
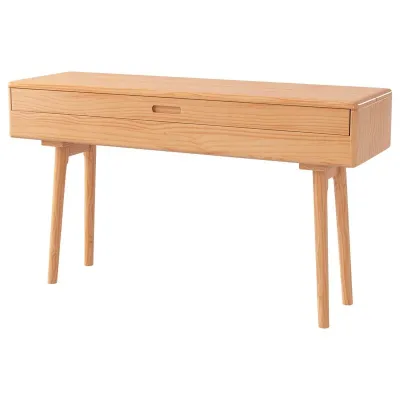
Prices are valid at publication and may change. Please refer to the product page for the latest price.
Weight capacity limits must be verified against your specific keyboard model’s specifications. Keyboards vary significantly in weight depending on their action and key count. A basic 61-key synthesizer-style keyboard might weigh only 4 to 5 kilograms, whereas a fully weighted 88-key digital piano can easily exceed 15 to 25 kilograms. You must check your keyboard’s manual for its exact weight and verify that the stand’s rated capacity exceeds this weight with a safe margin.
Height adjustability is essential for maintaining proper posture and preventing physical strain. Proper playing posture requires your elbows to be at a slightly open angle, roughly 90 degrees or slightly more, when your hands rest on the keys. Your shoulders should remain relaxed, and your wrists should be straight. An adjustable stand allows you to fine-tune the height of the keys relative to your seat, accommodating players of different heights and preventing long-term wrist or back strain.
Footprint and floor space requirements are crucial considerations in a typical home environment. In compact living spaces, such as high-rise apartments or HDB flats in Singapore, floor space is at a premium. You need to measure the designated practice area to ensure the stand’s legs do not block walkways, crowd other furniture, or create a tripping hazard. Some stands fold flat for easy storage, which is highly beneficial if you do not have a dedicated music room.
Common Types of Keyboard Tables and Stands
Comparing the structural designs available on the market helps you identify which style fits your space, budget, and stability needs. Each design offers distinct trade-offs regarding portability, legroom, and structural rigidity.

Single-X stands use a single pair of crossed metal tubes to support the instrument. While they are highly portable, lightweight, and easy to fold flat for storage, they are prone to lateral wobble, especially when supporting heavier 88-key digital pianos. Double-X stands improve on this design by adding a second set of reinforcing bars, forming a double-cross shape. This modification significantly increases structural rigidity and reduces side-to-side movement, making them a much safer and more stable choice for weighted keyboards.
Z-style stands feature a Z-shaped profile from the side, offering exceptional stability and weight capacity. Crucially, this design opens up the space directly underneath the keyboard, providing ample legroom for seated playing. You can sit comfortably with your knees positioned naturally under the instrument, without hitting the metal frame. Z-style stands are highly recommended for heavier digital pianos and dedicated home practice spaces where portability is not the primary concern.
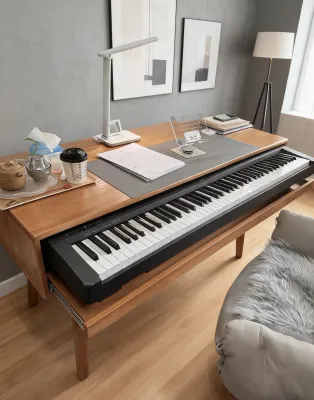
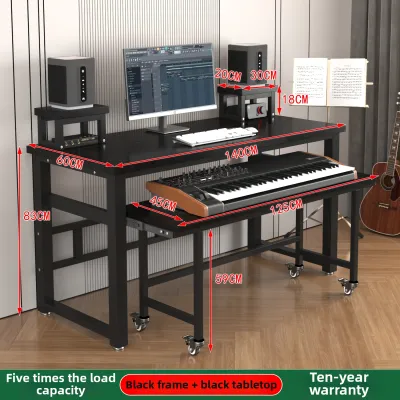
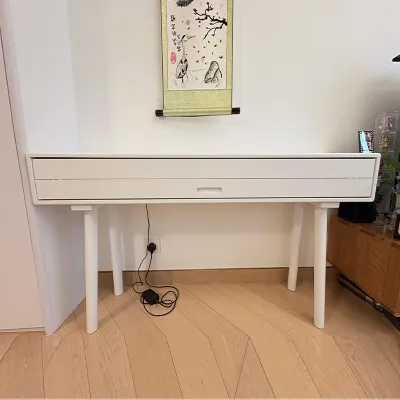
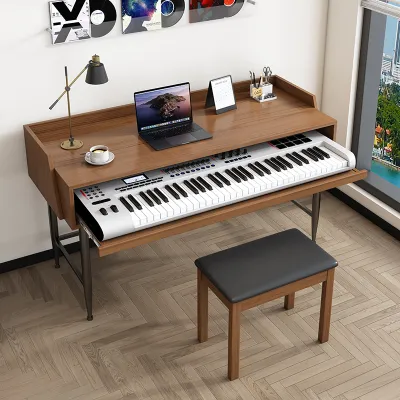
Table-style stands resemble a four-legged utility table with individually adjustable legs. They are incredibly stable, offer maximum legroom, and can support heavy instruments, but they tend to have a larger footprint and are less convenient to fold. Column stands are sleek and visually appealing, often used by performing musicians, but they can be expensive and sometimes lack the absolute stability required for heavy-handed home practice.
| Stand Type | Stability | Portability | Ideal Use Case | Legroom |
|---|---|---|---|---|
| Single-X | Low to Moderate | High | Lightweight 61-key keyboards, highly mobile players | Limited |
| Double-X | Moderate to High | High | 61 to 88-key keyboards, balanced home and travel use | Limited |
| Z-Style | High | Moderate | Heavy 88-key digital pianos, dedicated home practice | Excellent |
| Table-Style | Very High | Low to Moderate | Heavy digital pianos, permanent home setups | Excellent |
Matching the Table to Your Keyboard Dimensions
Before purchasing a stand, you must guide your decision by measuring and verifying that the support arms or table surface will properly hold your specific keyboard size. An ill-fitting stand can lead to instability, uneven key surfaces, or accidental drops.
Width requirements vary significantly across different keyboard sizes. A standard 61-key keyboard is roughly 90 to 100 cm wide, while an 88-key digital piano is typically around 130 to 140 cm wide. If your stand is too narrow, the keyboard will overhang significantly on both sides, creating a tipping hazard if you press keys at the extreme high or low registers. Conversely, if the stand is too wide, the support arms may not align with the reinforced contact points on the bottom of your keyboard.
Depth considerations are equally important to prevent the keyboard from slipping or resting unevenly. The support arms of the stand must match the depth of your keyboard’s chassis. If the arms are too short, the keyboard may rest precariously, risking a fall if bumped. If they are too long, they will protrude awkwardly from the front or back, creating a safety hazard in tight spaces.
Always check the instrument manufacturer’s specifications for exact dimensions before purchasing a stand. Do not rely on visual estimates or generic product descriptions. Measuring the physical instrument and comparing those numbers to the stand’s minimum and maximum width and depth specifications is the only reliable way to ensure compatibility.
Budgeting and Features to Avoid
Allocating your budget wisely involves identifying unnecessary expenses and avoiding risky, cheap alternatives that could compromise your instrument’s safety. A reliable stand is an investment in protecting your keyboard and ensuring a comfortable practice environment.
In Singapore, entry-level price brackets for reliable beginner stands generally range from S$30 to S$60 for a sturdy double-X stand. High-quality Z-style or table-style stands typically cost between S$60 and S$120. While it may be tempting to save money, spending slightly more on a reputable brand’s entry-level model ensures better materials and construction.
Ultra-cheap, single-tube X-stands often fail the stability test and pose significant tipping risks. These budget options, frequently priced under S$20 on online marketplaces, often use thin-walled metal tubing, weak plastic joints, and unreliable locking pins. Over time, the joints can wear down or strip, leading to sudden collapse under the weight of your keyboard.
Evaluating bundled keyboard-and-stand packages requires careful scrutiny. Manufacturers often bundle a high-quality keyboard with a low-quality, single-X stand to keep the package price attractive. In many cases, buying the keyboard and a high-quality stand separately is a safer and more cost-effective choice in the long run, as you avoid the need to replace a flimsy stand later.
Avoid overly complex folding mechanisms or multi-tier attachments if you only need a simple, single-keyboard setup. Extra joints, levers, and extension arms introduce more potential points of failure and can compromise the overall structural integrity of the stand. Keep your setup as simple and robust as possible to ensure long-term durability.
Setup, Adjustment, and Safety Checks
Once you have selected and purchased your keyboard table, performing a practical checklist during assembly ensures your setup is safe and secure before your first practice session. Taking a few minutes to verify the structural integrity of the stand prevents accidents and protects your investment.
Begin by tightening all joints and verifying the locking pins or knobs according to the included instruction manual. Ensure that any spring-loaded pins are fully engaged in their adjustment holes and that tension knobs are tightened securely. Do not overtighten to the point of stripping the threads, but ensure there is no play or movement in the joints.
Test for lateral wobble by placing the assembled stand on your practice floor and giving it a gentle shake. If the stand wobbles, adjust the leg spread or use the leveling feet. Many modern stands feature rotating rubber end caps on the feet, which can be turned to compensate for uneven floors or tile grout lines. This is particularly important on hard flooring surfaces common in Singapore homes.
Ensure that power cables, headphone cords, and sustain pedal wires do not interfere with the stand’s moving parts or folding joints. Route cables neatly along the frame using cable ties or straps to prevent them from getting caught or pulled. A snagged cable can pull the keyboard off the stand or damage the instrument’s input ports.
If any parts feel loose, misaligned, stripped, or structurally defective during assembly, stop immediately. Do not place your keyboard on a compromised stand. Consult the manufacturer or retailer for replacement parts or guidance before proceeding with the setup.
Frequently Asked Questions (FAQ)
Can I use a regular desk or table instead of a dedicated keyboard stand?
Standard office desks and dining tables are typically designed for sitting and writing, with a height of around 70 to 75 cm. When you place a digital piano—which itself has a thickness of 10 to 15 cm—on top of a standard desk, the keys end up far too high for proper playing posture. This forces you to raise your shoulders and bend your wrists awkwardly, leading to rapid fatigue and potential strain. A dedicated keyboard stand allows you to position the keys at the correct ergonomic height, which is usually around 70 to 72 cm from the floor to the top of the white keys. A sturdy, appropriately sized desk is only an acceptable temporary solution if you can adjust your seating height sufficiently to maintain proper elbow and wrist alignment.
Do I need an adjustable keyboard bench with my table?
Yes, an adjustable keyboard bench is highly recommended to complement your keyboard table. Standard dining chairs, office chairs with armrests, or fixed stools rarely align perfectly with the height of your keyboard. An adjustable bench allows you to fine-tune your seating position so your elbows remain level with or slightly above the keys. This alignment promotes a straight back, relaxed shoulders, and proper wrist positioning, which are essential for preventing fatigue and strain during long practice sessions. Fixed seating often forces you to slouch or reach upward, which can lead to poor playing habits and physical discomfort.

Community discussion
Share your experience or ask a question. Comments are reviewed before publication.