
Selecting the right piano note stickers is a practical way to accelerate your early learning journey on a keyboard or digital piano. The most effective stickers are those that match your instrument’s exact key dimensions, align with your current visual learning style, and feature a safe, residue-free backing that protects the key surfaces. By focusing on physical compatibility and material safety, you can support your practice sessions without risking cosmetic damage to your keys.
Quick Selection Criteria for Piano Note Stickers
Choosing a set of labels involves balancing your learning goals with the physical characteristics of your instrument. A mismatched set can slide around during practice, block the natural movement of the keys, or leave a stubborn residue that ruins the keytops. Investing a modest amount, typically between S$10 and S$20, in a dedicated set of piano note stickers is a highly practical step for any beginner.
To make an informed choice, you should evaluate three primary factors before purchasing:
Products mentioned in this guide
![TMW ABC 123 Piano Stickers for Universal 61 73 76 88 Keys Keyboards Sticker Digital Piano Music Note Transparent Removable Full Set Keyboard Absolute Piano The Music Works Store MA2 [BULKY]](https://img.lazcdn.com/g/p/d6521082e9a82ea48d8fcdea8de267d4.jpg_400x400q80.jpg_.webp)
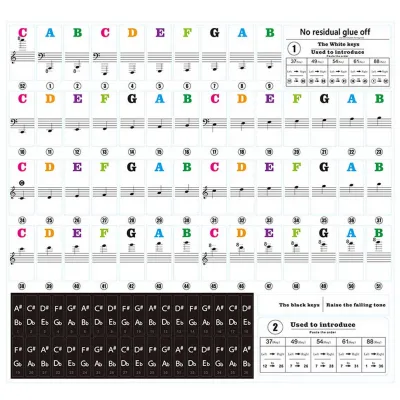
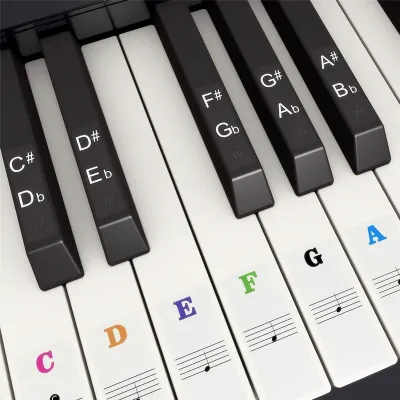
![[SG 🚚] 88/61Keys Reusable Silicone Piano Keyboard Note Labels Guide Labels One-Piece Removable Overlay Sticker for Kids](https://img.lazcdn.com/g/p/65dda5738f61c836145afe12097c6d05.jpg_400x400q80.jpg_.webp)
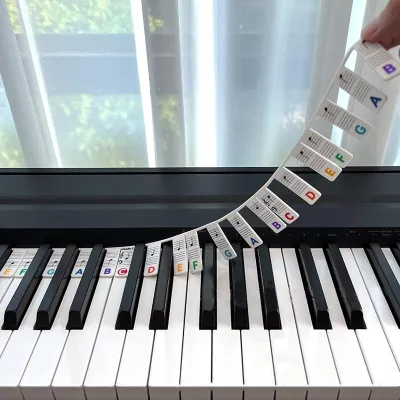
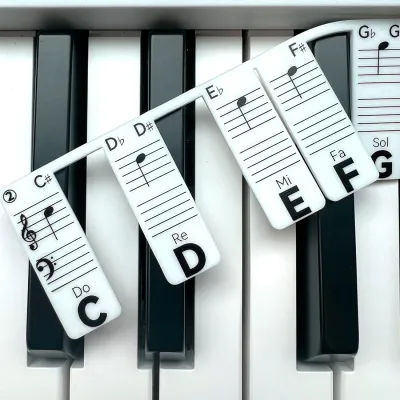
Prices are valid at publication and may change. Please refer to the product page for the latest price.
- Physical Dimensions: Ensure the stickers match the width and length of your specific keys, whether you play a full-sized digital piano or a compact MIDI controller.
- Visual Format: Select a notation style—such as simple letters, color-coded markers, or musical staff lines—that matches your current lesson plan.
- Attachment Method: Choose between static cling materials, removable silicone strips, or low-tack adhesives that can be peeled off cleanly when no longer needed.
Matching Sticker Dimensions to Your Keyboard
Keyboard instruments come in a wide variety of shapes and sizes, meaning there is no single universal standard for key dimensions. While full-sized digital pianos feature standard-width keys, many portable keyboards, synthesizers, and roll-up travel pianos use narrower mini-keys. Applying standard-sized stickers to mini-keys will cause the labels to overlap, which interferes with your finger placement and can cause the edges to peel.

The total number of keys on your instrument also dictates the type of sticker set you need. Standard sets are usually designed for 88-key layouts, but they often include instructions or layout guides for 76-key, 61-key, or 49-key variations. If you are using a smaller keyboard, you will need to identify which octave to start on so that the stickers align correctly with the actual pitches.
Before ordering any labels, take a moment to measure the width of a single white key on your keyboard using a standard ruler. Compare this measurement against the product specifications provided by the sticker manufacturer. Taking this simple step prevents the frustration of receiving stickers that are too wide for your keys or that cover up the natural gaps between them.
Choosing the Right Label Format for Your Learning Stage
The visual design of your piano note stickers should match your immediate learning objectives. For absolute beginners, simple letter notes (such as A, B, C or Do, Re, Mi) offer immediate clarity, helping you locate notes quickly and understand basic chord shapes. These basic letters are highly effective for casual players who want to play simple melodies right away.
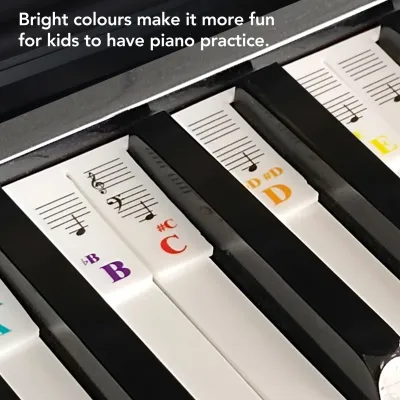
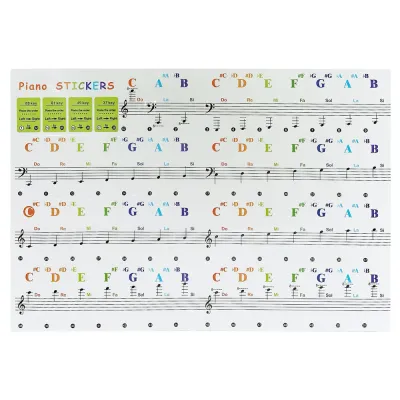
Color-coded systems are another popular option, particularly for visual learners and young children. These systems assign a distinct color to each note of the octave, making it easier to spot patterns and transition between keys. If you are following a specific beginner method book that uses color-coded notation, matching your stickers to that system can make your practice sessions much more intuitive.
For students who plan to transition to reading traditional sheet music, dual-note labels that feature both the letter name and the corresponding musical staff notation are highly recommended. These stickers display the note as it appears on the treble or bass clef, helping your brain build a direct connection between the physical key and the printed page. This format acts as a bridge, ensuring you do not become overly dependent on letters alone.
You should also consider the background material of the stickers, which can be either transparent or opaque. Transparent stickers allow the natural color of your keys to show through, offering a clean look that is less distracting under standard room lighting. Opaque white or black stickers can be easier to read in low-light environments, though they will alter the appearance of your instrument more noticeably.
Evaluating Adhesive Quality and Safe Removal
Protecting the surface of your keyboard is a critical consideration, especially if you plan to keep it in pristine condition. High-quality piano note stickers typically use static cling materials or flexible silicone strips that sit gently on top of the keys without any glue. These options are completely residue-free and can be repositioned or removed instantly without leaving a trace.
If you choose adhesive-backed stickers, look for products specifically labeled as low-tack, removable vinyl. Standard office labels, craft stickers, or cheap paper decals should never be used on musical instruments. These household adhesives are designed for permanent bonding and will dry out over time, leaving a sticky, hardened residue that is incredibly difficult to clean without scratching the plastic.
In warm and humid climates, such as in Singapore, cheap adhesives can degrade rapidly, turning into a gummy substance that attracts dust and dirt. This makes the choice of high-quality silicone strips or premium low-tack vinyl even more important for local players. The humidity can cause inferior adhesives to slide, leaving sticky borders along the edges of the keys where your fingers make frequent contact.
Always check the product packaging and descriptions carefully for explicit claims regarding safe, residue-free removal. If you are using a high-end digital piano with specialized key surfaces, such as synthetic ivory or textured ebony, it is wise to pause and consult the instrument manufacturer’s care guidelines. Some textured keytops are more sensitive to adhesives and require non-adhesive silicone overlays instead.
Step-by-Step Application and Maintenance Routine
Proper application ensures your stickers stay flat, remain highly visible, and do not interfere with your playing technique. Before applying any labels, prepare the key surfaces by wiping them down thoroughly with a dry, lint-free microfiber cloth to remove dust, skin oils, and moisture. Avoid using liquid cleaners, rubbing alcohol, or household solvents, as these can strip the protective finish off plastic keys or cause discoloration.
When you are ready to apply the stickers, use a systematic alignment technique to keep them centered. Using a small tool like a pair of tweezers or the edge of a plastic card can help you position each sticker without touching the adhesive backing with your fingers. Start from middle C and work your way outward, ensuring the stickers are centered horizontally and do not overlap the front edges of the keys or rub against adjacent keys.
Once applied, incorporate a quick check of the stickers into your regular instrument maintenance. Dust the keyboard weekly with a soft, dry brush to prevent dirt from accumulating around the edges of the labels. Keep an eye out for any peeling or lifting corners; a loose edge can catch on your fingernails during fast passages, which can be uncomfortable and will quickly ruin the sticker.
When the time comes to remove the stickers, peel them back slowly and steadily from one corner to avoid tearing the material. If you encounter any minor adhesive residue, gently rub the area with a clean, dry microfiber cloth using light circular motions. For stubborn spots on expensive instruments, avoid scraping with sharp objects and consider seeking advice from a professional piano technician to prevent surface scratches.
Frequently Asked Questions (FAQ)
Will note stickers affect the touch or weight of digital piano keys?
Standard vinyl note stickers are extremely thin and lightweight, meaning they have a completely negligible impact on the touch, weight, or key action of your instrument. Whether your keyboard features unweighted synthesizer keys or fully weighted hammer-action keys, these thin labels will not alter the physical resistance or key return. However, if you choose thicker silicone overlay strips, ensure they are positioned correctly at the back of the keys so they do not rub against the fallboard or restrict the key’s downward travel. Always check your digital piano’s warranty guidelines before applying any semi-permanent modifications to the key surfaces.
Can I use standard laptop keyboard stickers on a piano?
You should avoid using standard laptop keyboard stickers or general-purpose electronic decals on a piano. Laptop stickers are designed for flat, textured plastic or metal surfaces and often use high-tack adhesives that are meant to be permanent. Piano keys have a different surface texture, length, and subtle curvature that require specialized, low-tack adhesives or static cling materials. Using non-piano stickers carries a high risk of leaving permanent, gummy residue that can discolor the keys or damage synthetic ivory coatings, ultimately lowering the aesthetic and resale value of your instrument.
How long should a beginner rely on note stickers before removing them?
Note stickers are excellent training wheels, but they are intended to be a temporary learning aid rather than a permanent fixture. Most instructors recommend using them for no more than a few months, or until you can confidently identify the landmark keys (such as C, F, and G) without looking down. Relying on stickers for too long can hinder your ability to read sheet music, as your eyes will instinctively look at the keys rather than the page. To transition smoothly, try removing the stickers gradually—start by peeling off the labels for the black keys, then remove alternating octaves, and finally rely entirely on your muscle memory and interval recognition.

Community discussion
Share your experience or ask a question. Comments are reviewed before publication.