
The best keyboard sticker keys for a beginner depend on your learning method, instrument type, and long-term musical goals. For absolute beginners learning traditional sheet music, thin, transparent full note labels applied only to landmark keys offer the best balance of guidance and independence. If you are using a specific gamified app or teaching young children, color-coded stickers can accelerate early engagement. For those playing on high-end digital pianos or acoustic instruments where adhesives pose a risk, non-adhesive silicone key markers provide a safe, temporary alternative that can be removed instantly.
Assess Your Current Learning Stage and Goals
Before purchasing any visual aids, evaluate your current sight-reading ability and how much you rely on looking at your hands. Absolute beginners often struggle to find middle C or distinguish between the repeating patterns of black and white keys. If you find yourself constantly counting keys from the far left to locate a note, a temporary visual reference can save time and reduce frustration during your first few weeks of practice.
Identify your specific learning goals to narrow down the type of aid you need. If your goal is to play classical pieces using traditional sheet music, you need a system that connects the physical key to the musical staff. If you are focused on playing pop songs using chord charts, you only need to identify root note names rather than every single sharp and flat. Matching the sticker style to your immediate milestone prevents visual overload.
Products mentioned in this guide
Prices are valid at publication and may change. Please refer to the product page for the latest price.
The learning method you choose also dictates the style of helper you should use. Traditional piano pedagogy emphasizes spatial awareness and interval reading, where you recognize the distance between notes rather than reading individual letter names. In contrast, modern interactive apps often rely on color-coded falling bars. Using stickers that do not align with your primary learning tool will cause confusion and slow down your progress.
Compare the Main Types of Keyboard Sticker Keys
Selecting the right visual aid requires understanding how different designs affect your learning pace and muscle memory. Each style has distinct advantages and clear limitations.

Full Note Labels
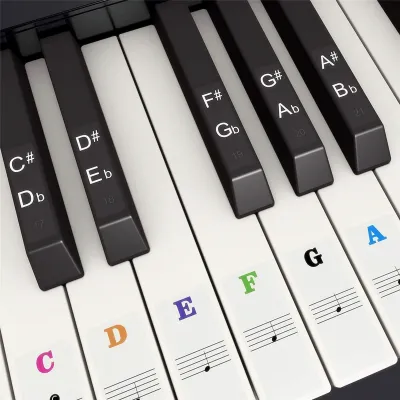
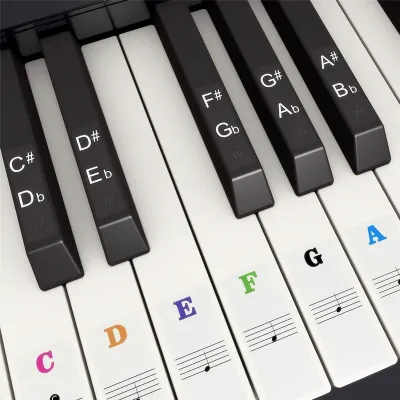
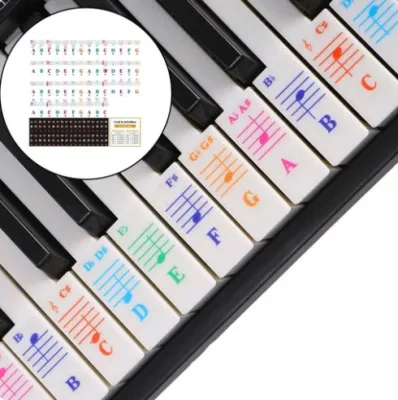
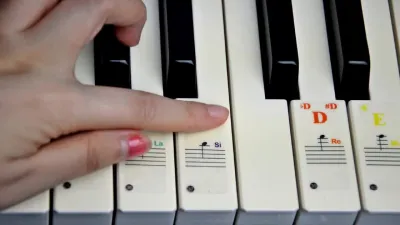
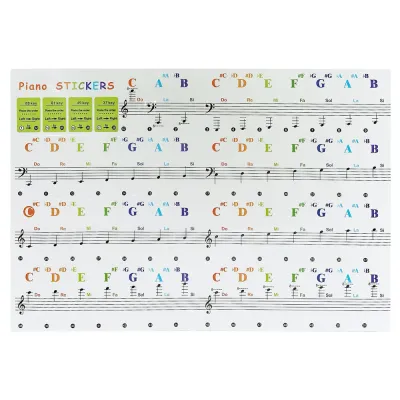
Standard letter-name stickers display the note name and often include a small depiction of the corresponding note on the treble or bass clef staff. These are highly effective for absolute beginners who are still learning to connect the written note on a page to the physical key on the keyboard. They remove the guesswork during the initial stage of learning where key geography feels unfamiliar.
However, full note labels can easily become a cognitive crutch. If every key is labeled, your eyes will naturally look down at the letters on the keys rather than up at the sheet music. This habit delays the development of interval reading, which is the ability to read the distance between notes on a staff and translate that distance into finger movements. Over-reliance on full labels can also hinder the development of spatial awareness across the keyboard.
To minimize these drawbacks, apply these stickers selectively. Instead of labeling all 88 keys, place them only on landmark keys such as middle C, treble G, and bass F. This approach provides anchor points to help you orient your hands while forcing you to calculate the surrounding notes manually, which builds stronger mental pathways.
Color-Coded Stickers
Color-coded stickers assign a specific color to each note of the octave, making it easy to identify patterns and play simple melodies quickly. This system is particularly beneficial for young children or beginners using specific educational software and color-mapped keyboards. It bypasses the initial hurdle of reading letters or notation, allowing immediate musical play.
The primary limitation of color-coded systems is their lack of transferability to standard sheet music. Traditional sheet music is printed in black and white, meaning color associations will not help you read a standard score. Furthermore, different apps and toy manufacturers use different color schemes, so a sticker set designed for one platform may not match another.
If you choose color-coded stickers, ensure they match the exact curriculum, app, or book series you are following. Use them as a short-term bridge to build confidence and hand coordination, but plan to transition to standard letter names or clean keys as soon as you begin reading basic black-and-white notation.
Removable Key Markers and Guides
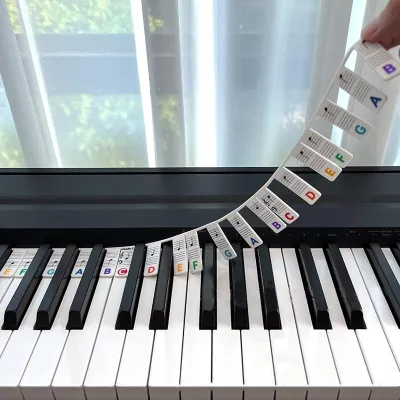
Removable key markers are non-adhesive strips, often made of flexible silicone or thin plastic, that lay flat across the top of the keys. They fit snugly behind the black keys and drape over the white keys to display note names and staff positions. Because they do not use glue, they can be placed on the keyboard at the start of a practice session and lifted off immediately afterward.
These guides are excellent for players who share an instrument with more advanced musicians or those practicing on expensive acoustic pianos where adhesive residue is unacceptable. They allow you to practice with visual aids when learning a difficult new piece, then remove them to test your memory or let another family member play on clean keys.
The main limitation of removable guides is physical compatibility. Because they rely on gravity and a precise fit around the black keys, they can shift or slide during vigorous playing or fast scale practice. They also may not fit all key profiles perfectly; a guide designed for a standard acoustic piano might not sit correctly on a portable electronic keyboard with shallower key beds or non-standard key spacing.
Check Compatibility with Your Electronic Keyboard or Piano
Before applying any visual aid to your instrument, you must verify that the material will not cause permanent damage or interfere with the action of the keys. Acoustic pianos, digital pianos, and budget electronic keyboards use different key materials and mechanical designs.
First, identify the material of your keys. Many modern digital pianos and keyboards feature textured synthetic ivory or ebony keytops designed to absorb finger moisture and mimic the feel of acoustic keys. Applying strong adhesives to these porous or textured surfaces can discolor the material or pull off the finish when removed. Always check your instrument manufacturer’s care guide before applying any adhesive product.
Adhesive residue is a common issue with low-quality stickers, especially in warm, humid climates like Singapore’s. Over time, high humidity and the warmth of your fingers can cause cheap glue to degrade, leaving a sticky, dirt-attracting residue that is difficult to clean. If you must use adhesive stickers, look for products explicitly labeled as using “removable” or “low-tack” adhesive, and avoid leaving them on the keys for more than a few months.
Physical clearance is another critical factor, especially on digital pianos with weighted keys or hammer-action mechanisms. If a sticker is too thick, or if a silicone guide is too bulky, it can rub against the adjacent keys or the fallboard behind the keys. This friction can cause keys to stick, slow down their return action, or alter the touch response of the instrument. Choose ultra-thin film stickers or low-profile guides to maintain proper mechanical clearance.
When to Remove Stickers and Transition to Sight-Reading
Keyboard stickers are training wheels; they are meant to be discarded once you gain basic balance. Keeping them on for too long will stunt your growth as a pianist and prevent you from developing the tactile relationship with the instrument that defines fluent playing.
You are likely ready to begin removing stickers when you can play simple five-finger patterns or basic pieces without constantly looking down at your hands. Another sign of readiness is the ability to identify intervals—such as a third or a fifth—by the physical distance between your fingers rather than reading the letter names on the keys. If you find yourself looking at the sheet music and automatically moving your fingers to the correct keys, the stickers have served their purpose.
A phased removal strategy is much easier than going cold turkey. Start by removing the stickers from the highest and lowest octaves, where you play less frequently. Next, remove the stickers from the accidentals (the black keys) and the less common white keys, leaving only your landmark notes like C and F. Finally, remove the remaining anchor stickers once you feel confident navigating the keyboard using touch and peripheral vision.
To ease the transition, incorporate tactile practice routines into your daily warm-ups. Practice finding specific keys with your eyes closed, using the groups of two and three black keys as physical guideposts to orient your fingers. By shifting your reliance from visual cues to tactile feedback, you will build a deeper, more intuitive connection to the piano that makes reading sheet music much faster and more natural.
Frequently Asked Questions (FAQ)
Will removing keyboard sticker keys damage my piano keys?
Removing adhesive stickers can occasionally leave a sticky residue or, in rare cases on older or low-quality keytops, peel away some of the surface finish. To prevent damage, peel the stickers off slowly and at a shallow angle rather than pulling straight up. If any adhesive residue remains, use a dry microfiber cloth to gently buff the area. If the residue persists, consult your instrument’s manual for approved cleaning solutions; avoid harsh chemical solvents like acetone or nail polish remover, which can melt plastic keys. If you are dealing with a high-value acoustic piano, consult a professional piano technician before applying or removing any adhesive materials.
Can I use keyboard sticker keys on a digital piano with weighted keys?
Yes, you can use keyboard stickers on a digital piano with weighted keys, but you must select thin, high-quality stickers to avoid interfering with the key action. Thick stickers or bulky silicone guides can rub against adjacent keys, causing friction that alters the weighted feel or prevents the keys from returning smoothly. Apply the stickers precisely in the center of the key surface, keeping them clear of the sides and the very back edge near the fallboard where friction is highest. It is wise to test a single sticker on an infrequently used key at the far end of the keyboard for a few days to ensure it does not affect the key’s movement before applying the full set.

Community discussion
Share your experience or ask a question. Comments are reviewed before publication.