
Choosing the right size dust cover for your keyboard or piano requires measuring the exact physical dimensions of your instrument—width, depth, and height—rather than relying solely on the number of keys. While standard key counts provide a helpful starting point, variations in chassis design, control panels, and built-in music rests mean a physical measurement is the only way to ensure a proper fit. A well-fitting cover protects sensitive electronics, delicate key contacts, and wood finishes from dust, spills, and ambient environmental factors.
By taking a few minutes to measure your instrument and understanding how different cover styles and materials interact with your room’s climate, you can preserve your instrument’s playability and appearance. This guide outlines how to identify your instrument’s specific sizing needs, take accurate measurements, select the right material for your environment, and maintain your cover over time.
Identify Your Instrument Type and Key Count
Keyboard instruments vary widely in their physical footprints, even when they share the same number of keys. Identifying where your instrument falls among standard categories is the first step in narrowing down your dust cover options.
Products mentioned in this guide
![[ammoon]61 / 88 Key Digital Piano Keyboard Dustproof and Waterproof Cover Electronic Organ Electronic Piano Keyboard Dust Cover](https://img.lazcdn.com/g/p/bf29434508907027828e2b9dca03f3d2.jpg_400x400q80.jpg_.webp)
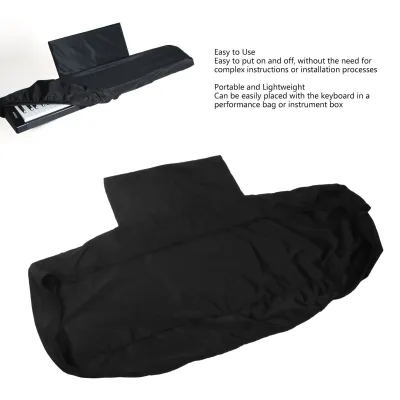
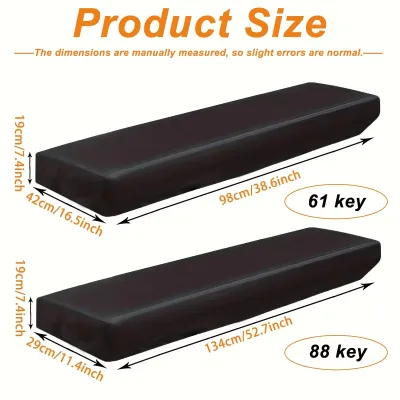

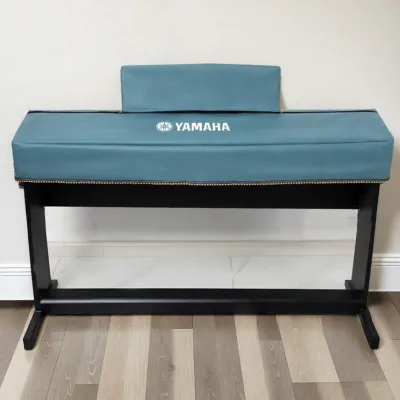

Prices are valid at publication and may change. Please refer to the product page for the latest price.
Standard Key Counts and Width Ranges
Portable keyboards and digital pianos generally follow standard key configurations, which directly influence their overall width:
- 61-Key Keyboards: These instruments are highly portable and typically measure between 90 cm and 100 cm in width. They are common for beginners, synthesizers, and MIDI controllers.
- 76-Key Keyboards: A middle-ground option, these keyboards usually range from 115 cm to 127 cm in width, offering extra range while remaining relatively compact.
- 88-Key Keyboards and Pianos: This is the standard full-size keyboard layout. These instruments typically measure between 130 cm and 145 cm in width, matching the span of an acoustic piano.
Instrument Categories and Cabinet Designs
Beyond key count, the structural design of your instrument plays a major role in determining the shape of the cover you need:
- Portable Keyboards and Stage Pianos: These flat, slab-style instruments have minimal built-in cabinetry. They are often placed on folding stands, meaning the cover only needs to wrap around the keyboard chassis itself.
- Console Digital Pianos: These instruments feature integrated wooden side panels, pedals, and a fixed back board. They have a deeper profile and a more boxy, furniture-like shape than portable stage pianos.
- Acoustic Upright Pianos: These are tall, heavy instruments with a vertical cabinet, a top lid, and a front board. They require structured, draped covers that account for the height of the upper cabinet and the projection of the keyboard bed.
Why Key Count Alone Is Insufficient
Two instruments with 88 keys can have completely different physical dimensions. A professional stage piano designed for touring often has a streamlined chassis with minimal borders around the keys. Conversely, a digital piano designed for home use may feature thick wooden side cheeks, built-in speakers, and a large control panel above the keys, adding several centimeters to the width and depth. Relying solely on key count when purchasing a cover often results in a fit that is either too tight to slip on easily or so loose that it sags and collects dust in the folds.
How to Measure Your Keyboard or Piano for a Custom Fit
To ensure a clean fit that fully protects your instrument without straining the seams of the cover, you must take precise physical measurements. Taking these measurements yourself is especially important if your instrument has non-standard dimensions or if you are ordering a tailored cover.

Preparation and Tools
Before you begin, gather a flexible sewing tape measure and a notepad. A flexible tape measure is preferred over a stiff metal construction tape, as metal tips can easily scratch high-gloss polyester or delicate wooden finishes. Ensure the instrument is resting on a flat, stable surface in its normal playing position.
Step-by-Step Measuring Process
Measure your instrument along three primary axes, keeping the tape measure straight and taut:
- Width (Left to Right): Measure the absolute widest part of the instrument. This includes any wooden side panels, plastic end caps, or protruding control knobs on the far left or right sides.
- Depth (Front to Back): Measure from the very front edge of the keys to the backmost part of the chassis. For acoustic upright pianos, you will need two depth measurements: the depth of the top lid and the depth of the keyboard shelf where the keys sit.
- Height (Top to Bottom): For portable keyboards, measure the thickness of the keyboard body itself, from the bottom base to the top surface. For console digital pianos and acoustic uprights, measure from the top lid down to the bottom of the keyboard bed, or all the way to the floor if you prefer a full-length cover.
Accounting for Protrusions and Accessories
Standard measurements often overlook parts of the instrument that stick out past the main chassis. Consider these common protrusions before finalizing your measurements:
- Music Stands: If you plan to leave your music rest attached to the keyboard while it is covered, you must measure the height from the keyboard bed to the top of the music stand. Alternatively, look for covers that feature a zippered or hook-and-loop slot designed to let the music stand slide through.
- Control Knobs and Pitch Wheels: Ensure your depth and width measurements include any joysticks, pitch bend wheels, or volume sliders that extend past the main frame.
- Rear Cables: Power cords, sustain pedal jacks, and MIDI cables plugged into the back of the keyboard often stick out by several centimeters. Add a small margin of safety (approximately 2 to 3 cm) to your depth measurement to avoid bending or damaging these connectors under a tight cover.
Match the Cover Style to Your Piano or Keyboard Design
Selecting the right cover style ensures that putting on and taking off the cover fits seamlessly into your daily practice routine. The style should match both the physical shape of your instrument and how often you play.
Stretch-Fit Covers
Typically made from elastic synthetic blends like spandex or lycra, stretch-fit covers are highly versatile. They feature an elasticized hem or an adjustable drawstring that pulls tight around the underside of the keyboard.
- Best For: Portable keyboards, MIDI controllers, and slab-style digital pianos on open stands.
- Advantages: They conform easily to irregular shapes, stay secure even in drafty rooms, and fold down into a very small size when not in use.
- Limitations: The tight stretch can sometimes press down on sensitive control knobs or keys if the cover is slightly too small.
Tailored and Custom-Fit Covers
Tailored covers are constructed from non-stretch fabrics and are cut to match the specific boxy dimensions of console digital pianos and acoustic uprights. They hang over the instrument like a fitted tablecloth, utilizing straight seams and structured corners.
- Best For: Acoustic upright pianos, grand pianos, and wooden console digital pianos.
- Advantages: They provide an elegant, formal appearance that complements home decor and do not put physical pressure on the keys or cabinet corners.
- Limitations: They are bulky to store when removed and must match your instrument's dimensions precisely to look neat.
Half-Covers versus Full-Covers
Your choice between a half-cover and a full-cover depends on your usage patterns and storage goals:
- Half-Covers (Top Covers): On acoustic upright pianos, these covers drape over the top lid and hang down just past the keyboard bed, leaving the lower cabinet and pedals exposed. They are excellent for daily players because they protect the most vulnerable dust-collecting surfaces while keeping the instrument easy to access.
- Full-Covers: These covers drape all the way from the top lid to the floor, completely enclosing the instrument. They offer maximum protection against dust, sunlight, pets, and accidental bumps, making them ideal for long-term storage, multi-use rooms, or homes with active pets.
Check Material and Functional Features for Your Environment
The climate of your room and the location of your instrument should dictate the material of your dust cover. A material that works well in a dry, climate-controlled studio may not be suitable for a humid home environment.
Breathability in Humid Climates
In warm, humid regions like Singapore, managing moisture is a primary concern for instrument care. High humidity can cause wooden keys to swell, felt hammers to soften, and internal electronic contacts to corrode.
- The Risk of Non-Breathable Materials: Heavy plastic, vinyl, or tightly coated waterproof covers can trap ambient moisture underneath the cover. This trapped humidity creates a microclimate that accelerates mold growth and wood warping.
- Breathable Alternatives: Opt for woven natural fibers like cotton, linen, or lightweight breathable polyester blends. These fabrics allow air to circulate freely, preventing condensation while still blocking fine dust particles.
Water-Resistance and Spill Protection
If your piano or keyboard is located in a multi-use space—such as a living room, playroom, or near a dining area—accidental spills are a constant risk. In these environments, look for covers made from water-resistant treated fabrics.
These materials are designed to bead liquid on the surface, giving you time to wipe away spills before they seep through to the keys. Ensure that only the outer layer is treated, leaving the underside breathable to prevent moisture buildup.
Inner Lining and Finish Protection
High-gloss polyester finishes (often found on polished black pianos) and delicate satin wood finishes scratch easily. Rough canvas or coarse synthetic fibers can leave micro-scratches on these surfaces over time as the cover is pulled on and off.
When selecting a cover, check the texture of the inner lining. Look for covers lined with soft flannel, brushed microfiber, or soft felt. These materials glide smoothly over polished surfaces without leaving abrasive marks.
Steps to Fit and Maintain Your Piano Dust Cover
Properly handling and maintaining your dust cover ensures that it continues to protect your instrument without introducing new risks, such as transferring accumulated dust back onto the keys.
Proper Installation Steps
To avoid damaging your instrument while fitting the cover, follow a consistent routine:
- Turn Off and Unplug: Ensure the keyboard is powered down. If you are using a stretch cover, make sure it does not catch on any rear power cables or headphone jacks.
- Clear the Music Rest: If your cover does not have a dedicated slot for the music stand, fold the stand down or remove it entirely to prevent the cover from stretching awkwardly or putting pressure on the stand's hinges.
- Drape from Center to Sides: Place the cover gently on the center of the instrument and unfold it outward toward the sides. Avoid dragging heavy seams, zippers, or metal adjustment toggles across the polished wood or plastic chassis.
- Secure the Hem: For stretch covers, gently pull the elastic hem under the front and back edges of the keyboard bed, ensuring it sits snugly without pulling too tight against the keys.
Routine Cleaning and Maintenance
Dust covers work by trapping airborne particles, meaning they accumulate dust over time. If left uncleaned, shaking the cover can release a cloud of dust directly into your keyboard’s key action.
- Regular Shaking: Take the cover outdoors once a week to shake out loose dust and pet hair.
- Washing Instructions: Clean the cover periodically according to the manufacturer's care label. Many spandex and polyester covers can be machine washed on a gentle cycle with cold water. Velvet, wool, or heavily embroidered custom covers often require dry cleaning or hand washing to prevent shrinkage and color bleeding.
- Drying: Always allow the cover to dry completely before placing it back on the instrument. Putting a damp cover on a piano or keyboard can trap moisture directly against the wood and electronics.
When to Consult the Manufacturer
If you notice any unusual changes in your instrument—such as sticky keys, a musty odor when removing the cover, or discoloration on a wooden finish—remove the cover immediately. These symptoms often indicate that the cover is trapping moisture or reacting chemically with the wood finish. Consult your piano manufacturer or a qualified technician to assess the humidity levels in your room and determine if a different style of cover or an active humidity control system is required.
Frequently Asked Questions (FAQ)
Should I remove the dust cover every time I play?
Yes, full-length covers and tight stretch-fit covers should be completely removed before you play. This ensures you have unobstructed access to the keys, control panels, and music stand, and prevents the cover from interfering with your playing posture. For top-only half-covers on acoustic pianos, you can leave the cover on the top lid while playing, provided it does not drape down over the music rest or key bed. When you remove the cover, fold it neatly and store it on a clean bench or shelf rather than placing it on the floor, where it can pick up dirt and pet hair.
Can a dust cover trap moisture and damage my piano?
Yes, if the cover is made from non-breathable materials like heavy vinyl, thick plastic, or dense waterproof synthetics, it can trap ambient humidity. In warm, humid climates, this trapped moisture can cause wooden keys to swell, strings to rust, and electronic circuit boards to fail. To prevent this, always choose breathable fabrics like cotton, linen, or specialized breathable synthetics, and periodically remove the cover to let the instrument air out in a well-ventilated room.

Community discussion
Share your experience or ask a question. Comments are reviewed before publication.