
Choosing the right X-style keyboard stand for your beginner electronic keyboard comes down to matching your instrument’s physical dimensions and weight with the structural limits of the stand. While these stands are highly popular for their portability and budget-friendly design, selecting the wrong model can lead to a wobbly playing experience or even risk damage to your instrument. To make the right choice, you must verify your keyboard’s exact specifications, compare single-X and double-X designs, and evaluate the height adjustment mechanisms to ensure a safe, ergonomic setup.
In Singapore, where space-saving furniture is essential for cozy apartments, a folding keyboard stand is often the most practical solution. The classic X-style stand is a favorite because it folds flat in seconds, allowing you to slide it under a bed or tuck it into a closet when you finish practicing. However, not all X-stands are built the same, and a mismatch can make your keys bounce or slide during practice.
Before buying any stand, you need to look beyond the price tag and focus on structural compatibility. By checking your keyboard’s weight, understanding how different frame designs distribute load, and learning how to adjust the stand for proper posture, you can find a stable setup that supports your musical journey. This guide will walk you through the essential specifications and verification steps to help you choose the perfect match.
Products mentioned in this guide
![[SG Seller] Double X Adjustable Portable Self-installation piano Keyboard Stand](https://img.lazcdn.com/g/p/b80c0e4f73cccbdb23d62602c484413c.jpg_400x400q80.jpg_.webp)


Prices are valid at publication and may change. Please refer to the product page for the latest price.
Assess Your Keyboard's Size and Weight Requirements
Every keyboard selection process must begin with your instrument’s physical specifications. Before browsing online marketplaces or visiting a local music shop, locate your keyboard’s user manual or check the manufacturer’s label on the underside of the instrument. You need to find two critical numbers: the exact weight of the keyboard (excluding the power adapter and music rest) and its overall width.
Beginner keyboards vary widely in weight depending on their key count and action type. A basic 61-key keyboard with unweighted keys might weigh only 3 to 5 kilograms, whereas an 88-key digital piano with fully weighted hammer-action keys can easily exceed 12 to 15 kilograms. Every keyboard X stand has a maximum weight capacity specified by its manufacturer, and exceeding this limit compromises the structural integrity of the joints, risking a sudden collapse.
Width is equally important for maintaining a safe center of gravity. If your keyboard is exceptionally wide but sits on a stand adjusted to a narrow setting, the ends of the instrument will overhang significantly. This uneven weight distribution makes the setup highly susceptible to tipping if you accidentally bump into one of the outer edges. Ensure the top support arms of the stand can span at least two-thirds of your keyboard’s total width to provide a stable foundation.
Understand the Types of X-Style Stands
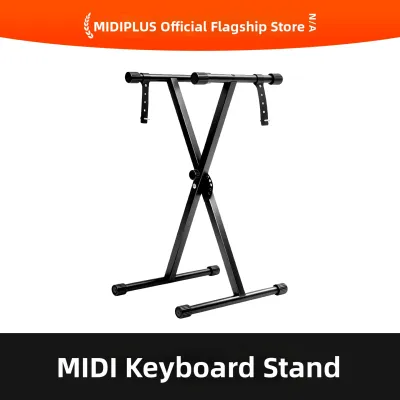
When shopping for a keyboard x stand, you will primarily choose between two structural designs: single-X and double-X. A single-X stand consists of two metal bars crossing in the center to form a single ‘X’ shape. These stands are lightweight, highly portable, and generally more affordable, making them a common choice for lightweight 61-key beginner keyboards. They also offer slightly more legroom underneath, which is helpful if you prefer to practice while seated.

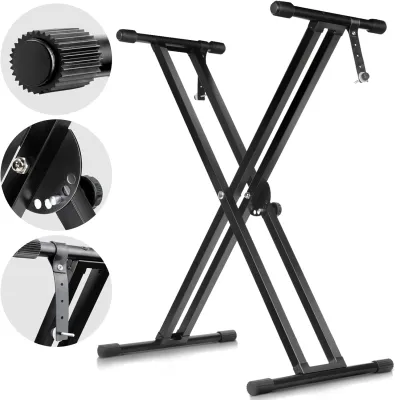
However, single-X stands are inherently less stable and can sway from side to side during energetic playing. If you have a heavier keyboard or plan to upgrade to a weighted-key model in the future, a double-X stand is a much safer investment. Double-X stands feature a second set of reinforcing metal bars running parallel to the main frame. This dual-bar design significantly increases lateral stability and weight capacity, though it does add extra weight to the stand itself.
One trade-off of the double-X design is that the extra metal bars restrict your legroom when sitting down. The crossed bars can prevent you from pulling your chair close to the keys, forcing you to sit further back or angle your knees outward. Additionally, you should evaluate the thickness of the metal tubing used in the frame. Thicker tubing generally indicates a sturdier build, but it also increases the collapsed profile of the stand, which is an important consideration if you have limited storage space in your home.
Evaluate Height Adjustability and Playing Posture
Maintaining proper ergonomic posture is crucial for preventing wrist strain and fatigue during long practice sessions. Your keyboard stand must adjust to a height that allows your elbows to bend at a comfortable 90-degree angle when your hands rest on the keys. Because X-stands change height by narrowing or widening their stance, you must carefully check the manufacturer’s height specifications to ensure they align with your seating arrangement.
When calculating your ideal stand height, do not forget to factor in the physical thickness of the keyboard itself. The distance from the bottom of the keyboard chassis to the top surface of the keys can add anywhere from 8 to 15 centimeters to your playing height. If you buy a stand that only adjusts down to a relatively high minimum setting, your keys may end up positioned too high, forcing you to shrug your shoulders or bend your wrists awkwardly while playing.
You should also closely examine the locking mechanism that secures the stand at your chosen height. Common designs include pull-lock pins, spring-loaded teeth, and manual screw-tighteners. Pull-lock pin systems are generally the most reliable and easiest to adjust, as they lock directly into pre-drilled holes in the central joint. Manual screw-tighteners require more effort to secure and can slip over time if they are not tightened sufficiently, so regular checks are necessary to ensure they remain locked under the weight of your instrument.
Check for Stability and Wobble Factors
A wobbling keyboard is one of the most frustrating obstacles for a beginner, as it disrupts your timing and makes it difficult to control your finger pressure. To minimize movement, look for stands equipped with thick, non-slip rubber end caps on both the top support arms and the bottom floor bars. Some models feature adjustable rubber feet that can be rotated to compensate for slightly uneven floors, which is incredibly useful for tiled or textured flooring.
The stability of an X-stand is directly tied to its height and width configuration. Because of the geometry of the X-shape, setting the stand to its maximum height narrows the base, making the entire setup top-heavy and prone to tipping sideways. Conversely, setting the stand to its lowest height widens the base significantly, which increases stability but may leave the top arms too far apart to support a shorter keyboard securely.
It is also important to recognize the inherent physical limitations of the X-stand design. Because all the weight is concentrated on a single central pivot point, even high-quality X-stands will exhibit some degree of flex when subjected to aggressive playing or heavy key strikes. If you are using a heavy digital piano and find that the lateral wobble is too distracting, you may need to look beyond the X-style entirely and consider a Z-stand or a table-style stand, which distribute weight across four vertical legs.
Step-by-Step Selection and Setup Verification
To ensure a safe and successful setup, follow a systematic verification process when selecting and assembling your new keyboard x stand. Start by comparing your keyboard’s physical measurements directly against the stand’s specifications. Ensure that your instrument’s weight is well below the stand’s maximum rated capacity—ideally leaving a safety margin of at least 20 to 30 percent to account for the downward force of your hands while playing.
Once your stand arrives, perform a thorough physical inspection before placing your keyboard on it. Examine the central locking joint, the welds along the frame, and the condition of the rubber grips. Look for any signs of manufacturing defects, such as loose rivets, cracked welds, or stripped threads on the locking pins. If any component appears damaged or loose, do not attempt to use the stand, as these structural weak points can fail under load.
After assembling the stand and adjusting it to your desired height, perform a manual stability test while the stand is still empty. Place both hands on the top support arms and apply moderate downward pressure, then gently shake the stand from side to side and front to back. The stand should feel firm, and the locking mechanism should remain securely engaged without slipping. Only when you are confident in the stand’s stability should you carefully place your keyboard on top and begin your practice session.
Frequently Asked Questions (FAQ)
Can I use an X-stand for a heavy 88-key weighted keyboard?
While some heavy-duty double-X stands are rated to support the weight of an 88-key digital piano, they are generally not the most stable option for full-sized, weighted instruments. The narrow footprint and single central joint of an X-stand struggle to handle the lateral leverage created when you play keys at the extreme high or low ends of an 88-key keyboard. If you choose to use an X-stand for a heavy keyboard, always verify that the stand’s rated weight capacity comfortably exceeds your instrument’s weight, and consider upgrading to a Z-stand or a dedicated wooden console stand for maximum stability.
How do I prevent my keyboard from sliding off the X-stand?
To prevent your keyboard from sliding, ensure that the rubber end caps on the top support arms are clean, free of dust, and positioned directly underneath the flat sections of your keyboard’s base. You should adjust the width of the stand so that the support arms sit closer to the outer edges of the keyboard rather than clustering in the center, which improves balance. Many X-stands also come with safety straps that screw into the bottom of compatible keyboards, or you can use aftermarket non-slip silicone pads to add extra grip between the metal frame and the plastic chassis of your instrument.

Community discussion
Share your experience or ask a question. Comments are reviewed before publication.