
Connecting a sustain pedal to your keyboard is one of the simplest ways to elevate your playing, allowing notes to ring out smoothly and creating a rich, connected sound. While the physical connection is straightforward, getting the pedal to behave correctly requires a basic understanding of plug types, power-up sequences, and electrical polarity. If your pedal is currently working in reverse—sustaining notes when your foot is off the pedal and cutting them off when you press down—a simple configuration adjustment or hardware switch will quickly resolve the issue.
To ensure a reliable setup, you must match the pedal’s plug to the correct port on your keyboard, secure the physical connection before turning on the power, and verify that the pedal’s polarity matches your instrument’s default settings. This guide provides a comprehensive walkthrough of the physical installation, polarity troubleshooting, advanced settings configuration, and common performance fixes.
What You Need Before Connecting Your Sustain Pedal
Before plugging any hardware into your keyboard, you must verify that you have the correct type of pedal and that your keyboard supports it. Most electronic keyboards, digital pianos, and MIDI controllers feature a dedicated port on the rear or side panel specifically designed for sustain. This port is typically labeled as “SUSTAIN,” “DAMPER,” or “PEDAL,” and it accepts a standard 1/4-inch (6.35 mm) jack.
Products mentioned in this guide
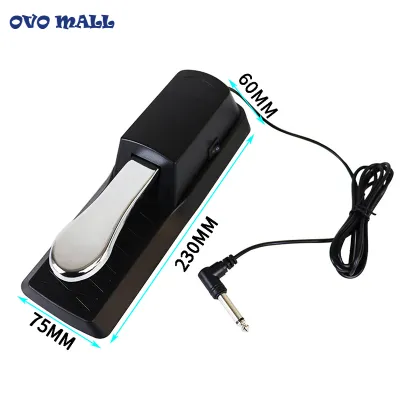
![[ammoon]Piano Sustain Pedal Keyboard Damper Pedal 6.35mm Plug For Casio Yamaha Roland Electronic Organ MIDI Keyboards Digital Pianos](https://img.lazcdn.com/g/p/99ba3dc141046067dcd3c3d44cad9563.jpg_400x400q80.jpg_.webp)
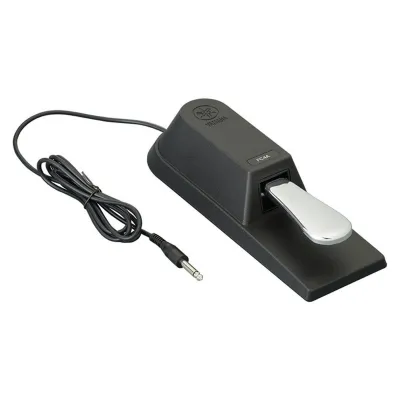

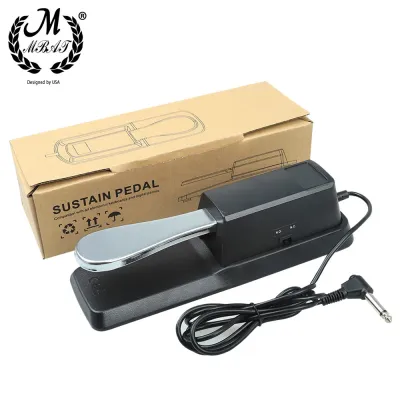
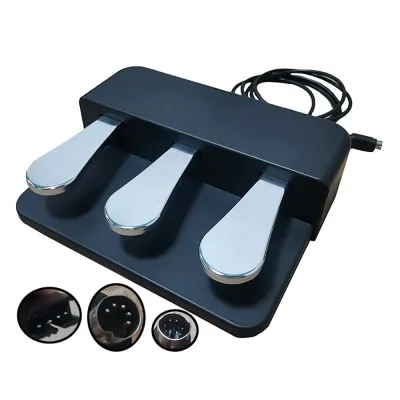


Prices are valid at publication and may change. Please refer to the product page for the latest price.
Sustain pedals generally come in two physical designs: compact, square plastic foot switches and heavier, metal piano-style pedals. While they look different, they function similarly by sending an electrical signal to the keyboard when pressed. However, you must check whether your pedal uses a Tip-Sleeve (TS) or Tip-Ring-Sleeve (TRS) plug. A TS plug has one black ring near the tip and is used for standard on/off switching, while a TRS plug has two black rings and is typically required for advanced pedals that support continuous half-pedaling.
Another critical factor is the pedal’s polarity type, which refers to its default electrical state. Sustain pedals operate as either “normally open” (NO) or “normally closed” (NC) switches. Different keyboard manufacturers design their instruments to expect one specific state; for example, some brands default to normally closed circuits, while others require normally open circuits. You can usually find this specification on the product label, in the user manual, or by checking for a physical polarity switch on the pedal itself.
Finally, always ensure your keyboard is completely powered off before making the physical connection. Plugging a pedal into an active keyboard can cause a minor electrical surge that may confuse the instrument’s internal sensors. Many modern keyboards run an automatic calibration routine during the boot sequence to detect the pedal’s resting state, and plugging the pedal in while the power is on can disrupt this process, leading to calibration errors or reversed operation.
Step-by-Step Guide to Connecting the Sustain Pedal
Once you have verified your equipment, you can proceed with the physical connection. Start by placing your keyboard on a stable stand and positioning the sustain pedal on the floor beneath it. Ensure the pedal cable has enough slack to reach the back of the keyboard without being pulled taut, which can strain the connector over time.

Locate the correct port on the back panel of your keyboard. It is incredibly common for beginners to mistake the sustain jack for other identical 1/4-inch ports, such as the headphone output (“PHONES”), main audio outputs (“L/MONO” or “R”), or an expression pedal input (“EXP”). Plugging your sustain pedal into an audio output will not damage the hardware, but the keyboard will not register your foot presses. Double-check the text labels printed on the chassis to confirm you are using the dedicated sustain or damper input.
Take the 1/4-inch plug and insert it straight into the sustain jack. Push the plug firmly until you feel it click or seat completely into the internal spring contacts. If the plug is only partially inserted, the electrical circuit will remain incomplete, resulting in intermittent sustain or a total lack of response. Avoid forcing the plug if you encounter unusual resistance, as this could indicate debris inside the jack or a mismatched plug size.
With the pedal securely connected and your foot completely off the pedal, turn on your keyboard’s power switch. Allow the instrument to complete its full startup sequence before touching any keys or pedals. This pause is crucial because the keyboard’s firmware reads the electrical state of the jack during boot-up and establishes that baseline as the “off” or “silent” position.
To test the setup, play a simple chord on the keyboard, press the sustain pedal down, and then lift your hands off the keys. The notes should continue to ring out clearly. Next, lift your foot off the pedal; the sound should damp immediately. If the notes stop when you press the pedal and sustain when you release it, you are experiencing a polarity mismatch, which can be easily corrected.
How to Fix Reverse Polarity Issues
A reverse polarity issue is the most frequent problem keyboard players encounter, but it does not mean your pedal or keyboard is broken. It simply means the keyboard expects a normally closed circuit, but your pedal is operating as a normally open circuit, or vice versa. Fortunately, there are several straightforward ways to align the electrical behavior of both devices.
The easiest solution is to check for a physical polarity switch on the pedal itself. Many universal sustain pedals feature a small slider switch on the bottom casing or along the cable, often labeled “N.C./N.O.,” “I/II,” or “+/-“. To use this switch, turn off your keyboard, unplug the pedal, toggle the switch to the opposite position, plug the pedal back in, and turn the keyboard on again. This physical toggle instantly reverses the electrical signal sent to the keyboard.
If your pedal does not have a physical switch, you can often adjust the polarity digitally through your keyboard’s internal software. Navigate to your keyboard’s system menu or global settings using the onboard screen and buttons. Look for a submenu labeled “Pedal Settings,” “Controller Assign,” or “Utility.” Within this menu, you should find an option to change the pedal polarity from “Standard” to “Reverse,” or from “Positive” to “Negative.” Save the settings and test the pedal to confirm the change.
For entry-level keyboards that lack a digital menu or a physical pedal switch, you can often use a simple power-on calibration trick. First, turn the keyboard’s power off. Next, press and hold the sustain pedal down completely with your foot. While keeping the pedal pressed, turn the keyboard’s power switch back on and wait for the instrument to boot up fully. Once the startup screen or lights are active, release your foot from the pedal. This forces the keyboard’s startup firmware to register the pressed state as the default “off” position, reversing the pedal’s behavior for that playing session.
Adjusting Pedal Settings and Half-Pedaling Features
Once your pedal is functioning correctly, you can explore advanced settings to match your playing style. Standard sustain pedals operate as simple binary switches, meaning they are either fully on or fully off. While this is perfect for basic playing, advanced pianists often prefer continuous controller pedals that support half-pedaling.
Half-pedaling mimics the behavior of an acoustic piano, where pressing the pedal down partially lifts the dampers only slightly off the strings, creating a shorter, more controlled sustain. To use this feature, both your keyboard’s sound engine and your sustain pedal must support continuous control (using a TRS plug). If your hardware is compatible, you can navigate to the keyboard’s system menu to calibrate the pedal’s sensitivity, adjusting how quickly the sustain effect builds up as you press the pedal through its physical travel.
Many modern keyboards also allow you to reassign the function of the sustain jack. If you are playing a piece that does not require sustain, or if you are using a multi-keyboard setup, you can enter the system menu and change the pedal’s role. Common alternative assignments include acting as a soft pedal (una corda), a sostenuto pedal (which sustains only the notes that were held down when the pedal was pressed), or even a program change switch to cycle hands-free.
If your keyboard supports multiple pedal inputs, you can connect a multi-pedal unit to replicate the full three-pedal setup of an acoustic grand piano. Always consult your keyboard’s manual to verify which ports support continuous control and which are limited to simple switch functions, as plugging a continuous pedal into a basic switch-only jack will prevent the half-pedaling features from working.
Troubleshooting Common Connection and Performance Issues
If your sustain pedal stops working, behaves erratically, or produces unwanted noise, a systematic troubleshooting approach will help you identify the root cause. Start by inspecting the physical cable and plug. Sustain pedal cables are frequently stepped on, rolled over by office chairs, or bent at sharp angles, which can cause internal wire breaks. Run your fingers along the cable to check for kinks, cuts, or exposed copper, and ensure the strain relief boots at the plug and pedal base are intact.
Next, examine the input jack on the keyboard itself. Over time, dust, lint, and pet hair can accumulate inside the jack, preventing the metal contacts from making clean electrical contact with the plug. To clean the jack safely, turn off the keyboard and use a can of compressed air to blow out any debris. Alternatively, you can insert a dry, clean cotton swab into the jack to gently sweep away dust; never use water, liquid cleaners, or contact cleaners unless specifically recommended by the manufacturer.
If the physical connections are clean and intact but the pedal still fails to respond, check your keyboard’s global settings. It is possible to accidentally disable the sustain function for specific keyboard zones, such as the lower half of a split keyboard, or to assign the pedal to a MIDI channel that your current instrument patch is ignoring. Resetting your keyboard to its factory default settings can often resolve mysterious software-related pedal issues.
Finally, know when to stop troubleshooting and seek professional assistance. If the 1/4-inch jack on your keyboard feels loose, wobbly, or pushes inward when you try to insert the plug, the internal solder joints connecting the jack to the main circuit board may have cracked. Attempting to force the plug into a damaged jack can cause permanent damage to the keyboard’s internal electronics. In this scenario, contact the manufacturer’s authorized service center or a qualified instrument technician to repair the physical connection safely.
Frequently Asked Questions (FAQ)
Can I use a guitar expression pedal as a sustain pedal?
No, you generally cannot use a standard guitar expression pedal as a direct substitute for a sustain pedal on basic keyboards. Expression pedals use a variable resistor (potentiometer) to sweep through a continuous range of values via a TRS cable, whereas standard sustain pedals operate as simple on/off switches. While some advanced keyboards and MIDI controllers allow you to reassign an expression input to control sustain digitally, entry-level keyboards will not recognize the expression pedal’s signal correctly, resulting in erratic behavior or no sustain at all.
Why does my sustain pedal make a clicking noise?
A distinct, physical clicking noise is usually normal for standard switch-style sustain pedals. This sound is produced by the internal mechanical microswitch engaging and disengaging as you press and release the pedal. However, if you hear abnormal noises such as loud squeaking, scratching, or rattling, or if the pedal fails to spring back quickly to its resting position, the internal spring may be broken or the casing may have come loose. In these cases, you may need to open the casing to realign the spring or replace the pedal entirely to maintain smooth playability.

Community discussion
Share your experience or ask a question. Comments are reviewed before publication.