
To know if an 88-key piano cover will fit your specific keyboard brand and model, you must compare the physical dimensions of your instrument against the exact interior dimensions of the cover, rather than relying on the “88-key” label alone. While 88 keys is the standard layout for full-sized digital pianos, stage keyboards, and synthesizers, the physical chassis surrounding those keys varies dramatically between different manufacturers and product lines. A cover designed for a slim, portable stage piano will not fit a home console digital piano with integrated wooden cabinetry, even though both instruments feature the exact same number of keys.
Finding the right fit requires a systematic approach of measuring your instrument, understanding how cover manufacturers list their dimensions, and selecting materials that accommodate your specific setup. Taking these steps prevents the frustration of purchasing a cover that is too tight to slip on, too loose to keep out dust, or heavy enough to put unwanted pressure on delicate control knobs and sliders.
Why Key Count Alone Does Not Guarantee a Fit
The term “88-key” refers strictly to the musical range of the keyboard, not the physical footprint of the instrument itself. While the keybed width remains relatively consistent across brands to maintain standard key spacing, the outer casing, or chassis, is designed according to the instrument’s intended use. For instance, a portable stage piano designed for gigging musicians is built to be as compact and lightweight as possible, featuring minimal bezels and a shallow depth. In contrast, a digital console piano designed for home use often features thick wooden side panels, integrated music rests, and a deeper cabinet to mimic the presence of an acoustic upright piano.
Products mentioned in this guide

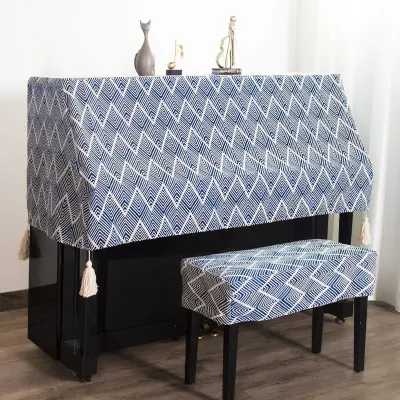
Prices are valid at publication and may change. Please refer to the product page for the latest price.
Control panels and user interfaces also introduce significant dimensional variations. Professional workstations and synthesizers are frequently populated with physical sliders, rotary knobs, pitch-bend wheels, and touchscreens that sit high above the keybed. These components not only increase the overall height and depth of the instrument but also create irregular profiles that standard, flat-cut covers cannot easily accommodate. Furthermore, pitch-bend and modulation wheels are often mounted to the left of the keys, extending the physical width of the keyboard by several centimeters beyond the standard keybed width.
Rear connection panels and accessories add another layer of complexity. Power supply inputs, sustain pedal jacks, and audio output cables protruding from the back of the keyboard require extra clearance. If your keyboard has a fixed or semi-permanent music rest, the cover must have enough volume and depth to drape over this accessory without pulling the fabric taut or bending the rest. A generic “one-size-fits-all” 88-key cover typically assumes a simple, low-profile rectangular shape, which inevitably fails when faced with these diverse hardware layouts.
How to Measure Your Keyboard for a Custom Fit
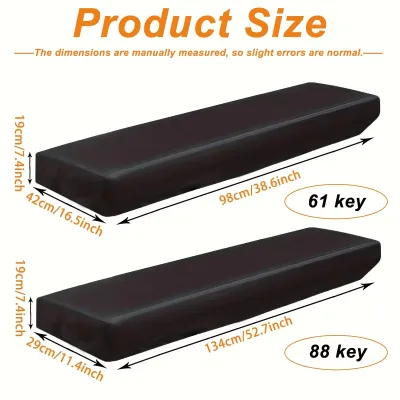
To guarantee a precise fit, you must take physical measurements of your keyboard rather than relying on generic product descriptions. Use a reliable metal measuring tape, as fabric tapes can stretch and lead to inaccurate readings. It is highly recommended to record your measurements in both centimeters and inches, as cover manufacturers on online marketplaces use different measurement standards depending on their target region.

Begin by measuring the absolute width of the keyboard. Place the measuring tape at the outermost edge of the left side panel and extend it to the outermost edge of the right side panel. Do not simply measure the length of the black and white keys; you must capture the entire chassis, including any side-mounted buttons, decorative wooden end cheeks, or protective rubber bumpers.
Next, determine the true depth of the instrument. Measure from the very front edge of the keys to the furthest protruding point at the back of the chassis. If you plan to keep your music rest attached while the keyboard is covered, measure the depth from the front of the keys to the back of the music rest. Additionally, factor in any plugged-in cables or power bricks that remain connected to the rear panel during storage, as these can add several centimeters to the required depth.
Finally, measure the maximum height of the keyboard. This measurement should run from the bottom surface of the chassis (where it rests on your stand or table) to the highest point on the top panel. This highest point is rarely the keys themselves; it is usually the top of the control panel, a raised speaker grille, or the top of the music stand. If your keyboard sits on a custom wooden stand, measure only the keyboard unit itself, unless you are purchasing a full-cabinet cover that is designed to drape all the way to the floor.
Cross-Referencing Measurements with Cover Specifications
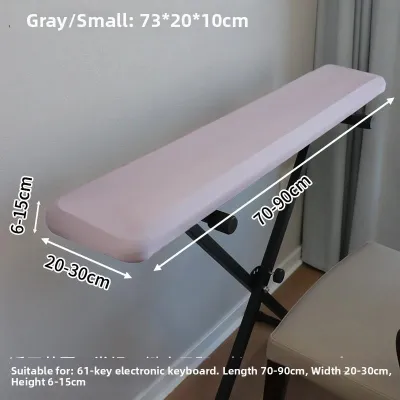
Once you have recorded your keyboard’s physical dimensions, you can begin comparing them with the specifications of available covers. When browsing product listings, pay close attention to how dimensions are stated. Manufacturers typically list either the “relaxed” dimensions of the cover or the “fits up to” maximum dimensions. “Fits up to” dimensions indicate the absolute limit of the cover’s stretch capacity; if your keyboard matches these maximum limits exactly, the cover will be extremely tight, which can strain the seams and apply constant pressure to your instrument’s controls.
To verify your keyboard’s official dimensions, consult the specifications page at the back of your user manual or visit the manufacturer’s official website. Keep in mind that these official dimensions represent the bare instrument without accessories. If your physical measurements differ from the manual’s specifications due to an attached music rest or rear cables, always prioritize your physical measurements when choosing a cover.
Many reputable cover manufacturers provide compatibility charts listing popular keyboard models from major brands. While these charts are incredibly helpful, treat them as a helpful guide rather than an absolute guarantee. Minor design variations between product generations or the use of aftermarket keyboard stands can still affect how the cover sits on your specific setup.
Additionally, factor in the material stretch allowance of the cover. Stretchy fabrics like spandex or Lycra blends can comfortably expand to accommodate minor dimensional differences, making them highly forgiving if your measurements are off by a centimeter or two. However, non-stretch materials like heavy canvas, faux leather, or padded nylon offer zero flexibility. For non-stretch covers, you must select a size that is slightly larger than your recorded measurements—ideally leaving a clearance of one to two centimeters on all sides—to ensure you can easily slip the cover on and off.
Selecting Cover Features for Your Specific Setup
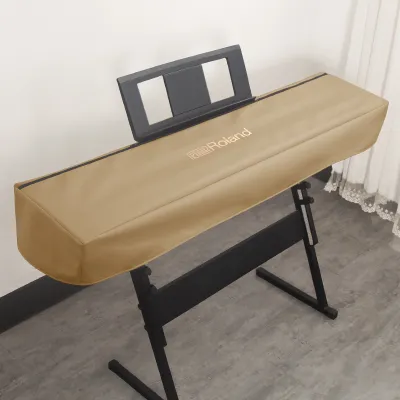
Choosing the right cover involves more than just matching dimensions; you must also select design features that complement how and where you use your keyboard. If your instrument is mounted on a heavy-duty double-X stand or a Z-stand, a standard slip-on cover may bunch up or fail to drape properly around the stand’s upper support arms. To resolve this, look for covers featuring split-bottom designs, zippered openings, or hook-and-loop slots that allow the stand supports to pass through the cover cleanly, ensuring a snug fit all the way around the chassis.
The material of the cover should align with your primary protection needs. If your main goal is to keep household dust and pet hair out of the keybed in a climate-controlled room, a lightweight, stretchy spandex blend is an excellent choice. These covers offer a sleek, form-fitting appearance and are easy to wash. However, if your keyboard is located in a high-traffic area, a school, or a studio where it is vulnerable to liquid spills, physical impacts, or sunlight exposure, a heavy-duty padded nylon or water-resistant polyester cover is far more suitable.
Ventilation is another critical consideration for electronic instruments. Digital pianos and synthesizers generate mild heat during use, particularly around their internal power supplies and amplifiers. If you prefer to cover your instrument immediately after a practice session, ensure the cover is made from a breathable fabric or features integrated mesh ventilation panels. This allows heat to escape naturally, preventing moisture condensation and heat buildup from affecting sensitive internal circuitry.
Finally, look for practical securing mechanisms to keep the cover anchored. Adjustable elastic hems, drawstring toggles, and under-keyboard tie-down straps are invaluable features, especially in homes with active pets or in venues with strong drafts. These securing features prevent the cover from sliding off smooth plastic or polished wooden finishes, keeping your instrument fully protected at all times.
Verifying the Fit and Troubleshooting Common Issues
When your new cover arrives, perform a thorough test fit before discarding the packaging. Carefully drape the cover over the keyboard and observe how it sits. The most important check is to ensure that the cover does not apply downward pressure on the keys, sliders, or delicate control knobs. Continuous pressure on the keys can compress the underlying sensors and weaken the key return springs over time, while tight fabric pressing against sliders can bend or snap the control shafts.
Next, inspect the rear and underside of the instrument. Verify that the cover does not pinch or bend any connected cables at sharp angles, as this can damage both the cable connectors and the keyboard’s input ports. If the cover blocks essential ventilation grilles, make a habit of leaving the keyboard uncovered for a few minutes after turning it off to allow it to cool down completely before putting the cover on.
If you find that a stretchy cover tends to slip off the corners of a smooth plastic cabinet, you can often resolve this by adjusting the tension of the integrated drawstring or elastic hem. For wooden console pianos, placing small, non-slip silicone grips or felt pads on the underside corners of the cover can provide the necessary friction to keep it securely in place without scratching the instrument’s finish.
If the cover is so tight that you must force it over the corners, or if it bends your music rest out of shape, do not attempt to stretch it out permanently. A cover that is too small will eventually tear at the seams and fail to provide adequate protection. In such cases, it is best to return the cover and select a larger size or a different material style that accommodates your keyboard’s unique physical profile.
Frequently Asked Questions (FAQ)
Can I use a generic dust cloth instead of a fitted 88-key cover?
While a simple sheet or generic dust cloth offers basic top-surface protection, it lacks the secure fit needed to keep dust out of the sides and under the keybed. Loose cloths easily slide off when bumped or during routine room cleaning, leaving the keys exposed. They also offer zero protection against accidental liquid spills or minor physical impacts, which a fitted, water-resistant cover can easily deflect.
Should I cover my digital piano immediately after playing?
It is generally best to wait a few minutes before covering your digital piano, especially after long practice sessions. Internal power supplies and amplifiers generate heat that needs to dissipate. Covering the instrument immediately can trap this warm air, potentially shortening the lifespan of sensitive electronic components. Check your keyboard’s user manual for specific guidelines regarding heat dissipation and safe covering practices.

Community discussion
Share your experience or ask a question. Comments are reviewed before publication.