
Selecting your first guitar pick maker requires looking closely at material compatibility, cutting mechanism durability, and ergonomic design. While the concept of punching custom plectrums out of old plastic cards seems straightforward, the actual playability of the finished pick depends heavily on the precision of the tool you choose. A poorly constructed cutter can leave jagged edges, crack your materials, or cause hand strain after only a few uses. By focusing on how a tool handles different plastic thicknesses and how much physical effort it requires, you can find a reliable device that fits your creative goals.
For a beginner, the decision-making process involves balancing the volume of picks you plan to make against your available workspace and physical comfort. Different tools are engineered for different levels of output, ranging from casual crafting at a desk to high-volume production for local bands or events. Understanding these technical differences ensures you purchase a tool that performs consistently without damaging your raw materials or wearing out prematurely.
Understanding the Main Types of Pick Makers
Manual punch pliers are the most common and accessible option for beginners. Shaped similarly to a heavy-duty stapler or a pair of office pliers, these handheld devices rely entirely on your grip strength to shear through plastic. They are highly portable, easily fitting into a gig bag or a small drawer, making them excellent for casual players who want to make a few quick picks on the go. However, because they depend on direct hand pressure, punching through thicker or harder plastics can be physically demanding and may cause hand fatigue during longer crafting sessions.
Products mentioned in this guide
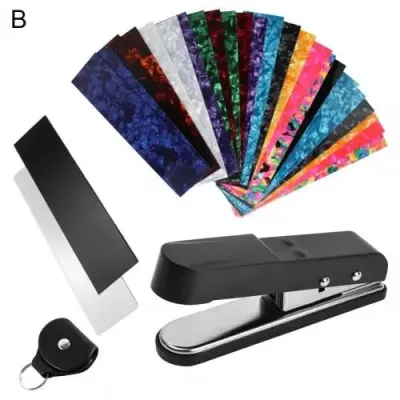
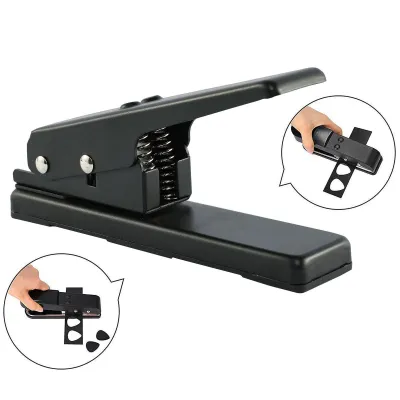
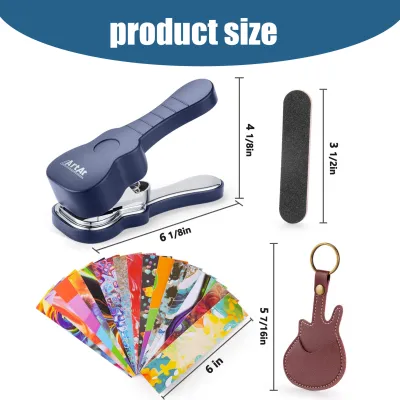
Prices are valid at publication and may change. Please refer to the product page for the latest price.
Electric or rotary cutting systems represent a more automated approach, though they are less common for standard home use. These systems typically involve a motorized press or a rotary tool paired with a cutting template. They eliminate the physical strain of manual punching, making them highly efficient for bulk production or small-scale crafting businesses. The trade-off lies in their power requirements, larger physical footprint, and higher initial cost, which may not be practical for a hobbyist who only needs a dozen picks a year.
Heavy-duty benchtop press systems utilize a mechanical lever arm mounted on a solid base, often constructed from cast iron or steel. By using a long handle to multiply your physical force, these desktop machines make it incredibly easy to punch through thick, rigid materials with minimal effort. They offer superior stability and precision compared to handheld pliers, ensuring clean cuts every time. The main drawbacks are their weight and size; they require a dedicated, stable workstation and are not designed for easy transport.
Key Features to Evaluate for Your First Purchase
Before purchasing a guitar pick maker, you must verify which materials the tool is rated to cut. Most basic models are designed for soft, flexible plastics like expired credit cards, gift cards, or thin celluloid sheets. If you plan to use more specialized materials—such as thick acrylic, polycarbonate, natural wood veneers, or heavy recycled plastics—you must check the manufacturer’s product specifications. Attempting to punch hard or brittle materials with a tool designed only for light plastics can chip the cutting die or permanently misalign the mechanism.

Thickness limits are equally critical to your decision. Guitar picks are generally categorized by thickness, ranging from extra thin (under 0.50 mm) to extra heavy (over 1.20 mm or even 1.50 mm). Many standard handheld punch pliers have a maximum thickness limit of 1.0 mm. If you prefer playing with heavy or extra-heavy picks, you will need to look for a heavy-duty benchtop press rated for thicker materials. Always check the minimum and maximum thickness ratings on the product packaging or user manual to ensure the tool matches your playing preferences.
The quality of the cutting mechanism directly determines how much post-processing work you will have to do. High-quality pick makers feature precision-engineered, hardened steel dies with very tight tolerances between the male and female cutting parts. When the tolerance is correct, the tool shears the plastic cleanly, leaving a relatively smooth edge. If the tool is poorly made, the plastic will bend and tear rather than cut, resulting in rough, fibrous edges and a pronounced lip or burr that requires extensive sanding before the pick is playable.
Ergonomics and grip comfort should not be overlooked, especially if you opt for a manual handheld model. Look for pliers that feature padded, non-slip rubber grips and an integrated return spring that automatically opens the handles after a cut. The handle length also matters; longer handles provide better leverage, reducing the amount of force your hand must apply. For benchtop models, a comfortable, rounded grip on the lever handle makes repetitive punching much more comfortable.
Matching the Tool to Your Crafting Goals and Volume
Your choice of a guitar pick maker should align with how often you plan to use it and what you intend to do with the finished products. If your goal is simply to upcycle old membership cards for personal use or to make occasional gifts for friends, a standard handheld punch is highly practical. It is inexpensive, easy to store, and perfectly adequate for occasional use. You do not need to invest in heavy industrial equipment if the tool will spend most of its time in a closet.
If you are a gigging musician who goes through dozens of picks a month, or if you want to produce custom picks to sell at local markets, a heavy-duty benchtop press is a much better investment. These tools are built to withstand thousands of cycles without losing their alignment. They also allow you to work faster and more consistently, ensuring that every pick in a large batch has the exact same shape and edge profile.
Customization is another factor to consider. While most entry-level pick makers cut a standard 351-shape teardrop pick, some advanced benchtop systems feature interchangeable dies. This allows you to swap out the cutting mold to create jazz-style picks, large triangle picks, or teardrop shapes. If you like to experiment with different pick shapes for different playing styles, look for a modular system that supports multiple die shapes, even if you have to purchase the additional dies separately.
Workspace and storage constraints are highly relevant, particularly in compact living environments. In a typical apartment where space is at a premium, a small handheld tool that fits into a drawer is incredibly convenient. Furthermore, if you live in a warm, humid climate like Singapore, storing metal tools requires some care. Exposed steel dies on cheap or unvarnished tools can rust quickly if left in damp areas. Beginners should look for tools with corrosion-resistant coatings or plan to store their equipment in an airtight container with silica gel packets to maintain the cutting edge.
Safety, Maintenance, and Essential Accessories
Like any cutting tool, a guitar pick maker requires regular maintenance to perform at its best. Over time, the cutting edges of the steel die will naturally dull, especially if you frequently punch tough materials like polycarbonate or recycled vinyl records. Before buying, check if the manufacturer offers replacement dies or if the tool is designed to be disassembled for sharpening. Applying a drop of light machine oil to the pivot points and the cutting die every few months will keep the action smooth and prevent rust.
Safety should always be a priority when operating these tools. When punching brittle plastics, such as old CD cases or certain types of rigid packaging, the material can occasionally shatter under pressure. This can send small, sharp plastic shards flying. It is highly recommended to wear basic eye protection when experimenting with unfamiliar or brittle materials. Additionally, always keep your fingers clear of the feeding slot where the die descends to prevent accidental pinches or cuts.
It is important to understand that a pick maker is only one part of the workflow; a punched pick is rarely ready to use straight out of the machine. The shearing action almost always leaves a slight edge or burr. To make the pick playable, you will need finishing accessories. Many starter kits include small sanding blocks or strips of fine-grit sandpaper. For a professional finish, you will want to have fine-grit sandpaper (such as 400 to 1000 grit) and a nail buffer on hand to smooth and bevel the edges, ensuring the pick glides off the guitar strings smoothly.
Building Your Shortlist: A Step-by-Step Evaluation Checklist
To find the right guitar pick maker for your needs, follow this structured evaluation process before making a purchase:
- Identify Your Materials: Write down the exact materials you plan to use (e.g., old credit cards, 0.80 mm celluloid sheets, or recycled plastic packaging) and measure their thickness.
- Verify the Specifications: Compare your material list against the manufacturer's official specifications. Ensure the tool's maximum thickness rating is higher than your thickest material.
- Assess Your Physical Space: Determine where you will store and use the tool. Choose a handheld model if you need portability, or a benchtop model if you have a dedicated desk space and want to minimize physical effort.
- Calculate the Total Cost of Ownership: Look beyond the initial price of the machine in S$. Factor in the cost of replacement dies, sanding consumables, and the raw blank materials. A cheaper tool that dulls quickly and cannot be repaired may cost more in the long run than a slightly more expensive, durable model.
- Check the Warranty and Support: Verify the seller's return policy and the manufacturer's warranty terms. Ensure that replacement parts or customer support are accessible in your region so you can resolve any issues quickly.
Frequently Asked Questions (FAQ)
Can I use a standard hole punch to make guitar picks?
No, a standard office hole punch is not suitable for making guitar picks. Office hole punches are designed specifically for thin paper and lack the structural strength, blade hardness, and leverage required to cut through plastic. Attempting to use one on plastic cards or celluloid sheets will likely jam the mechanism, bend the metal frame, or tear the plastic rather than cutting it. Additionally, standard hole punches only cut small circles, whereas a dedicated pick maker is shaped to cut the specific teardrop or triangular geometry required for playing a stringed instrument.
Do I need to sand or bevel the picks after cutting them?
Yes, sanding and beveling are essential steps in the pick-making process. Even the highest-quality pick maker uses a shearing action that leaves a microscopic burr or sharp edge around the perimeter of the cut. If you play with an unfinished pick, these sharp edges can catch on your guitar strings, produce a harsh scratching noise, and cause premature string wear. Spending a minute or two rubbing the edges of your new pick against fine-grit sandpaper or a nail buffer will smooth out the profile, creating a comfortable grip and a clean, professional release off the strings.
Are there eco-friendly or recycled materials I can use with these machines?
Yes, one of the greatest benefits of owning a pick maker is the ability to upcycle household waste into functional musical accessories. Excellent eco-friendly options include expired credit cards, gift cards, plastic membership cards, and plastic lids from food containers (such as those marked with recycling codes 2 or 5, provided they meet the thickness limits). You can also use old vinyl records or plastic packaging sheets. Always measure the thickness of these materials first and ensure they are clean, dry, and free of adhesive residue before punching to protect the cutting blades.

Community discussion
Share your experience or ask a question. Comments are reviewed before publication.